Angular 2+ jQuery File Uploader
Angular 2+ jQuery File Uploader
Receive files from your users with a clean, lightweight and easy-to-integrate widget. This Angular component helps you integrate jQuery File Uploader into your Angular app natively.
Features
- Upload files from a local disk, camera, and cloud source (up to 5 TB)
- Multipart uploading for large files
- Bulk file uploading
- In-browser image editing
- Uploading network to speed uploading jobs (like CDN)
Integration
Run this command in your project’s directory.
For Angular v12+ — install ngx-uploadcare-widget v3.x:
For Angular from v9 to v11 — install ngx-uploadcare-widget v2.x:
For Angular v8 and lower — install ngx-uploadcare-widget v1.x:
Once you’re done with the installation, import the uploading widget into your project.
For new Angular projects, you can open the file /src/app/app.module.ts in a
text editor and insert this line:
After that, include the module in the imports section of your project’s
module:
If you work with an existing project, then you’ll need to do the same in
the part of your app where you want to use the integration. If you are unsure,
stick with /src/app/app.module.ts.
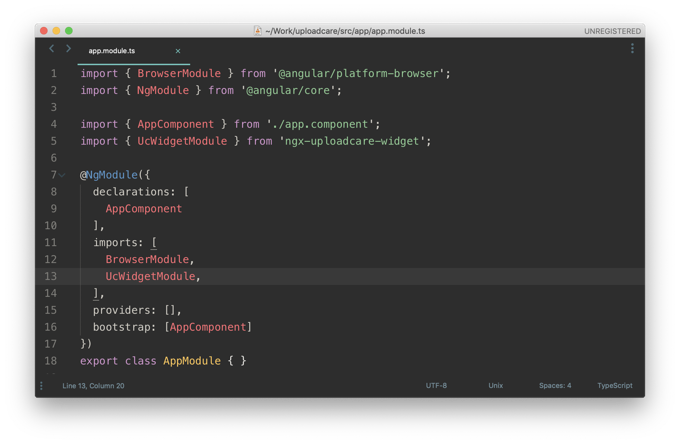
That’s how app.module.ts should look like after your changes:
Test
You are now ready to add the uploading widget to some page and try using it.
Insert the following lines in one of the something.component.html files of
your project (or in /src/app/app.component.html for new projects):
If you want to to go with the customized the uploading widget look use this element:
Don’t forget to replace YOUR_PUBLIC_KEY with an actual
Public API Key from your Uploadcare project’s
Dashboard.
Save the file and let the Angular serve itself:
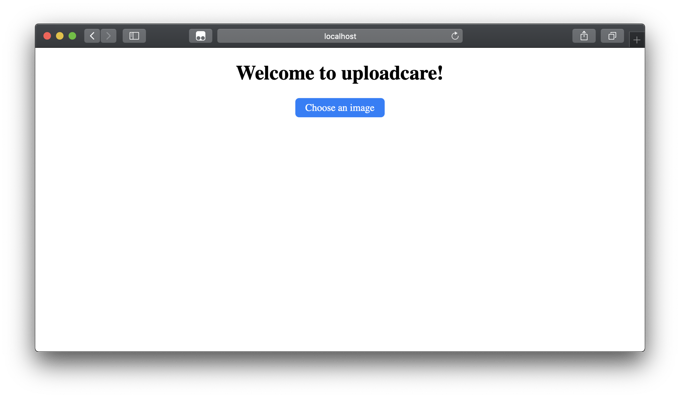
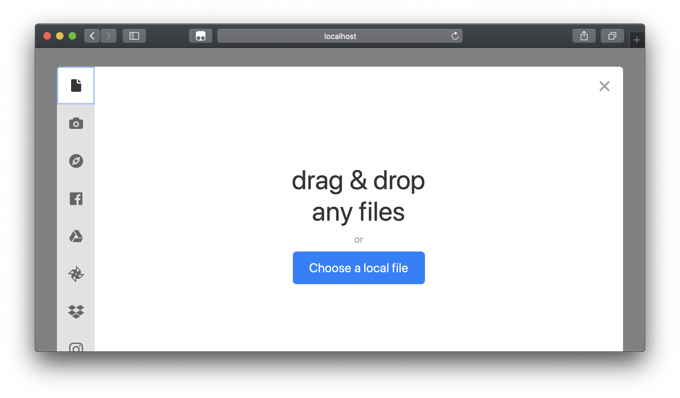
The uploading widget will load like this:
Settings
The uploading widget integration for Angular 2+ is highly customizable. You can use all the attributes listed in the ngx readme. Learn more about jQuery File Uploader options.
For example, this is how you allow uploading files only from local storage and
URLs via the data-tabs attribute:
Full documentation
Read the full documentation on GitHub.