How to upload files from a Marketo form
Last edited:
Please note that the guide is currently being updated. If the current instructions are not working for you, please refer to the new instructions.
Marketo is a marketing software-as-a-service platform designed to help businesses automate marketing tasks. Among the great number of tasks Marketo performs is the ability to build forms for your landing pages. However, uploading files via Marketo forms is not possible "out of the box."
Luckily, Marketo allows you to integrate third-party solutions into the existing functionality — and that's where Uploadcare jQuery File Uploader comes in to save the day.
This article will walk you through the process of integration step by step to help you create easy-to-use forms with the ability to attach images, videos, PDFs, and any other files you need.
Quick introduction to Uploadcare jQuery File Uploader
Uploadcare jQuery File Uploader is a responsive and mobile-ready HTML5 uploader provided as a typical JavaScript library. Here are just a few facts to give you an idea of what it looks like and how it works:
-
It has an easy-to-use intuitive UX with a tab-based UI, drag-and-drop field, and progress bar for every file.
-
jQuery File Uploader accepts any type of file up to 5 TB in size and can get files from over a dozen sources including local storage, cloud storage, social media, and camera.
-
jQuery File Uploader allows users to edit uploaded images: crop, rotate, flip, mirror, sharp, blur, enhance, etc.
-
It’s compliant with SOC2 and HIPAA, and provides a 99.9% percent guarantee that all uploads hit their target.
You can visit our docs for more information. Now, let’s make some magic!
Step 1. Create an account at Uploadcare and configure jQuery File Uploader
First of all, sign up for an Uploadcare account. After that, you’ll be able to create your first project from the dashboard and configure jQuery File Uploader. Go to the Integration tab and click on the Customize Uploader button. You’ll see the following:
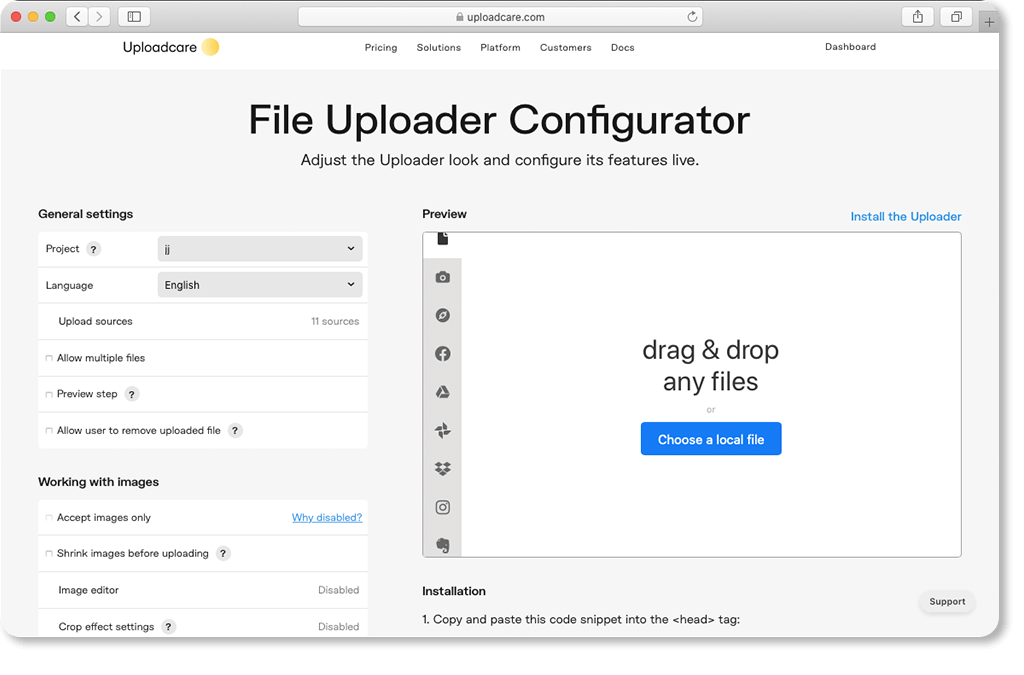 jQuery File Uploader Configurator interface
 Here you can choose upload sources for your uploading form and disable any services you don’t need. Available sources are:
- local disk
- local webcam
- any publicly available URL
- social media platforms (Facebook, Instagram)
- cloud storage (Google Drive, Dropbox, OneDrive, Box)
- other services like Evernote, Flickr, Huddle, etc.
Also, you can:
- allow multiple uploading
- turn on the preview option
- allow users to remove uploaded files
- allow users to crop uploaded files
- allow users to edit images
- shrink images before uploading
Configure your file uploader depending on your needs and proceed to the next step. We’ll get back to the configurator later.
Step 2. Create a Marketo landing page template and add a form
Go to Marketo Design Studio and create a new landing page template.
 Creating a new landing page in Marketo Design Studio
 Choose your folder, give your template a name, and click Create. Your template will appear in a new tab:
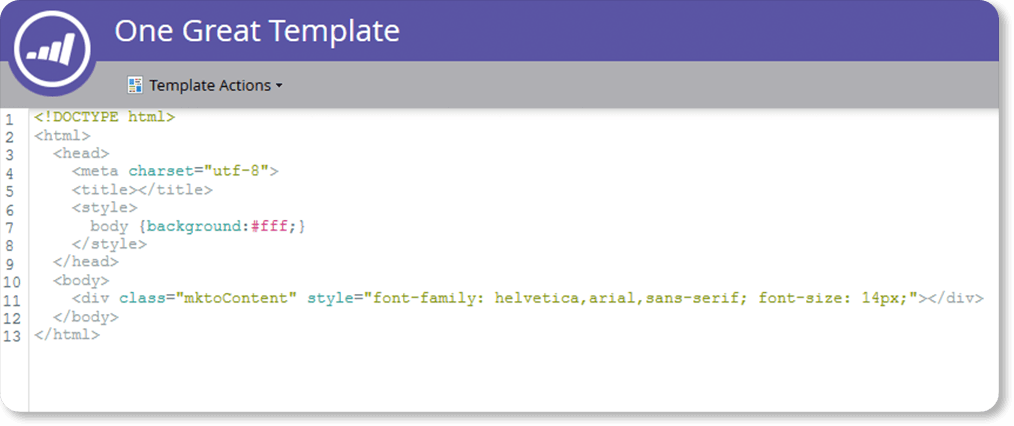 Landing page template
 Now you can write custom code to edit this template and add your own blocks.
Also, you can download the template to your computer and do all the manipulations in your own code editor.
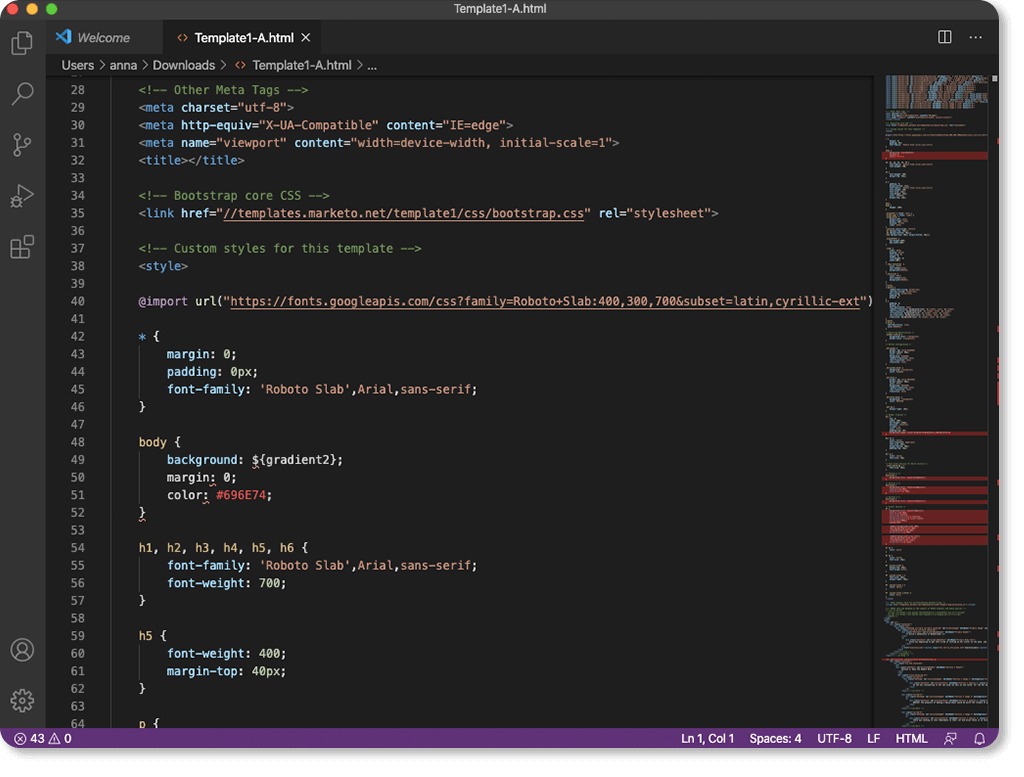 Edit the landing page template in your own code editor
When everything’s done, you’ll need to copy your code and paste it back into the design studio. If you want to go this way, here’s a detailed guide for you.
Now you need to add a form to your landing template. You can write your own form, or use a ready-made form available on Marketo. It’s almost the same as creating a landing page: just go to Marketing Activities, then click on New > New local asset > Form.
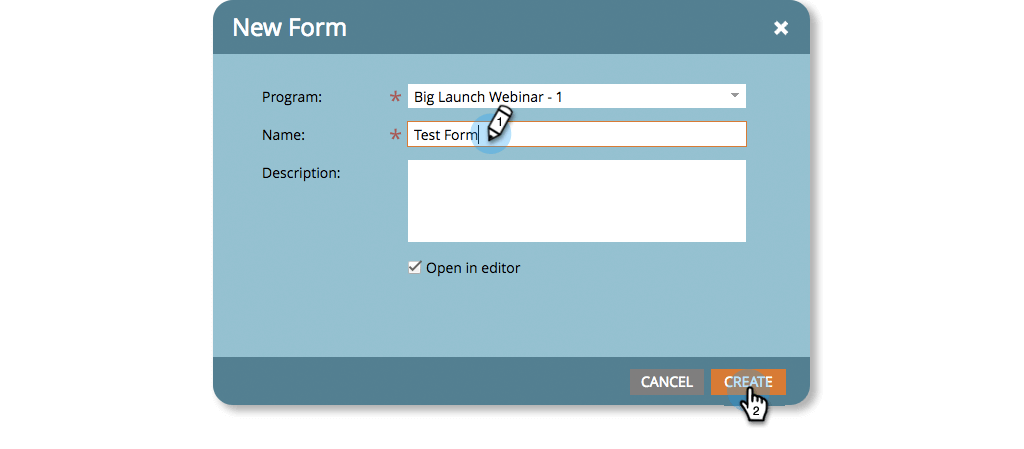 Create a new form with Marketo
 Step 3. Integrate jQuery File Uploader
Now that we have our landing page template and form, we can add a bit of code to integrate Uploadcare jQuery File Uploader into it.
1. Get back to Uploader Configurator from the first step and find the code snippet at the bottom, which is generated automatically depending on your configurations. Copy and paste that code snippet into the <head> tag. It will look something like this:
<script>
  UPLOADCARE_PUBLIC_KEY = 'publickey';
  UPLOADCARE_TABS = 'file camera url facebook gdrive';
  UPLOADCARE_PREVIEW_STEP = true;
  UPLOADCARE_CLEARABLE = true;
</script>
<script src="https://ucarecdn.com/libs/widget/3.x/uploadcare.full.min.js"></script>
The “publickey” will be changed to your own unique Uploadcare Public Key, which can be found from the API Keys tab on the dashboard.
2. Copy and paste the other piece of code from the configurator to add the Uploader button to your page. It will look something like this:
<input
  type="hidden"
  role="uploadcare-uploader"
  data-multiple="true"
  data-multiple-min="1"
  data-crop="4:3"
  name="upload-file" />
After that, you can add some CSS to style your upload widget and match your brand identity if you want, then click on Approve and Close.
And there you have it!
If you’ve done everything right, you’ll see a shiny new form on your landing page with a Choose a file button. If you click on it, you’ll see the File Uploader window, where your users can upload and edit images:
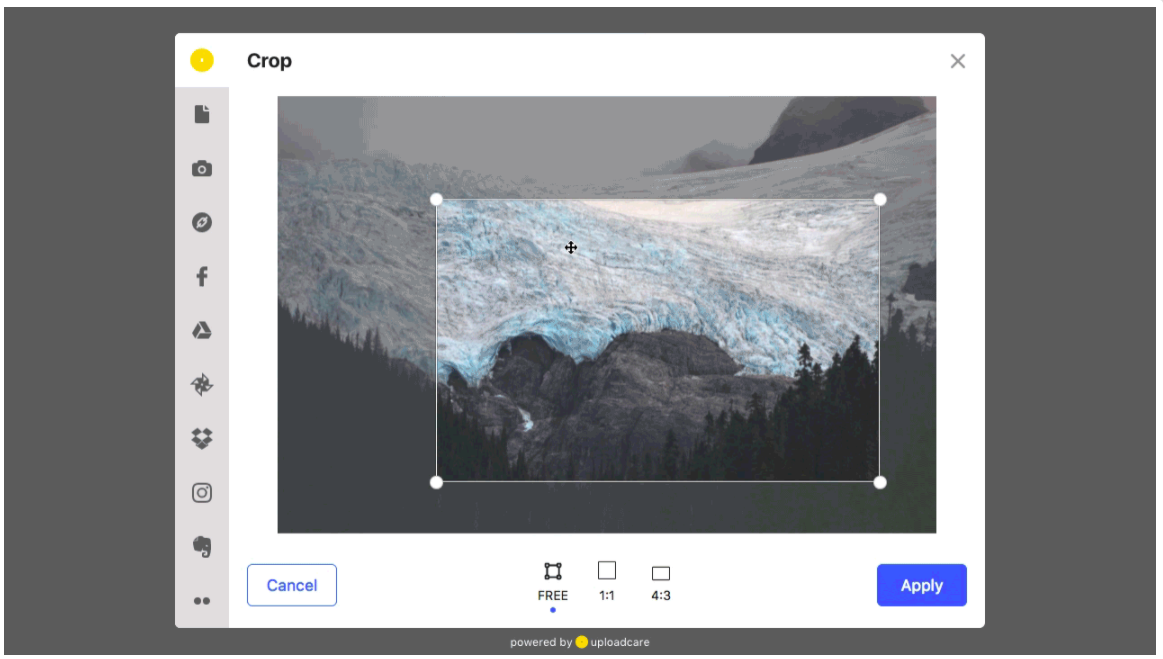 jQuery File Uploader interface
Wrapping up
That’s it! Now you have a powerful, easy-to-use solution to gather all kinds of files from your users. If you have any questions, you can ask them in our Community area, or leave them in the comments below.