How to upload files in Next.js
Last edited:
In this tutorial, you will learn how to use Uploadcare’s React File Uploader component to upload files in a Next.js application, customize the file uploader to fit your needs, and design and display optimized images in your Next.js application.
This tutorial is written in JavaScript but can be adapted to TypeScript if preferred. You can follow along with the provided code snippets and convert them to TypeScript as needed.
Prerequisites
Before you begin, you need:
- A free Uploadcare account
- Node.js installed on your machine
- Basic knowledge of JavaScript and Next.js
Set up Uploadcare
Login to your Uploadcare account and create a new project called uc-next.
On the sidebar, click on the API keys link to retrieve the Public key for the project.
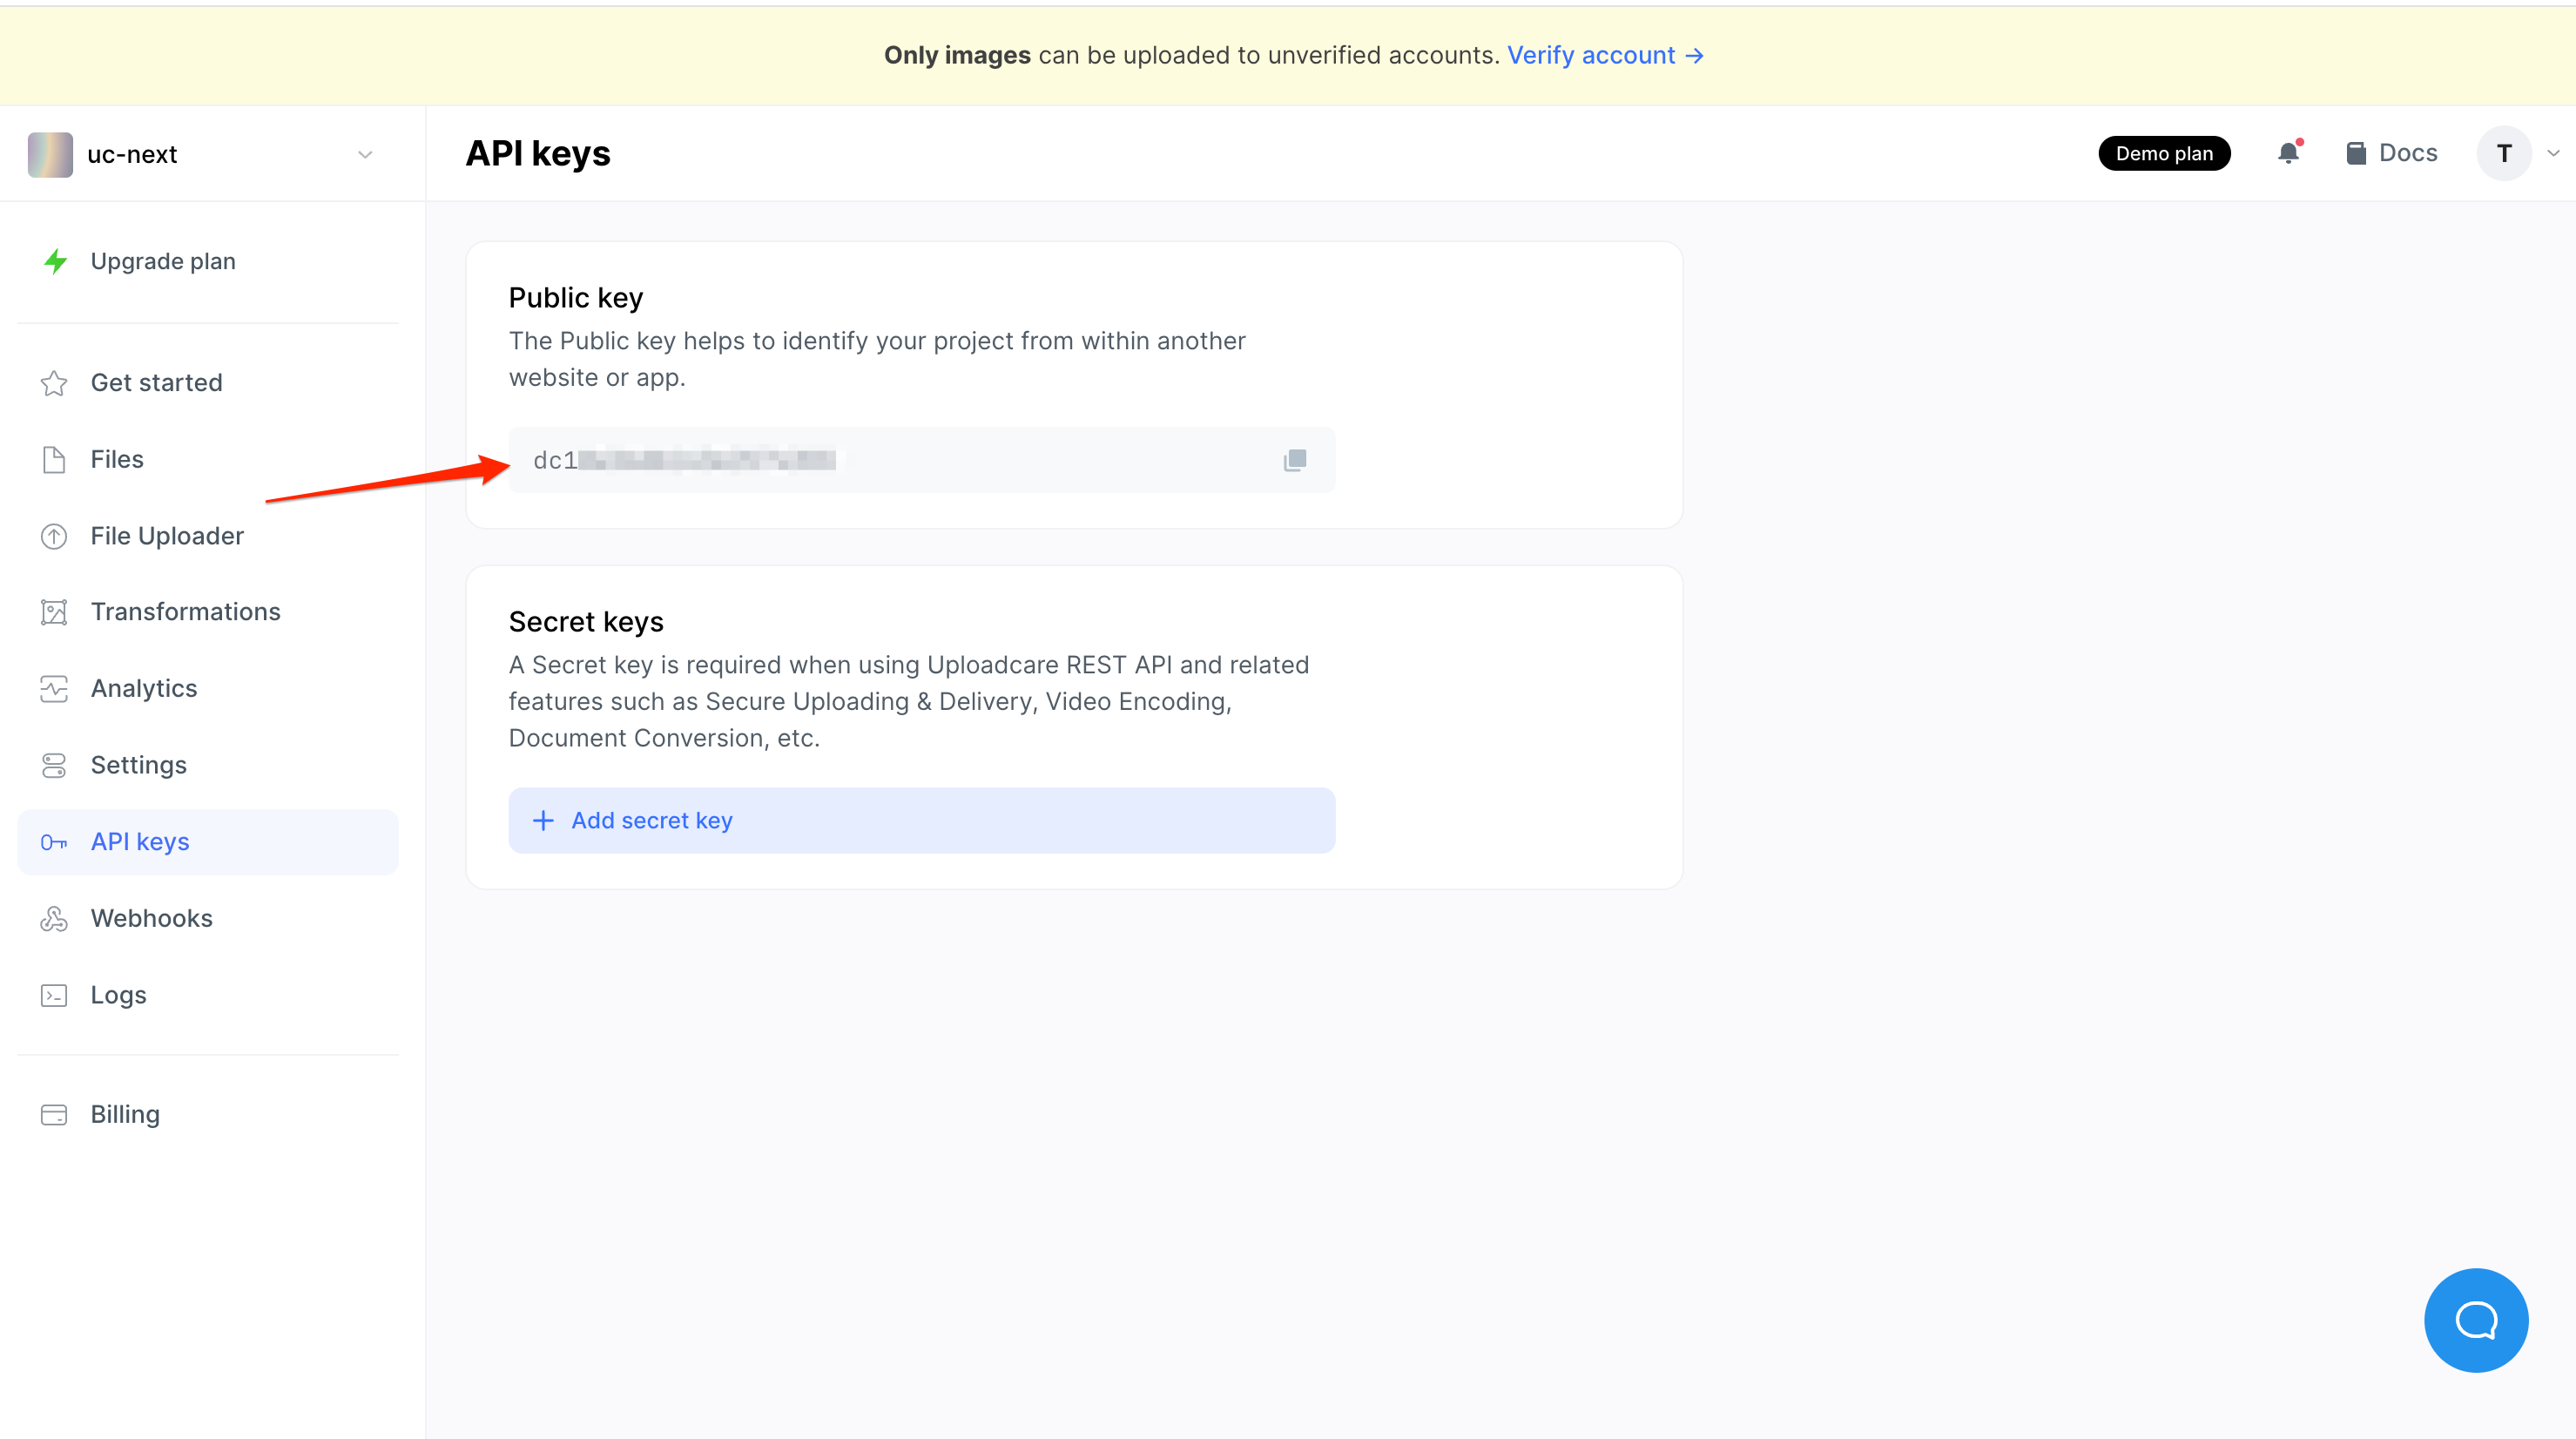 Uploadcare Public key
You will use the Public key in the next steps of this tutorial.
Create a Next.js application
To create a new Next.js application, run the following command in your terminal:
npx create-next-app@14 uc-nextDuring installation, when prompted, choose the following configurations:
✔ Would you like to use TypeScript?  No
✔ Would you like to use ESLint?  Yes
✔ Would you like to use Tailwind CSS? No
✔ Would you like to use `src/` directory?  No
✔ Would you like to use App Router? (recommended)  Yes
✔ Would you like to customize the default import alias (@/*)? No
Open the uc-next directory in a code editor of your choice and install the Uploadcare React File Uploader:
npm install @uploadcare/react-uploaderIn the root of the project, create a .env.local file and add the following environment variable:
NEXT_PUBLIC_UPLOADCARE_PUBLIC_KEY=YOUR_PUBLIC_KEYReplace YOUR_PUBLIC_KEY with the public key from the Uploadcare dashboard.
Create a file uploader component
In the app directory, remove the page.module.css file and delete the content of global.css as you do not need these styles for this tutorial. Next, replace the content on the page.js with the content:
"use client";
import { useState } from "react";
import { FileUploaderRegular } from "@uploadcare/react-uploader/next";
import "@uploadcare/react-uploader/core.css";

const pubKey = process.env.NEXT_PUBLIC_UPLOADCARE_PUBLIC_KEY;

export default function Home() {
  const [files, setFiles] = useState([]);
  const handleChangeEvent = (e) => {
    setFiles([
      ...e.allEntries.filter((file) => file.status === "success"),
    ]);
  };

  console.log(files);

  return (
    <main>
      <h1>Hello from UC File Uploader</h1>
      <FileUploaderRegular pubkey={pubKey} onChange={handleChangeEvent} />
    </main>
  )
};
The code above does the following:
- Imports the
FileUploaderRegularcomponent and initializes it using thepubKey. - Imports the CSS styles for the File Uploader component.
- Creates a
filesstate variable to store files uploaded. - Creates a
handleChangeEventfunction that handles anyonChangeevent triggered by theFileUploaderRegularcomponent. - Checks the event
epassed to thehandleChangeEventfunction for anallEntriesarray and filters the array for files whose status equalssuccess, indicating that those files were uploaded successfully. - Logs the
filesto the console to view the uploaded data.
The allEntries array contains all the files involved in the upload event. This includes both successfully uploaded files and those that may have failed.
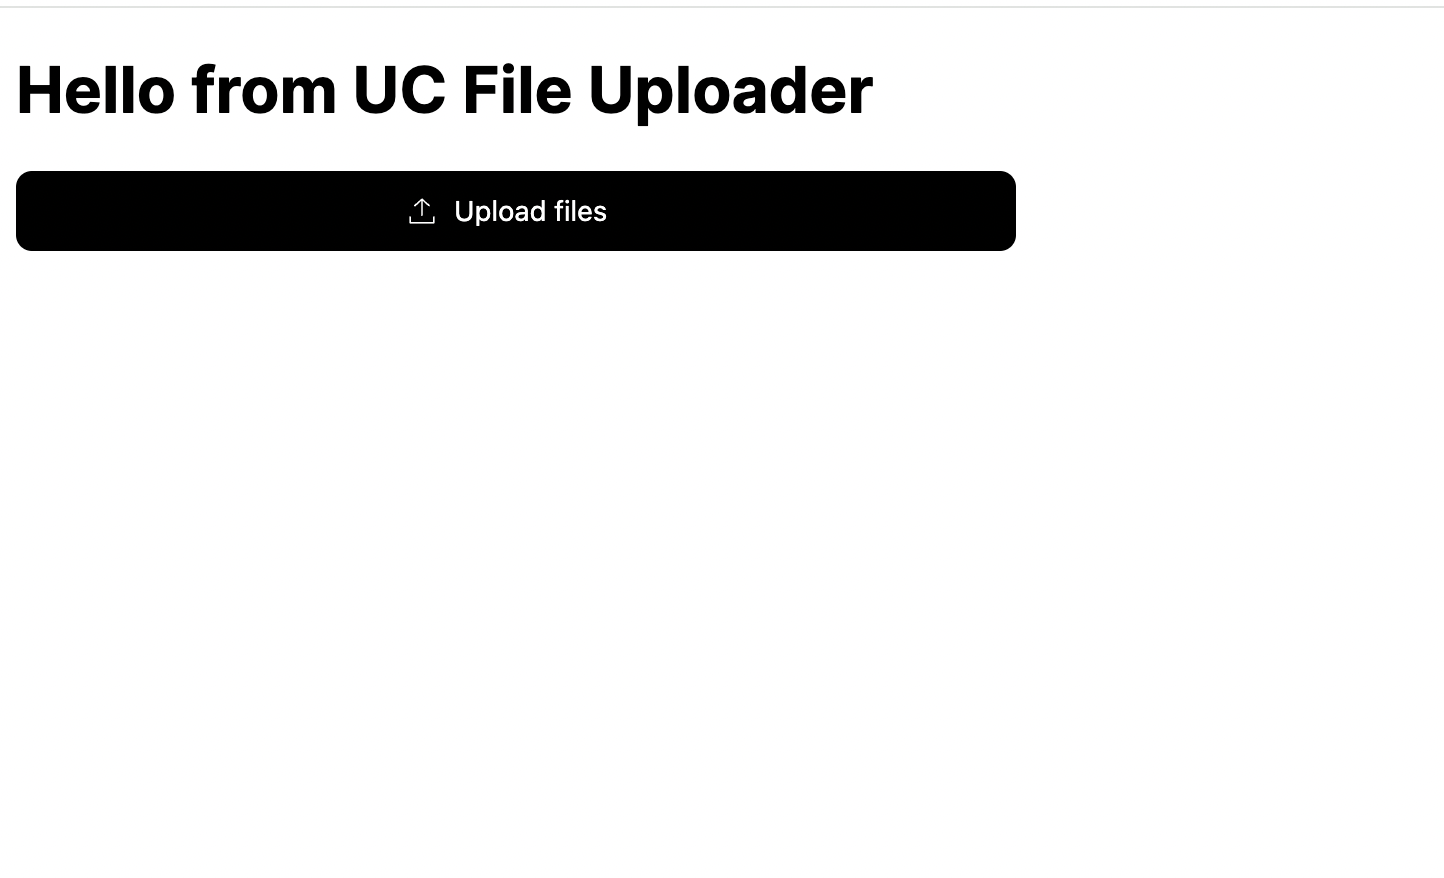
In your terminal, run the command npm run dev to start the Next.js server, and you should have a page that looks like this in http://localhost:3000:
 Landing page with File Uploader component
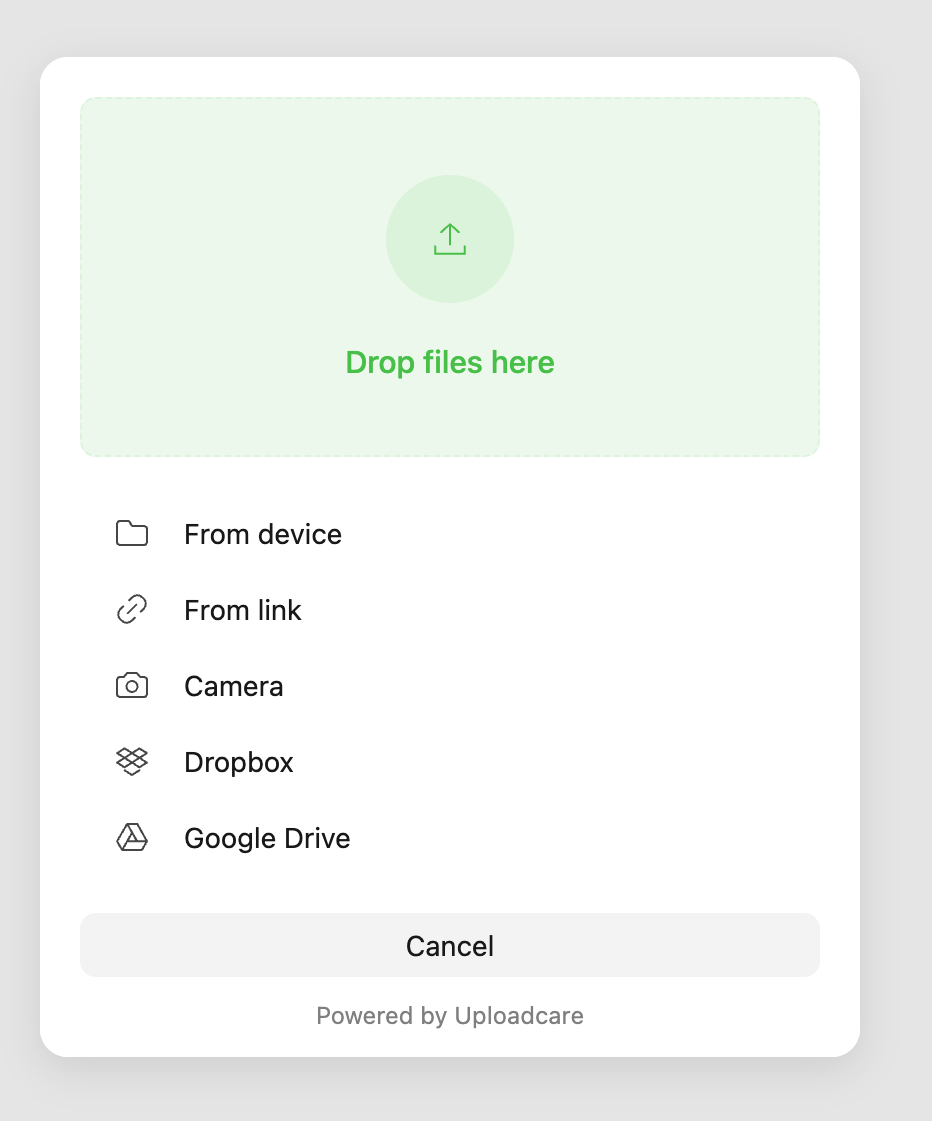
Clicking on the “Upload files” button will open the file uploader modal, where you can select files to upload.
 File Uploader modal
You should see the files state data on your browser console.
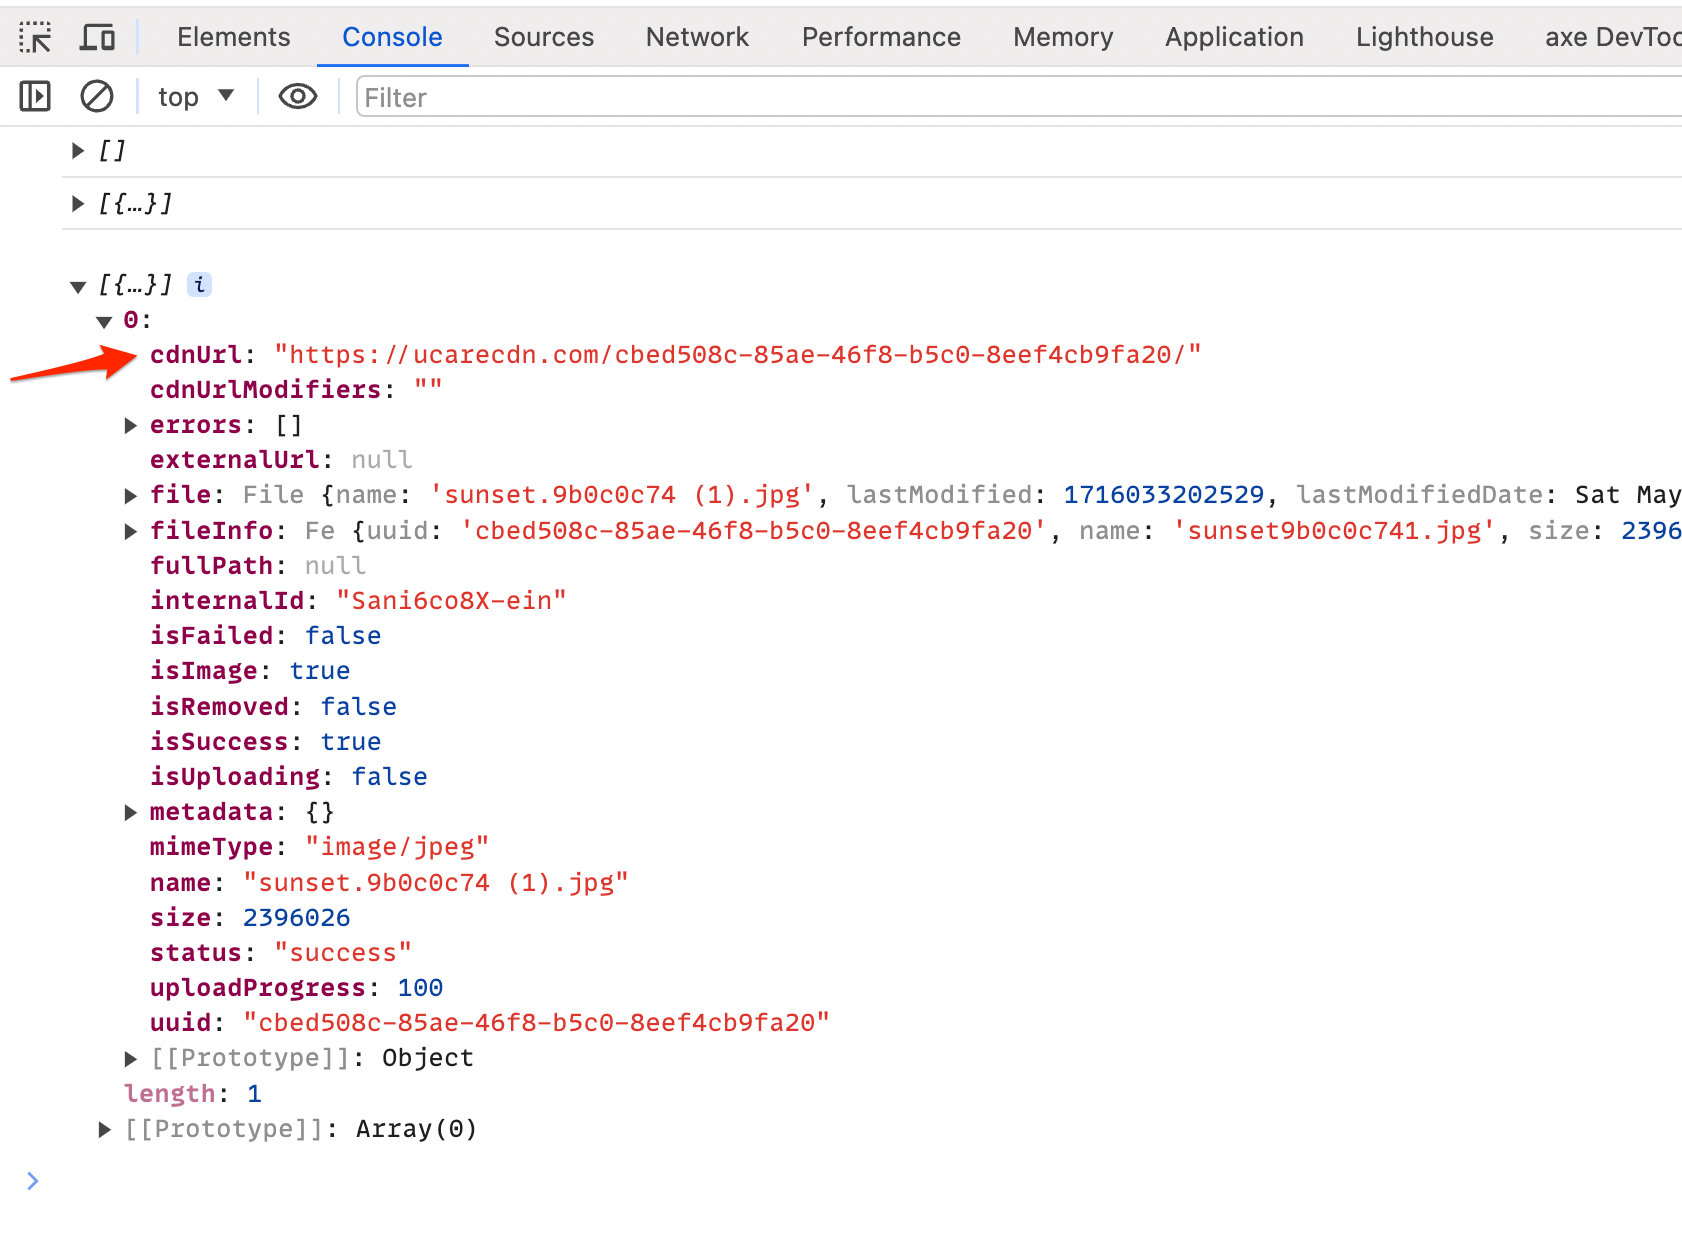 Files state browser logs
That’s it! You have successfully implemented file upload functionality in Next.js using the Uploadcare File Uploader.
Error handling
In a real-world application, you may want to handle errors that occur during file uploads.
The FileUploaderRegular component emits an onFileUploadFailed event when an error occurs during file upload.
You can handle this event by creating a handleUploadFailed event handler.
Let’s set the maximum file size a user can upload to the file uploader component using the maxLocalFileSizeBytes property to be 2 MB.
If a user tries to upload a file larger than 2 MB, the file upload will fail, and the onFileUploadFailed event will be emitted.
const handleUploadFailed = (e) => {
  console.log(e.errors[0]);
};

return (
  <main>
    <h1>Hello from UC File Uploader</h1>
    <FileUploaderRegular
      pubkey={pubKey}
      onChange={handleChangeEvent}
      onFileUploadFailed={handleUploadFailed}
      maxLocalFileSizeBytes={2000000}
    />
  </main>
);
Try uploading a file larger than 2 MB, and you should see the error message in the browser console.
 File size exceeds the limit of 2 MB error
The onFileUploadFailed event emits an errors array of objects with the type of error and message properties.
In this case, the error type is FILE_SIZE_EXCEEDED and message is File is too big. Max file size is 2 MB.
Editing uploaded files
Using the Uploadcare File Uploader, you can apply edits such as cropping, effects, and rotation to the uploaded files.
To edit an uploaded file, click the edit icon next to the file.
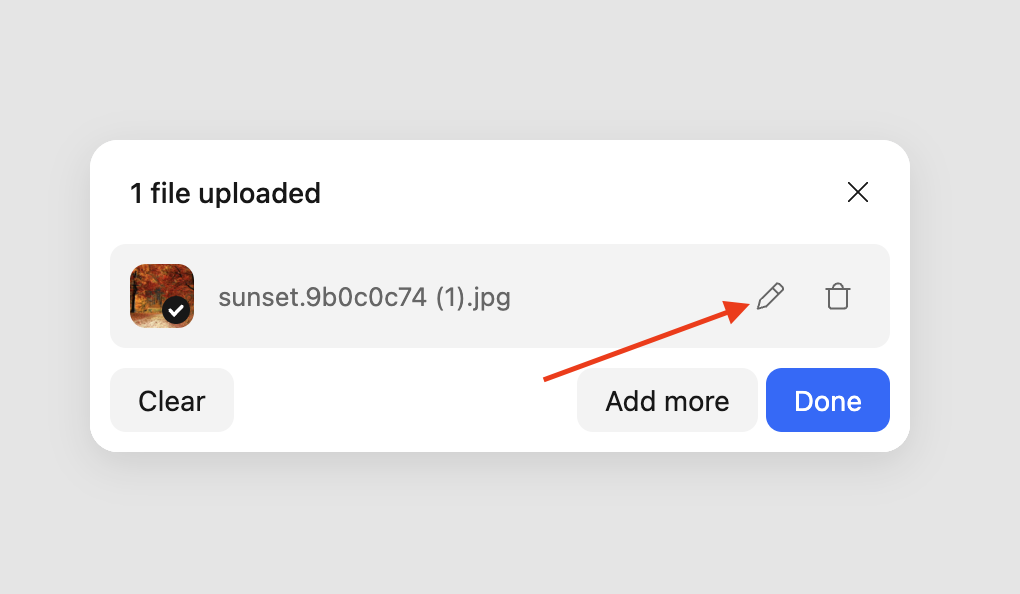 Edit file icon
This will open the file in the Uploadcare editor, where you can edit the image.
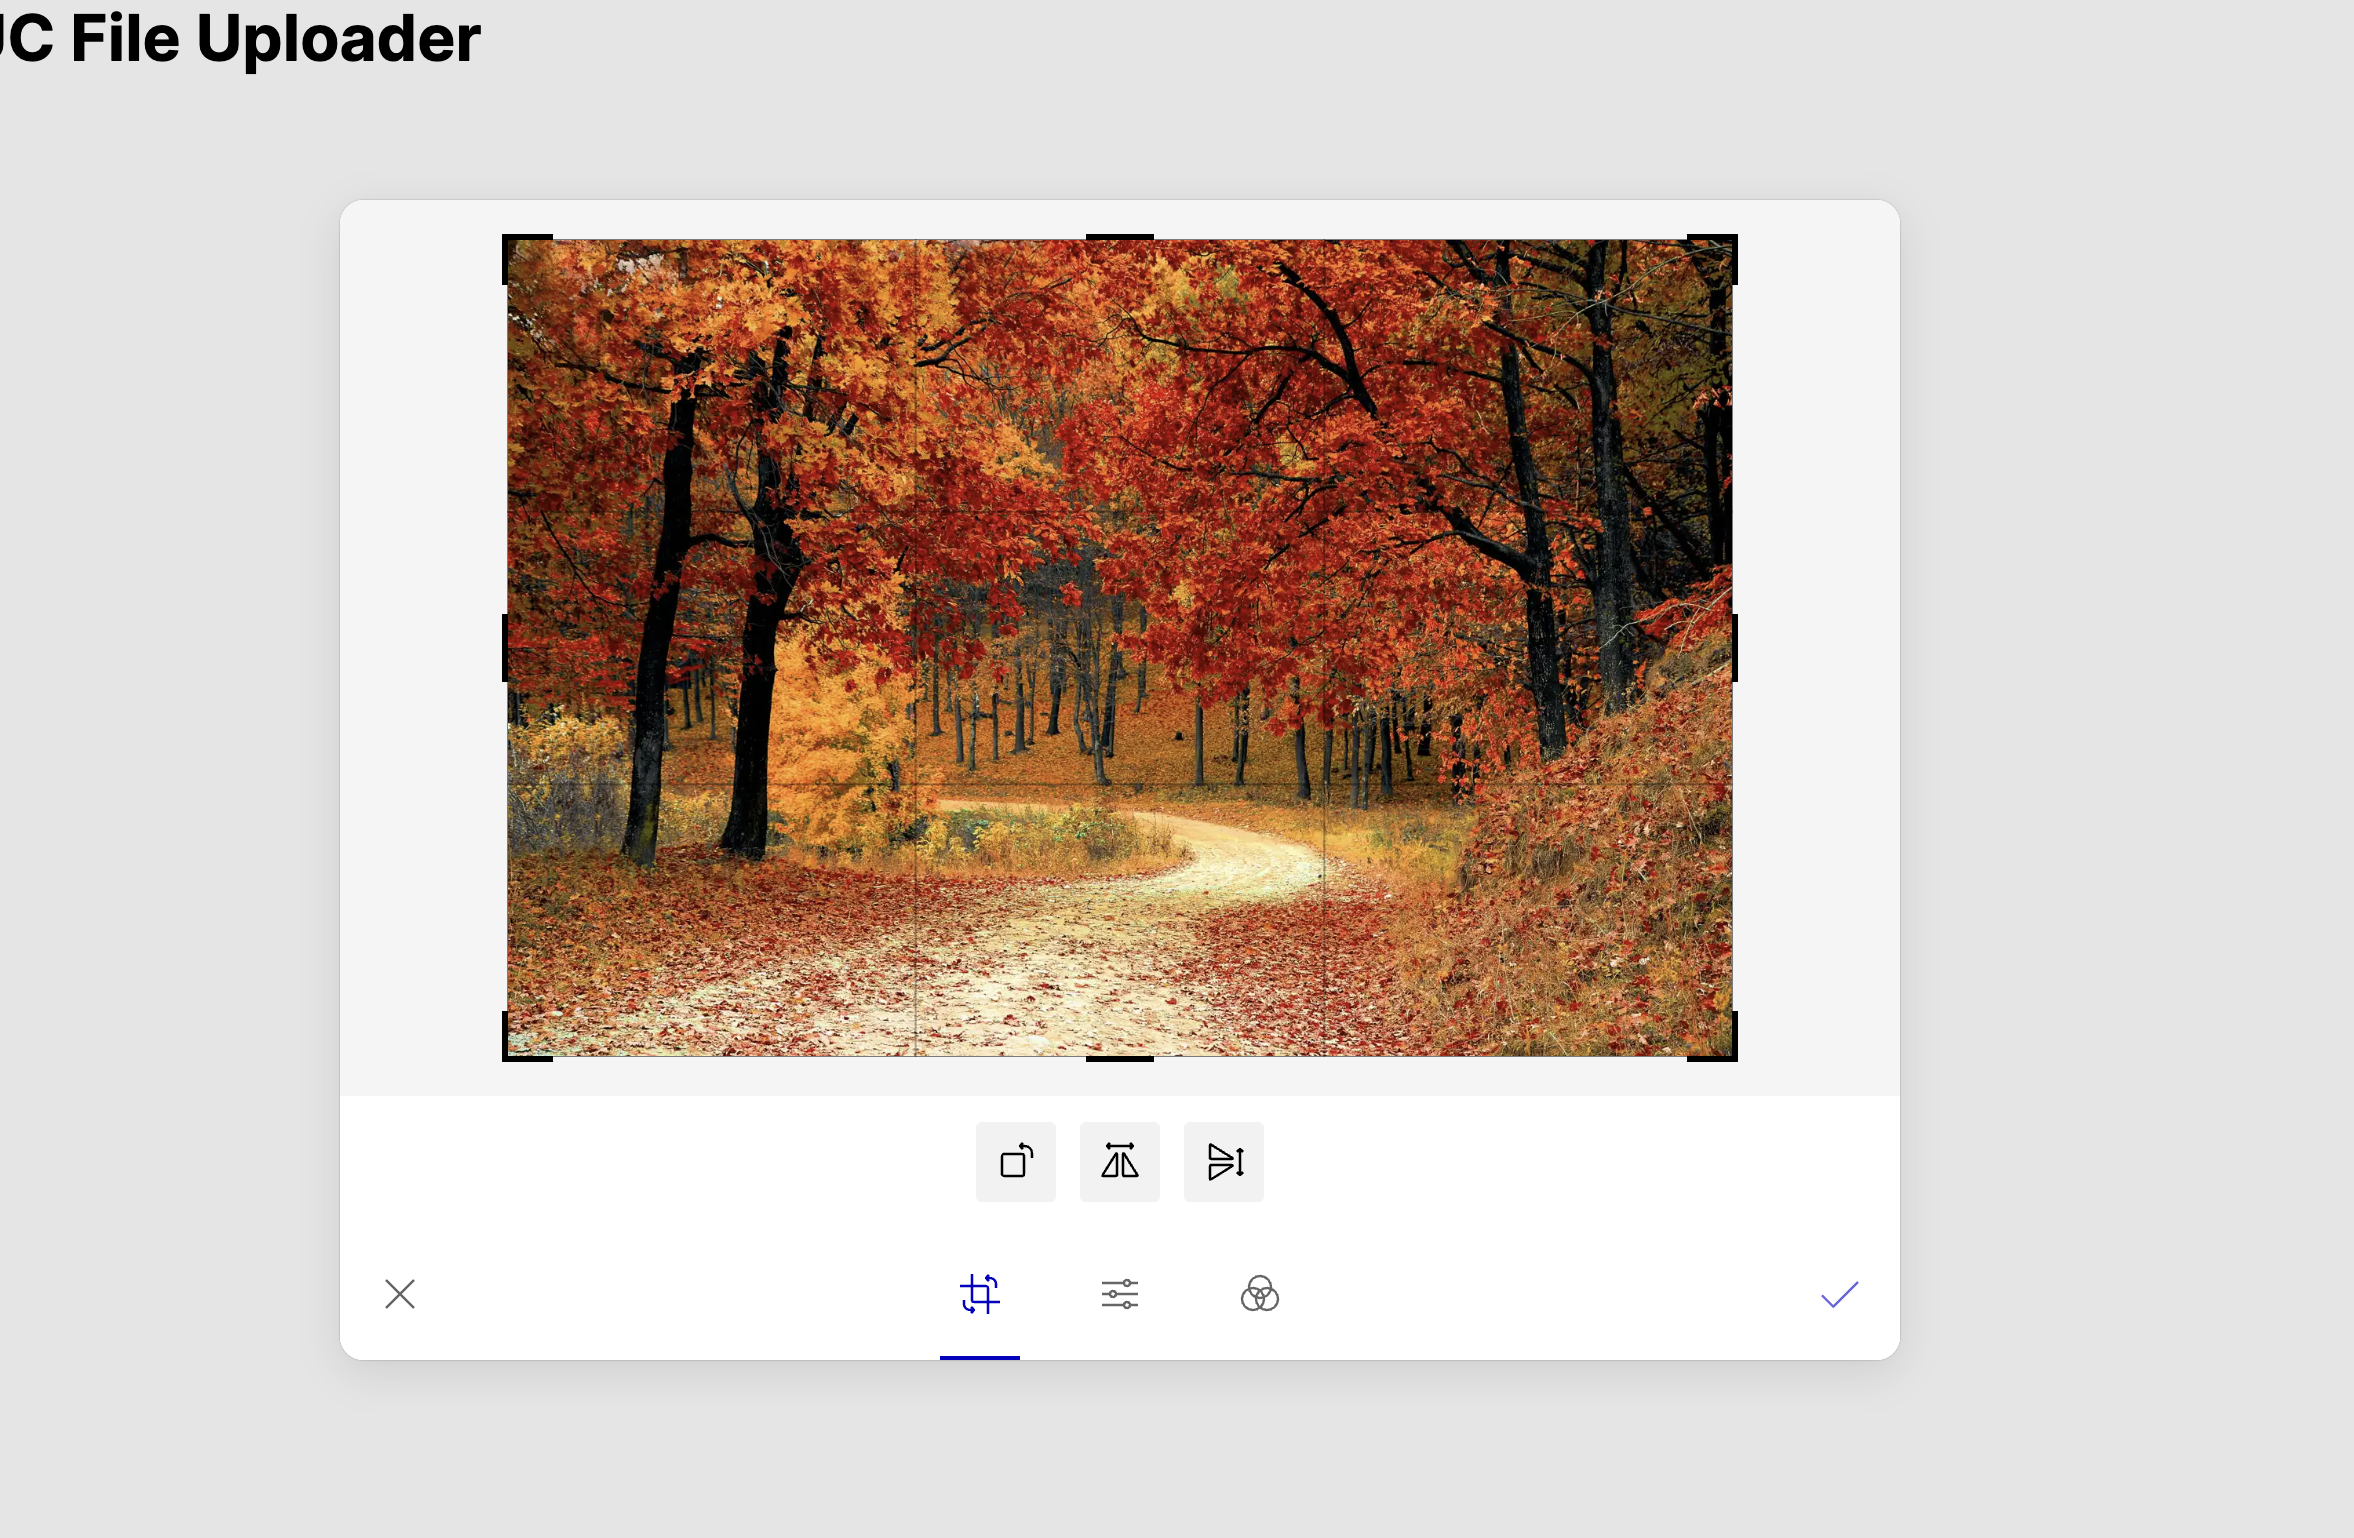 Uploadcare file editor
After making the edits, save the file, and the files state will be updated with your changes.
Displaying optimized images
Next.js typically suggests using its Image component to display optimized images in your Next.js application.
However, Uploadcare offers an
UploadcareImage component
that you can utilize to render optimized images and dynamically transform them to meet your specific requirements.
Using Next.js image component
Since images uploaded to Uploadcare are returned via the Uploadcare CDN, add the Uploadcare CDN to your next.config.mjs to inform Next.js where you want to retrieve images from using the following code:
/** @type {import('next').NextConfig} */
const nextConfig = {
  images: {
    remotePatterns: [
      {
        protocol: 'https',
        hostname: '6ca2u7ybx5.ucarecd.net',
        port: '',
        pathname: '/**',
      },
    ],
  },
};

export default nextConfig;
The hostname 6ca2u7ybx5.ucarecd.net is the Uploadcare CDN URL for your project.
A project’s unique subdomain (6ca2u7ybx5) found in your Uploadcare delivery settings.
Next, import the Next.js Image component into your page.js.
import Image from "next/image";Let’s display the images you uploaded in the previous steps of this tutorial.
For this, loop through the array stored in the files state variable and use the cdnUrl field of each item
as an image src.
In your page.js file, add the following lines of code:
{
  files.map((file) => (
    <div key={file.uuid}>
      <Image src={file.cdnUrl} width={500} height={500} alt={file.name} />
      <p>{file.name}</p>
    </div>
  ))
}
In your browser, upload an image, and you should have the image displayed on the browser.
 Uploaded image using Next.js component
Open your browser console to view the image rendered by Next.js Image component.
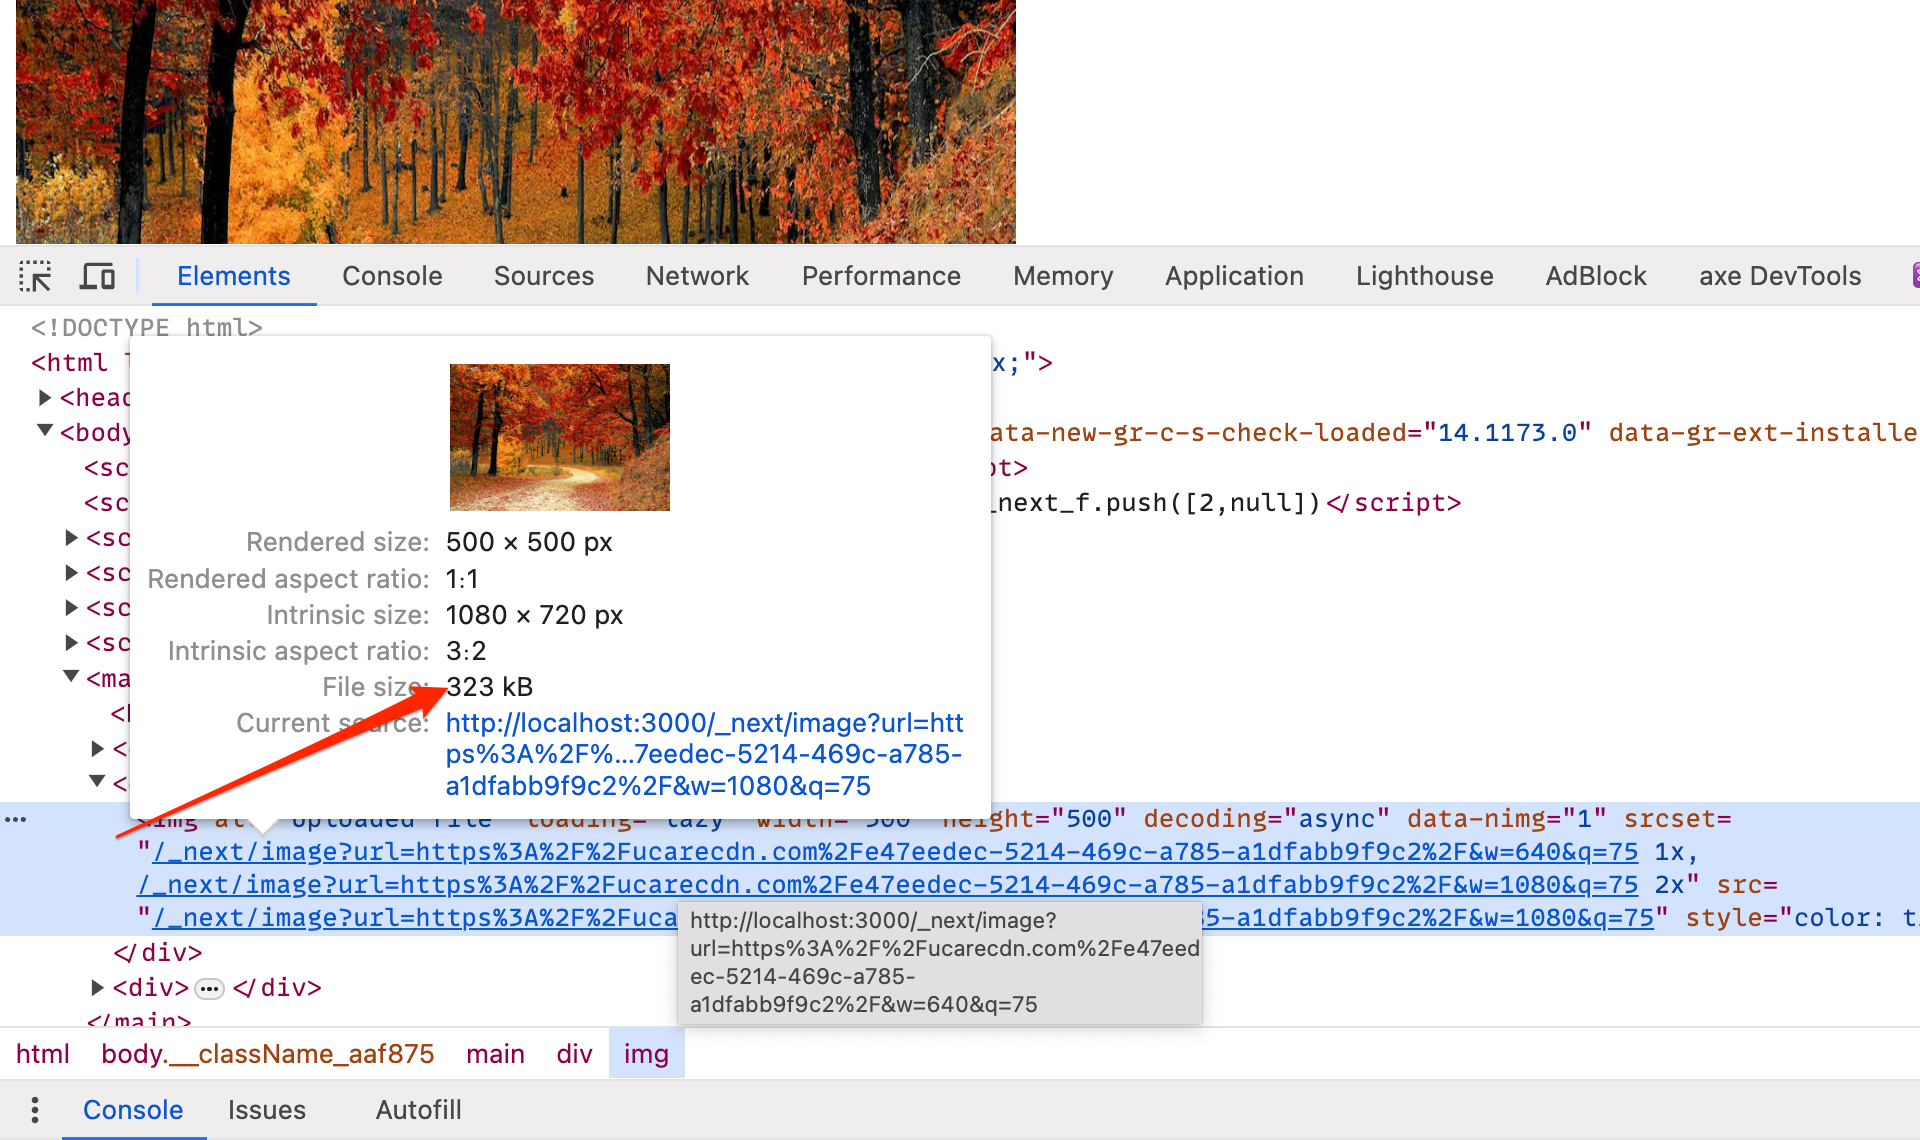 Browser Logs showing Next.js image
Notice that the image file size is 323 KB.
Using Uploadcare image component
Run the command below to install the UploadcareImage component:
npm install @uploadcare/nextjs-loaderIn your .env.local file, add a new env variable:
NEXT_PUBLIC_UPLOADCARE_TRANSFORMATION_PARAMETERS="quality/lightest, progressive/yes"Using the NEXT_PUBLIC_UPLOADCARE_TRANSFORMATION_PARAMETERS variable,
you can tell Uploadcare how to transform the images you want to display. For example:
quality/lightesttells Uploadcare to optimize the image to the smallest file size possible with the highest compression ratio while maintaining acceptable quality. This results in approximately 50% of the original file size.progressive/yestells Uploadcare to load the image in a progressive manner, which improves the loading experience by initially displaying a lower-quality version of the image and gradually enhancing it as more data is downloaded.
In the app/page.js file, import the UploadcareImage component:
import UploadcareImage from "@uploadcare/nextjs-loader";Next, update the component to render the files using the UploadcareImage component:
{
  files.map((file) => (
    <div key={file.uuid}>
      <UploadcareImage
        src={file.cdnUrl}
        width={500}
        height={500}
        alt={file.name}
      />
      <p>{file.name}</p>
    </div>
  ))
}
You should have the image uploaded via the file uploader displayed on the browser.
Open your browser console to view the image rendered by the UploadcareImage component.
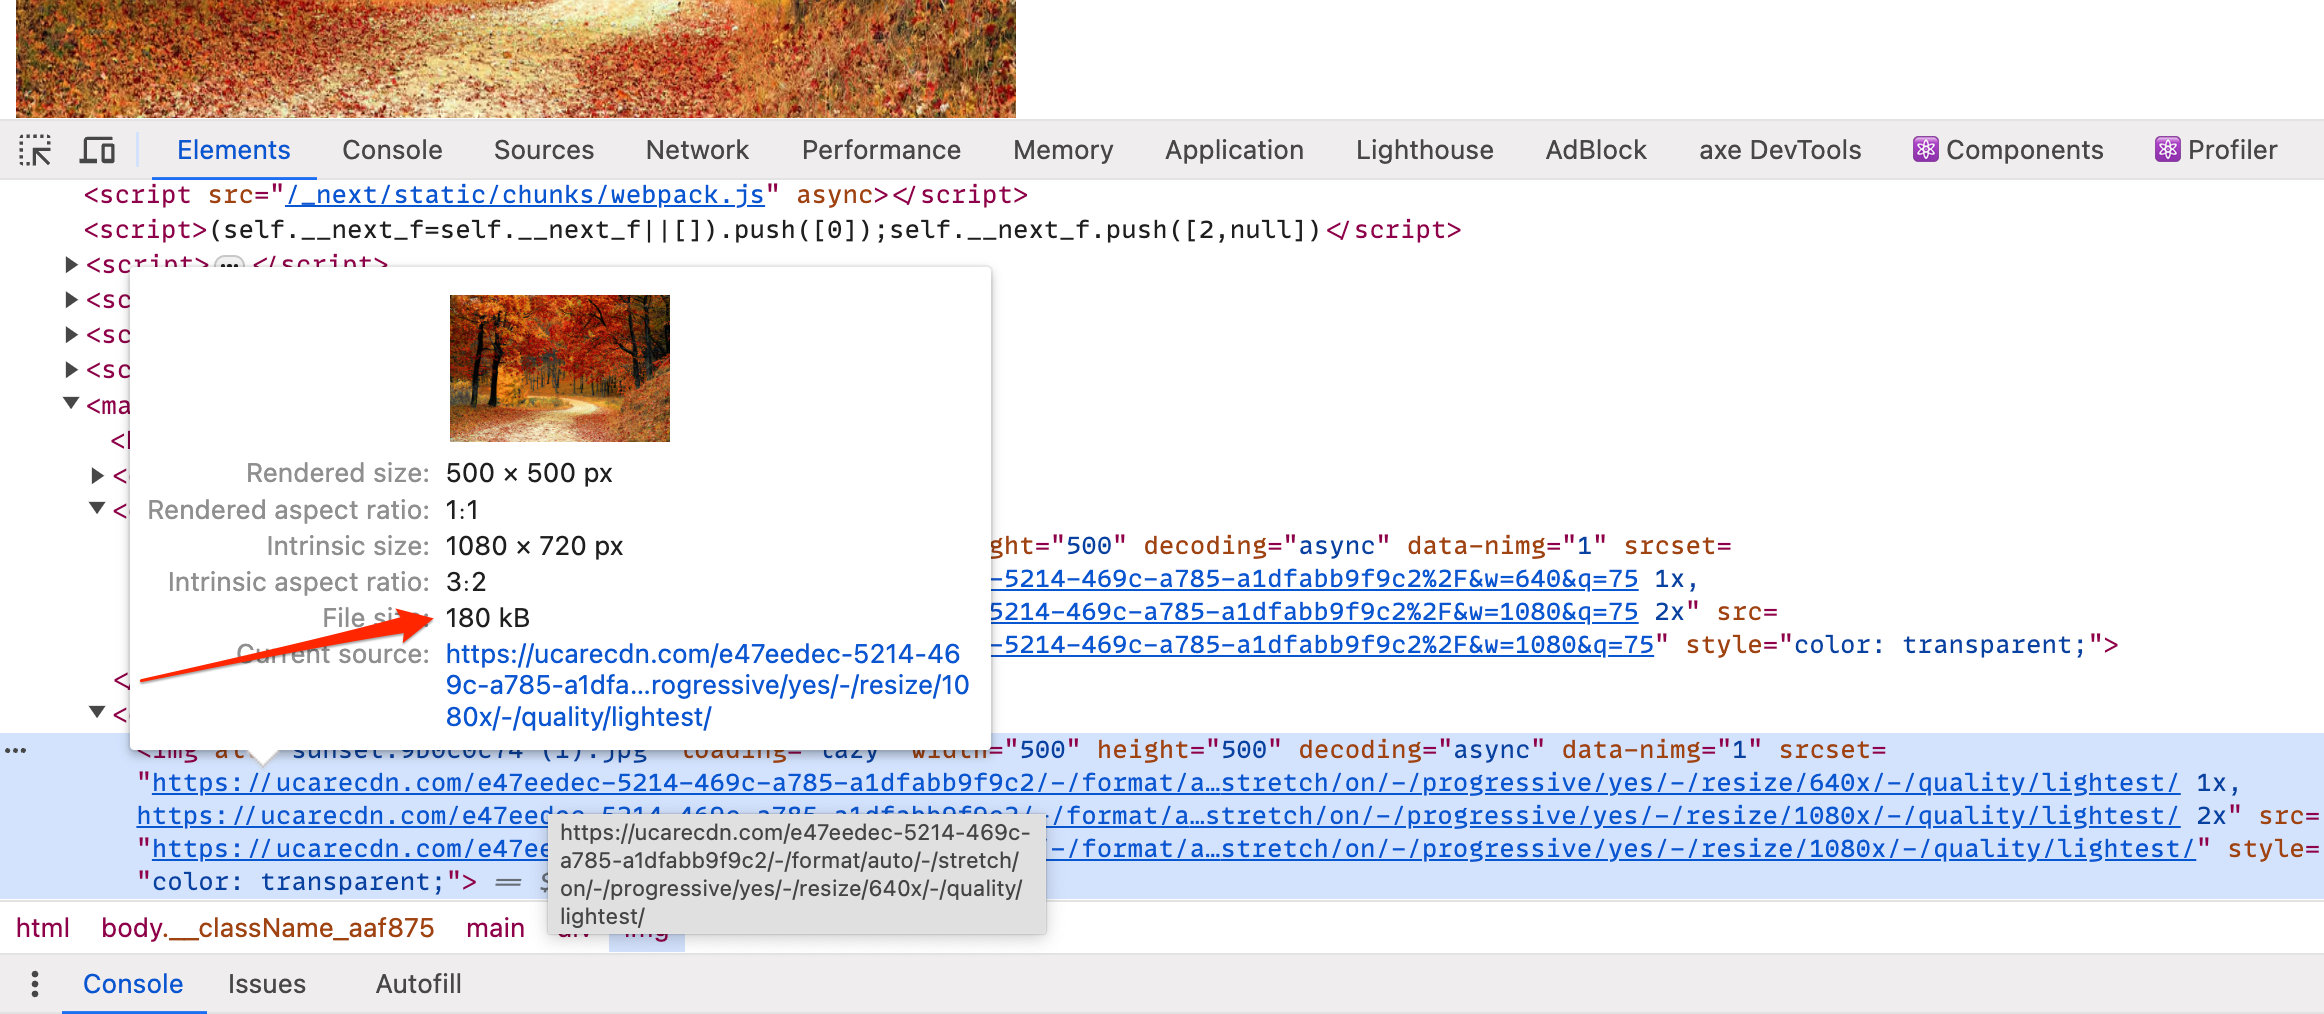 Browser Logs using Uploadcare image component
Notice that the image file size is 180 KB.
That’s 44.27% smaller than the image rendered by the Next.js Image component.
For more information about the UploadcareImage component, check out this tutorial on image optimization for Next.js applications.
Transforming images on the fly
Uploadcare offers powerful transformation capabilities that allow you to optimize and manipulate images on the fly, such as smart resizing, cropping effects, and more. These transformations can help improve your application’s performance and visual appeal.
Transforming images in Uploadcare is done by appending transformation properties to the image URL. The general format for transforming images in Uploadcare is:
https://{unique-subdomain}/.ucarecd.net//{fileUUID}/-/{transformProperty}/{value}/Where:
{unique-subdomain}is the unique subdomain for your Uploadcare project found in your Delivery settings.{fileUUID}is the unique identifier of the file.{transformProperty}is the transformation you want to apply to the image.{value}is the value of the transform property you want.
Let’s apply some transformations to the images uploaded in the previous steps of this tutorial.
In your page.js file, update the UploadcareImage component to include the transformation properties:
{
  files.map((file) => (
    <div key={file.uuid}>
      <UploadcareImage
        src={`${file.cdnUrl}-/warmth/-80/-/crop/70px70p/`}
        width={500}
        height={500}
        alt={file.name}
      />
      <p>{file.name}</p>
    </div>
  ))
}
This applies a warmth value of -80 and a crop value of 70p (percentage)
to both the width and height of the image.
 Transformed image using Uploadcare transformation
For a list of all the possible transformations you can apply to images in Uploadcare, check out the Uploadcare transformation documentation.
Customizing File Uploader Component
The File Uploader component can be customized to fit your design and needs.
To customize the file uploader, you can pass a className to the FileUploaderRegular component and style it with CSS classes.
<FileUploaderRegular
  pubkey={pubKey}
  onChange={handleChangeEvent}
  onFileUploadFailed={handleUploadFailed}
  maxLocalFileSizeBytes={2000000}
  className="file-uploader"
/>
In your global.css file, add the following CSS to style the file uploader component:
.file-uploader uc-file-uploader-regular {
  --uc-primary-oklch-light: 70% 0.235 146.65;
}
This will change the modal color accent in light mode using the OKLCH color space.
 File Uploader with customized modal color accent using OKLCH color space
Customizing individual components from the File Uploader
You can also customize the individual components rendered by the File Uploader component using CSS. For example, to change the appearance of the File Uploader button, add the following CSS to your global.css file:
.file-uploader uc-file-uploader-regular uc-simple-btn button {
  width: 500px;
  padding: 20px;
  background-color: #000;
  color: #fff;
}
This will add a black background color, white text color, and a width of 500px to the File Uploader button.
 File Uploader button with custom styling
For a list of all the possible customizations you can apply to the File Uploader component, check out the File Uploader styling documentation.
Conclusion
Using this tutorial, you have successfully implemented file upload functionality in a Next.js application using the Uploadcare React component. You’ve learned how to set up Uploadcare, create a file uploader component, handle file uploads, and display optimized images using Next.js and Uploadcare image components.
Uploadcare also provides more advanced features, such as image transformation, face-detection-based transformation, and smart cropping. These features can enhance the user experience by providing more dynamic and responsive image-handling capabilities.
To learn more about Uploadcare File Uploader and image transformation, check out the Uploadcare documentation.