Automate format and quality selection for all your images with Uploadcare
Last edited:
Image optimization is all about reaching the right balance between the visual quality of the image and website load speed. Why is this so important? A small improvement in this area can trigger a whole chain of improvements: better SEO rankings and customer experience, lower bounce rate and, eventually, higher conversions. Sounds nice, but how can you achieve this?
Mainly, it can be achieved by manipulating image format and quality. Though it’s not rocket science, it can be hard to understand all the nuances if you’re not a professional designer. This guide will help you to figure everything out. We’ll give you an overview of the most common image formats and their features, as well as tell you how you can automate the process. Beyond that, we’ll talk about how to set the right image quality. Let's find out how it works.
Most common web image formats overview
Each file format has a set of features that make it the best choice in a certain situation. By understanding the purpose of each format, you can make all your images look as good as possible. Now let’s dig into the features of each image format.
| Usage | Advantages | Disadvantages | |
| JPEG | Digital photographs of real-world subjects, large web images like banners | High compression, over 16 million possible colors, supported by all browsers | Loses quality after each re-saving, on some types of images compression artifacts are visible |
| PNG | Transparent web graphics (logos, icons, charts, signs), illustrations with limited colors | Built-in transparency, over 16 million possible colors, supported by all browsers | Larger file size for photos |
| GIF | Web animation, graphics with few colors (simple diagrams, logos), transparent images | Ability to render flat colors with smaller file sizes, supported by all browsers | Limited color palette — only 256 colors |
| WebP | Digital photographs, transparent web graphics, web animations | Eliminates most problems of other formats, provides smaller but richer images | Loses quality after each re-saving, not all browsers support WebP yet |
JPEG (.jpg or .jpeg) — Joint Photographic Experts Group
JPEG is the most popular image format online. It’s the default file type for images from most smartphones and digital cameras. That’s why it’s supported by all browsers and devices.
It’s suitable for nearly all photographs on the web and it’s especially good for photographs of real-world subjects, and large and colorful web images (banner ads, for instance). However, it’s not suitable for drawings, text or icon graphics, because the edges don’t stay sharp.
JPEG uses a lossy compression method, meaning that some information is deleted permanently when the image is compressed. Sounds terrifying, but in fact, it strives to throw away only unnecessary data the human eye can’t see, so the quality doesn't suffer too much. This way you get lightweight yet quality photographs that are ideal for sharing and storing.
That said, each time you re-save the same file, you lose a little more information, so the quality may get worse over time. If you need to edit and re-save an image multiple times, you should use a format with lossless compression instead.
 JPEG photo
PNG (.png) — Portable Network Graphics
PNG is commonly used in web design as it has built-in transparency. It’s great for logos or various graphic icons as it can be easily placed over another image used as a background.
PNG uses a lossless compression method, meaning that it doesn’t lose any data during compression. In essence, lossless compression reduces file size by identifying parts of the file that are repeated and encoding those parts with a shorter representation. Still, PNG tends to be much larger than other file types, especially those with lossy compression.
That’s why PNG isn’t the best fit for photos. With its lossless compression, high-resolution photos will look great but the file size will get very large, harming your website performance.
 PNG graphics
GIF (.gif) — Graphics Interchange Format
GIF format supports both animated and still images but most often it’s used in animation, for instance, animated graphics like banner ads. Unlike JPEG, GIFs use lossless compression algorithms that do not degrade the quality of the image.
The GIF color palette is limited to 256 colors in RGB format, which results in a dramatically reduced file size. But, of course, this makes high-quality, colorful photographs look flat in GIF format. For complex color photographs, JPEG is a better choice.
WebP (.webp) — Google Web Picture Files
WebP is a next-gen image format that uses both lossless and lossy compression. It was designed by Google with the aim of reducing image size and speeding up webpage loading without compromising quality. It works excellent with all types of images: photographs, web graphics, animations, etc. Additionally, WebP supports transparency and can be animated.
Google claims that WebP lossless images are 26% smaller in size compared to PNGs, and WebP lossy images are 25-34% smaller than JPEG images.
In fact, WebP eliminates most of the problems of other formats and provides better compression and image quality. The problem is that this format is relatively new and not all browsers support it. Also, it loses quality after each re-saving even more than JPEG.
 WebP photo
How to convert between formats using Uploadcare
Now that we know what image formats are best suited for certain image types, let’s find out how to convert between formats. At Uploadcare, all transformations are done via CDN image operations.
To get things rolling, you need to sign up for an Uploadcare account. After that, you’ll be able to create your first project from the dashboard and start uploading your images.
Once an image is uploaded, you receive a CDN link with its own unique identifier (UUID). The link looks like this:
https://6ca2u7ybx5.ucarecd.net/19099936-3af8-4260-af53-bbe52da31ef5/flower.jpeg
Where:
6ca2u7ybx5— your CDN unique subdomain for your project.19099936-3af8-4260-af53-bbe52da31ef5— your unique file identifier (UUID).flower.jpeg— the filename (optional).
From there, you can switch between formats by simply adding different URL parameters to this link. To change the format, you need to add the CDN operation format and specify the format you want to get. After adding these parameters, the link will look like this:
https://6ca2u7ybx5.ucarecd.net/19099936-3af8-4260-af53-bbe52da31ef5/-/format/webp/
Where:
- /-/ — the mandatory delimiter for our parser to tell operations from one another and other path components.
- format — a CDN operation, a command to our CDN to change the format.
- webp — the format we’re converting to.
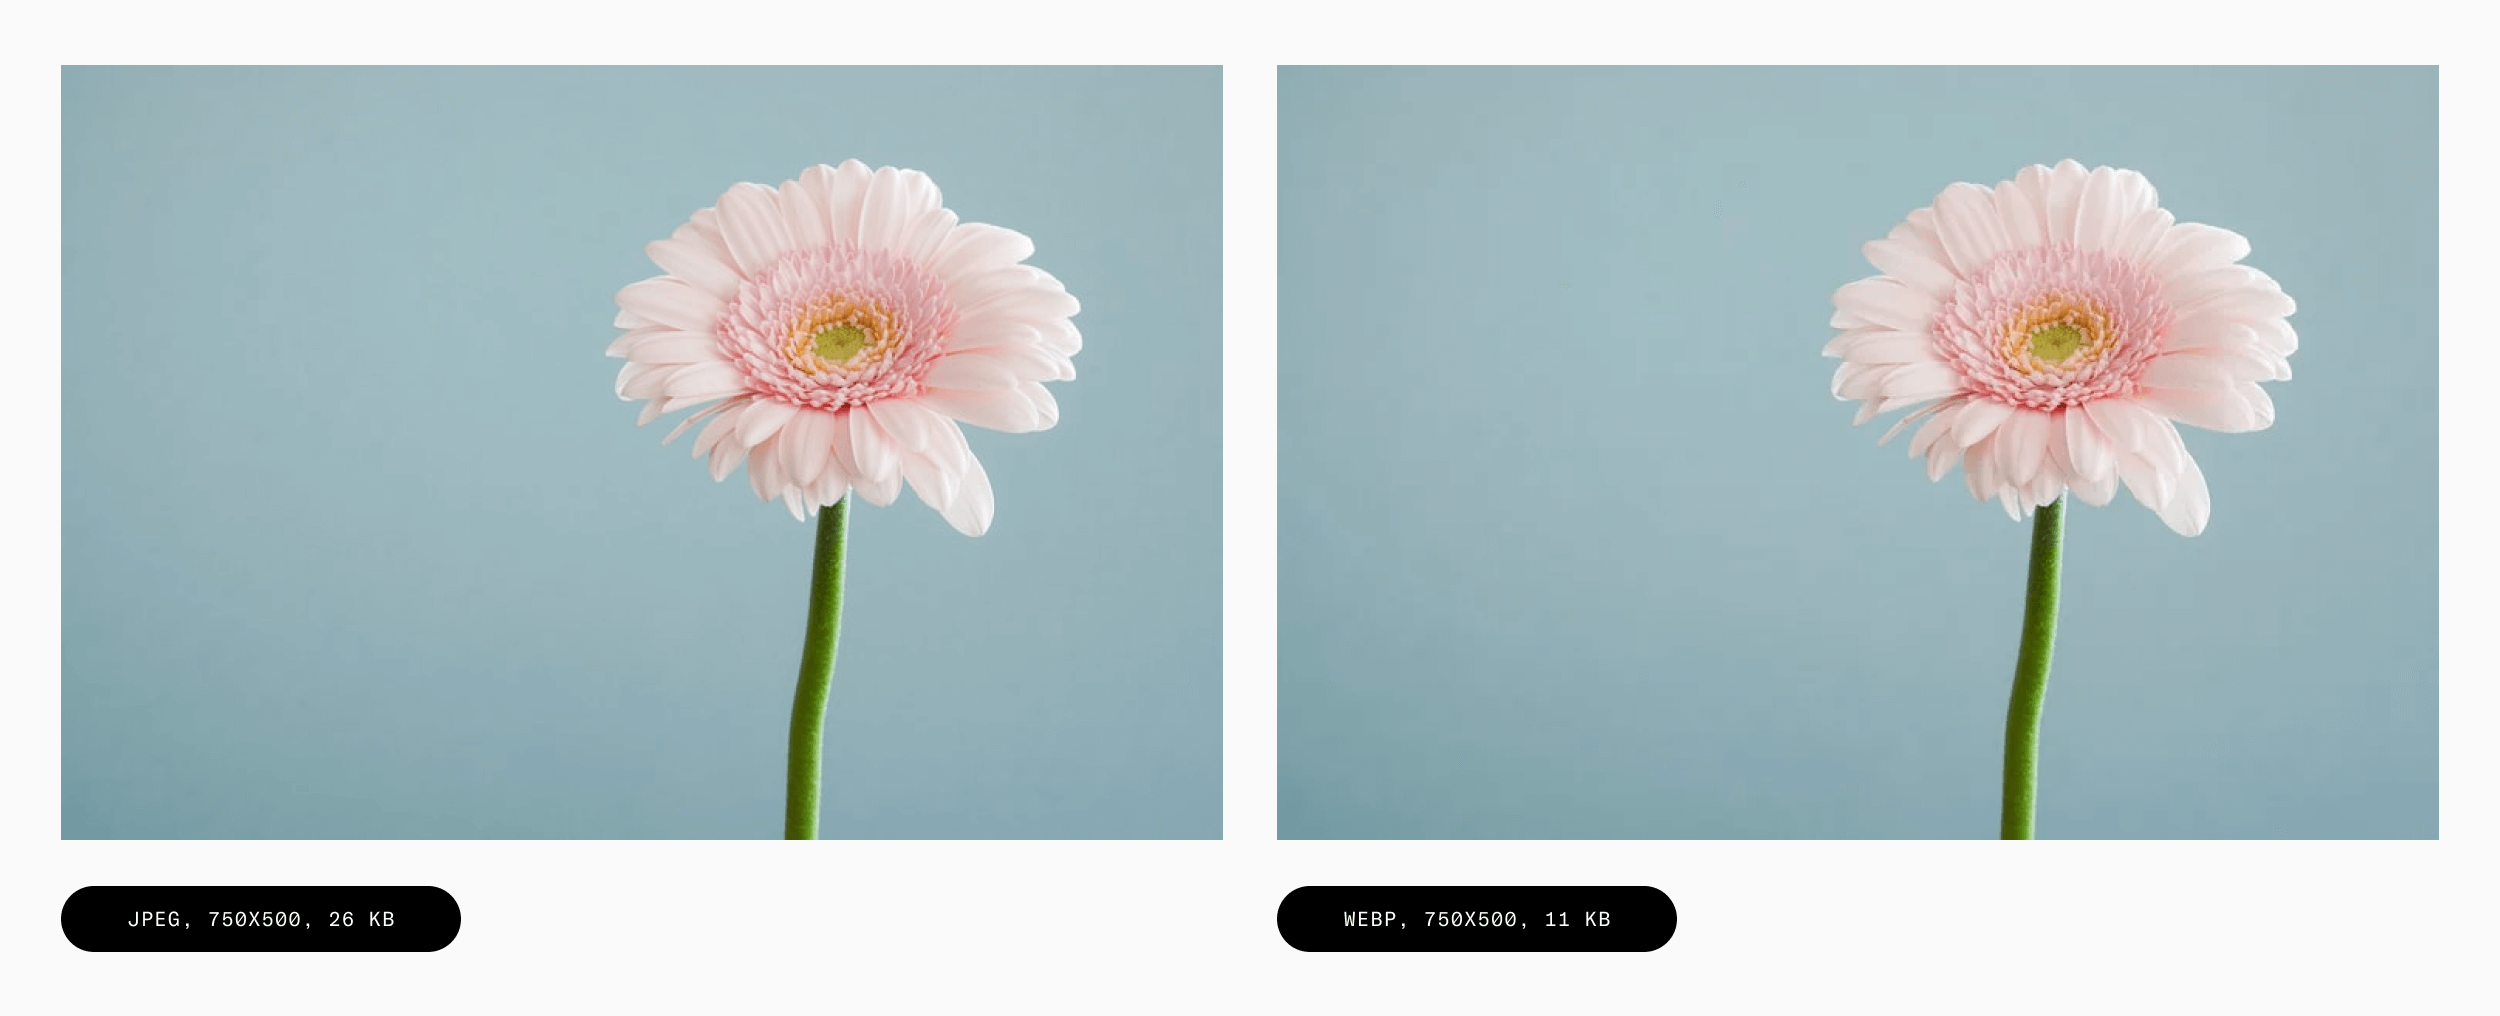
And that’s it. We’ve turned the JPEG image into WebP.
 JPEG converted to WebP
From here, you can download the converted image or use the link in your code.
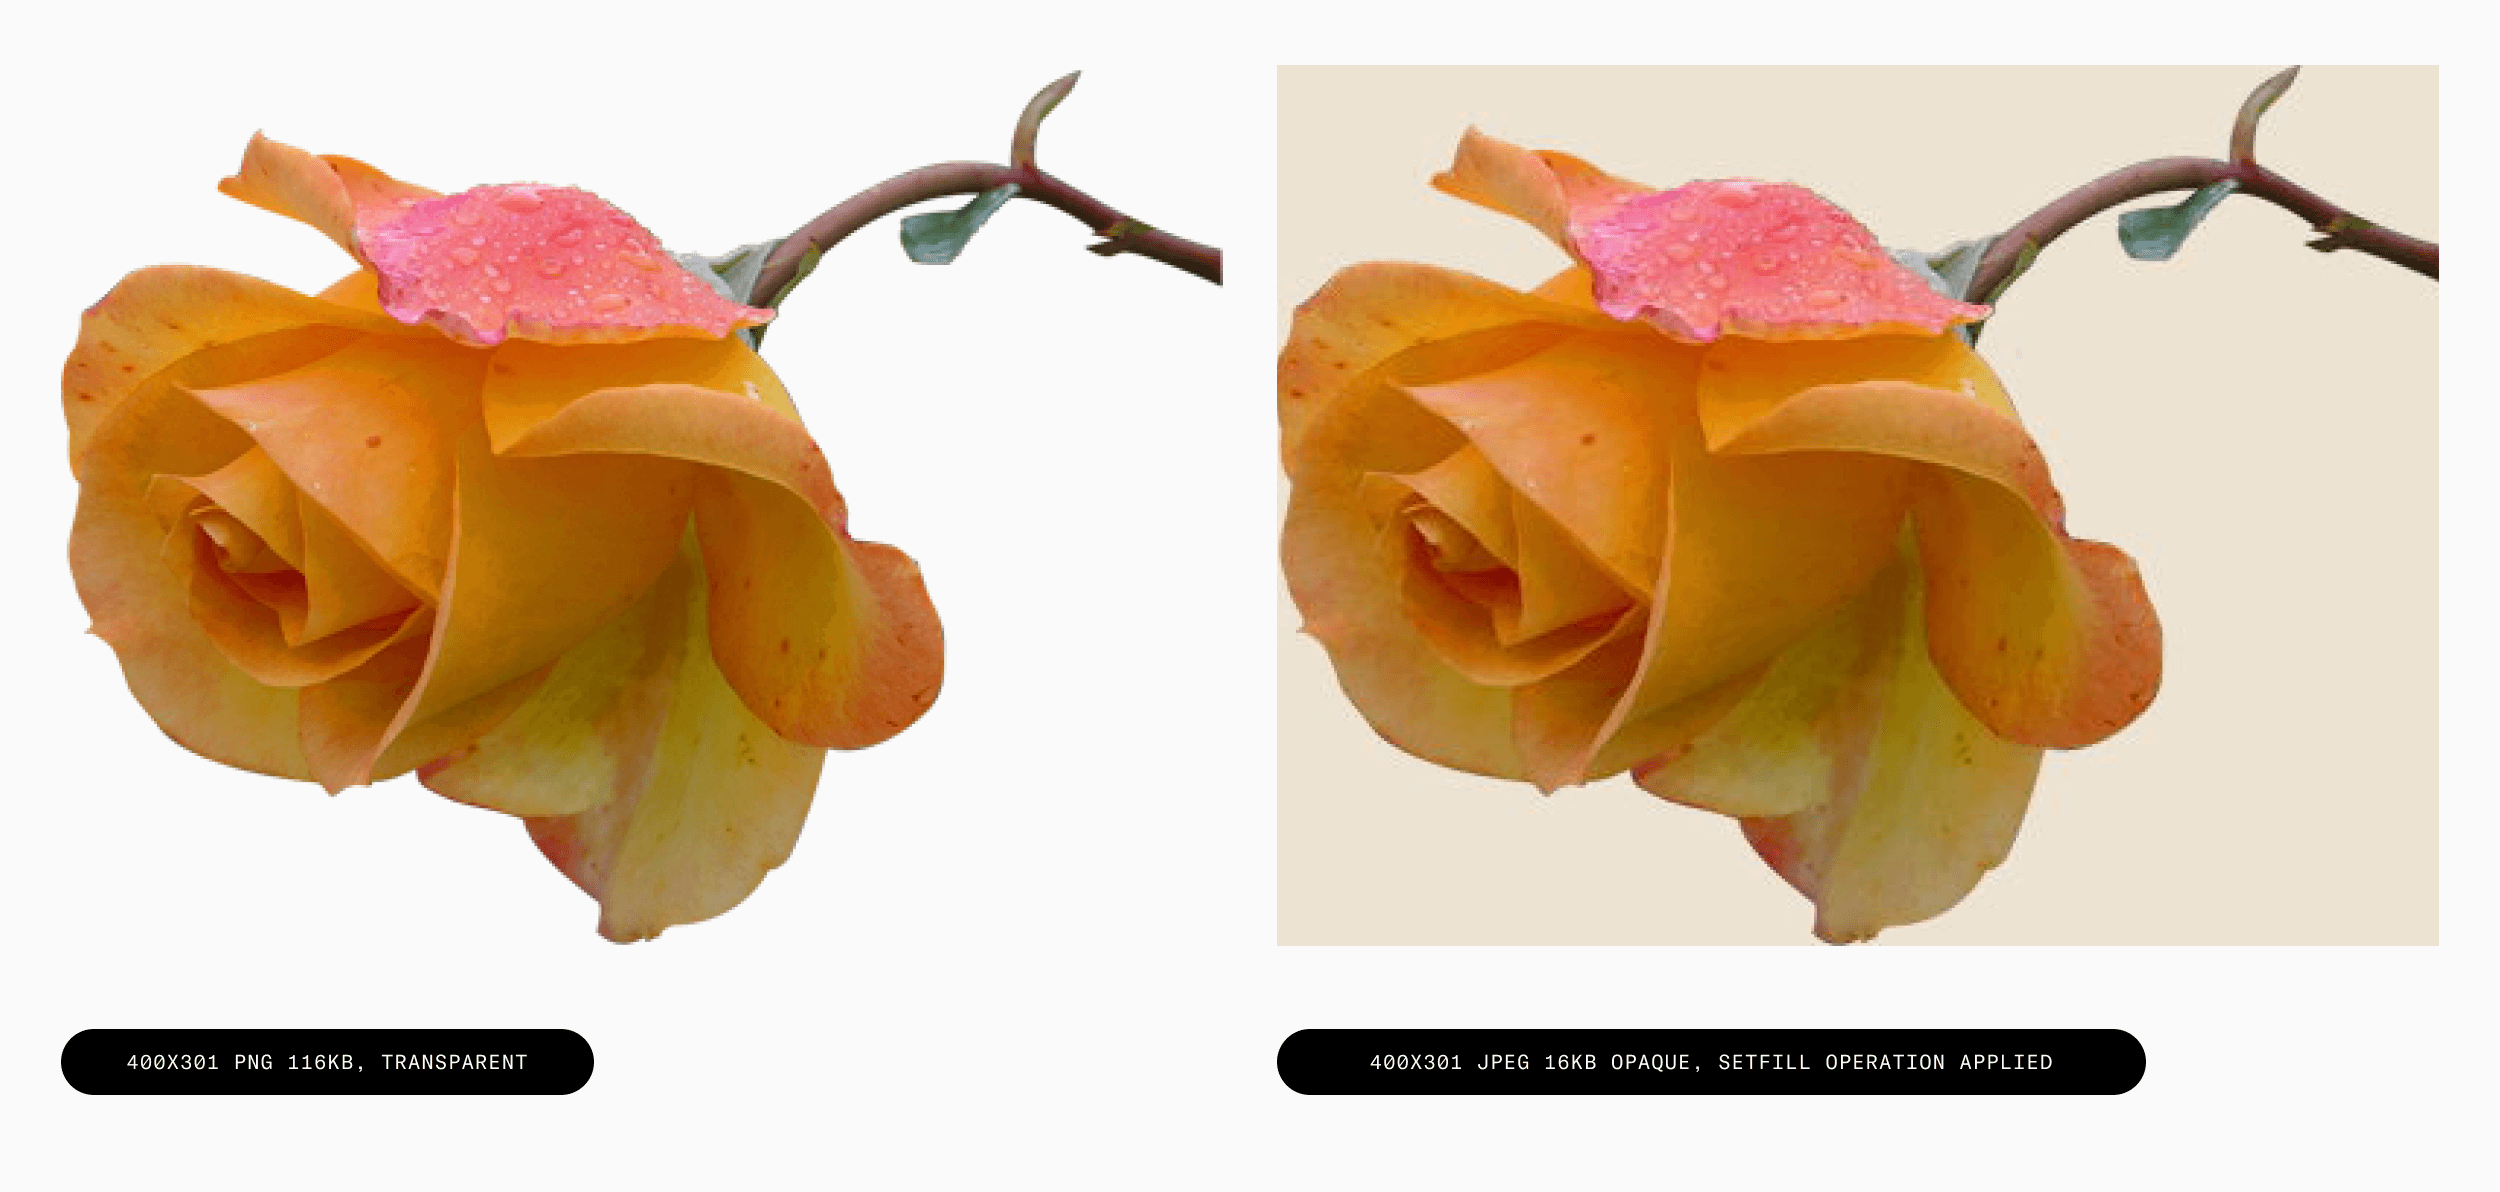
As of now, Uploadcare supports 3 formats: JPEG, PNG and WebP. JPEG doesn’t support an alpha channel (transparency), hence you can use the setfill operation to set a background color.
 Setfill operation applied
How to automate this process with the auto-format feature
To make this process even easier, Uploadcare rolled out the auto-format feature. When you add the auto operation to the link, it sets the image format automatically, depending on the presence of an alpha channel (transparency) and the capabilities of the user’s browser. How does it decide which format to choose? There are several rules:
- By default, the auto-format feature always strives to deliver WebP format, as it’s the most efficient format to date. If the user’s browser supports WebP format, the algorithm detects it and converts the image to WebP.
- If the user’s browser doesn’t support WebP, then our algorithm checks if the image supports the alpha channel. If yes, it delivers PNG.
- If there’s no alpha channel, it delivers JPEG.
To make this work, just add the auto command to the link. It will look like this:
https://6ca2u7ybx5.ucarecd.net/1080887f-7929-4025-ba5f-b1522eaf4448/-/format/auto/
That’s it. Our algorithms automatically determine what format will work best with the image you uploaded and convert it a matter of seconds.
What about image quality?
Regarding formats with lossy compression, there’s a setting called quality. The quality shows how much information has been removed from the photo during compression. Obviously, the more information is removed, the more lightweight the image gets, and the more visible compression artifacts become.
Lightweight images mean faster load speed and thus better user experience. At the same time, the visual quality of the image is what draws users’ attention, retains it, and sometimes even influences purchasing decisions. Both factors are important, so you can’t afford to compromise one of them — you need to find a balance.
By adjusting compression level and encoding quality settings, you can make your images as lightweight as possible without noticeable changes in quality.
The problem is, there are no standardized quality and encoding settings that work for all formats. Some codecs specify quality settings on a scale between 0 and 100, others between 1 and 99, or even between 1 and 12. Some codecs don't even use numbered scales.
A specific quality might mean different things for different formats, so you can’t use a one-size-fits-all approach here. To find the optimal quality settings for your images, you would need to adjust every image manually one by one. Of course, this would be quite inefficient, especially if you have a lot of images to adjust.
Fine-Tune image quality with understandable quality settings
To save you from all that manual work, Uploadcare created standardized quality settings that are easy to understand and use. They work with JPEG and WebP images. Here they are:
- normal — the default setting, suits images with 1x pixel scaling.
- better — can be used to render relatively small and detailed previews. ≈125% file size compared to normal.
- best — useful when you want to get perfect quality without paying much attention to file sizes. ≈170% file size.
- lighter — useful when applied to relatively large images to save traffic without significant losses in quality. ≈80% file size.
- lightest — useful for retina pixel density, when you don’t have to worry about the quality of each pixel. ≈50% file size.
Actually, the normal setting is the best choice for most websites. In most cases, it makes your images lighter without any degradation noticeable to the human eye. If you run a website that specializes in photography and image quality is your top priority, you may want to use the better or best setting. Lighter and lightest are perfect for retina screens.
That’s it! No need to figure out different codec settings and adjust your images manually. Choose from 5 understandable settings and add this command to the link, just like we did when we chose the format. Your link will look like this:
https://6ca2u7ybx5.ucarecd.net/5876c100-2a41-442a-93b0-db493607e799/-/quality/normal/
 Image quality comparison
 You can choose what setting is best for you depending on your website’s purpose, what's in the image, whether it's a thumbnail or full-quality version, and so on.
Wrapping up
Both visual quality and page load speed are crucial to creating a pleasant user experience. These factors directly influence your conversions and overall business metrics, so it’s important to strike a balance between image quality and size. By manipulating formats and quality, you can get visually compelling yet lightweight images.
Uploadcare can help you automate format and quality selection. Using Uploadcare Image CDN, you can switch between formats and set quality by simply adding parameters to the link. These features are just a part of the Uploadcare Image Transformation engine, which can help you completely automate your image editing. Besides auto-format and quality, you can crop, resize, align, rotate, apply different effects, and do all kinds of manipulations on the fly, saving you a bunch of time.
Visit our docs to learn more about Image Transformations, or give them a try with a free account.