With so many devices on the market, it’s a challenge to make on-site images match each screen size. This is what happens (hopefully) in milliseconds before a visitor sees the actual webpage. The faster the process, the better the user experience.
In this blog post, I’ll tell you about the mistakes you may come across while trying to speed up image resizing, and how I solved these issues in the latest Pillow release and Uploadcare.
A quick overview of Pillow
Pillow is an open-source Python imaging library. We’d been using it for Uploadcare in its early days until I developed the Pillow-SIMD fork. Unlike Pillow, it uses the SIMD extensions of x86 processors to speed up the most common operations, such as resizing.
Today, Pillow-SIMD is used for most operations with images processed by Uploadcare. It does resizing, changes colors, converts JPEG into WebP, and more — just like a food processor but for images.
Resizing techniques 101
There are plenty of algorithms for image resizing. Here are the three basic techniques I considered when I was trying to speed up image processing at Uploadcare.
1. Nearest neighbor
Nearest neighbor is the fastest and easiest algorithm to implement. If you upscale, it duplicates and reuses some of the pixels from the source image. If you downscale, the algorithm calculates the nearest neighboring pixel in the source image and uses it in the output. Say, when you reduce a picture three times, the algorithm picks just one pixel out of nine neighboring pixels.
While it’s super fast, the result is far from being perfect, as it usually ends up with jagged edges. This effect is also known as aliasing.
The skyline looks especially jagged
2. Box filter
The most obvious solution to the previous issue is box filter or box sampling. For the output image, this algorithm picks the average value for a group of pixels. Imagine that we need to downscale an image three times. To do so using the box filter technique, we take 9 pixels of the source image (a box of 3×3 pixels, that's it!) and simply find the average value of them.
The result of box sampling is smoother than after using the nearest neighbor technique
The result is much better than in the previous case. Still, there are three problems:
“Find the average value” doesn't sound precise, and this isn’t exactly the way digital signal processing works. In some cases, this may lead to moiré, an odd pattern of curvy lines, on the resulting image.
Box filter works well enough with integer scaling. But what if we need to scale at 3.5x?
For upscaling, box filter gives a result similar to the nearest neighbor algorithm (which is poor).
3. Convolution-based resampling
Сonvolution-based resampling is a way to calculate output pixels while taking into account as many input pixels as you need. It helps you avoid local geometry distortions.
This algorithm is applied in professional software and many image processing libraries, including ImageMagick and GIMP. A positive side of convolution resampling is the reliable mathematics, which makes this method applicable for both upscaling and downscaling. The drawback of this approach is the increased calculation complexity.
The result of this convolution-based sampling is even smoother
What if you need to be quick but still accurate? Well, one of the common approaches for downscaling is using box filter before convolution resampling to reduce an image several-fold.
What benefits does it provide? Since box filtering is faster, the whole process can be faster in general, too, even though there are two operations instead of just one.
But what’s most important here is that some image formats, such as JPEG, support opening images in a lower resolution. So, instead of loading a full-scale image and applying box filter, in some cases you can open a reduced version of the image.
For example, let’s say we have a 4,000×4,000 px JPEG image that we want to reduce by ten times and get a 400×400 px picture. To do it faster, we can open the image eight times smaller, at 500×500 px. This provides us with two advantages.
First, since we don't have to load the full-sized version, we save a considerable amount of memory.
Second, by opening the image at 500 px instead of 4,000 px, we significantly speed up the resizing process, since its speed depends on the source file size and the desired output.
This is a real game-changer.
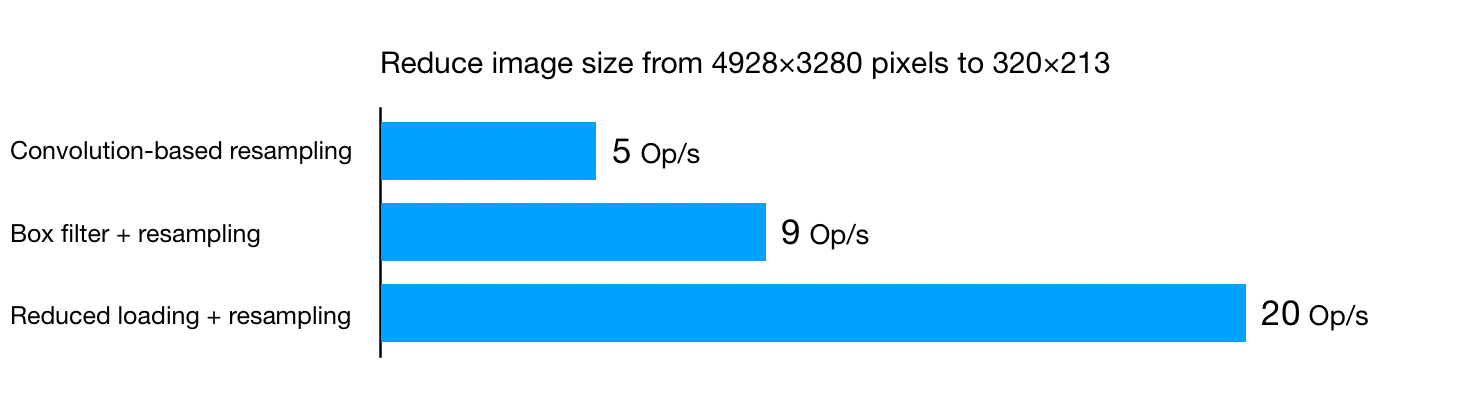
Comparison graph of the three resizing techniques
Sonic running GIF
Preventing blurring effect
4X speedup looks incredible, but maintaining image quality is still the key. So, we need to make sure that any optimization doesn't spoil the content.
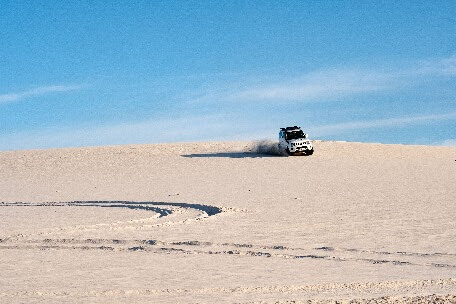
Now, let's have a closer look at the operations we perform. Let’s say we have an image at 4928×3280 px, and we need to turn it into a 320×213 px image. In other words, we need to reduce the image by 15.4 times.
As I said, we can first apply box filter, reducing the image by 15 times to 329×219 px and then apply convolution resampling to compress it a little more, to 320×213 px.
Convolution-based resampling
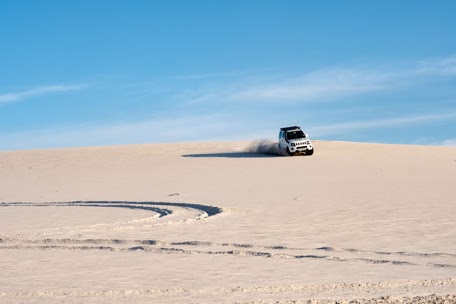
Resizing in two steps using box filter
So, what’s the catch? The images may seem to be similar, but they’re not. If you have a closer look, you'll notice that the left image generally looks much sharper, and the right image has lost a lot of details.
Oops
What happened, and why?
The key was in the second step when we were resizing from 329×219 pixels to 320×213. This small resize is not enough to preserve pixel accuracy. The solution is simple: we need to make this step more significant by weakening the previous one.
For example, instead of 329×219 px, we could use 704×469 px. Using an intermediate size (at least 2x compared to the desired size) prevents blurring and makes the сonvolution-based resampling result indistinguishable to human eyes.
5 / 3 = ?
See the issue here? I mentioned earlier that box filter could only be used for integer scales, and then I showed how it is applied to reduce a 4928×3280 image by 15 times. The problem is that neither 4928 nor 3280 can be divided by 15 without a fraction, and an image cannot have a fractional resolution.
Confused math GIF
Let’s look at another example to make it clear. Say we have an image at 122x122 px, and we need to reduce it ten times.
122 / 10 = 12.2.
What can we do? Since 12.2 is much closer to 12, it looks natural to round the value to 12. The problem is that by doing so, we’ll have to take only a 120x120 px frame from the original image and throw away the last two rows and columns. It doesn't seem like a big deal unless those rows contain something noticeable like a border, which will be completely trimmed from two sides.
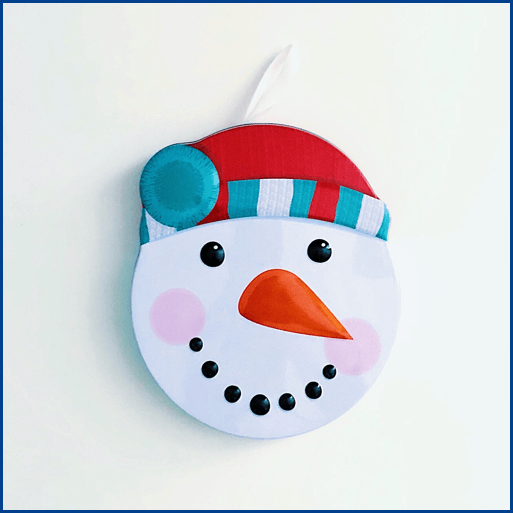
A source image
An image with a 3-pixel border which is trimmed after resizing 10 times
The solution is to always round up (to 13x13 pixels in our example) and fill the last row or column with the remaining rows or columns from the original image. Even if we have a choice between cropping one row or adding ten, we should always preserve content.
The image with a 3-pixel border after resizing ten times
The problem now is the border doesn’t look natural, since it has way more weight on the right and bottom. It seems like we still need to crop half of the last row and column from these sides, which is not possible, right?
Well, not really. Like I said, the image itself can’t have a fractional resolution, and this is true. But there’s no such limitation on the area of the image that we use as a source for the resize operation. This is a bit hard to imagine since we usually consider the whole image as the source area, but in fact, the source area can be of any size.
Ideal border
For our example, this means that we can resize a 122×122 px image by ten times to a 13×13 px image. Then we get an area at 12.2×12.2 px to resize it to the requested size (6x6 px, for example) without losing or spoiling content.
Duff, Duff Lite, and Duff Dry tanks
Don’t throw the baby out with the bathwater as Disney did
Are we still that fast?
In the beginning, I told you that applying box filter may speed up resizing by four times. After that, we eliminated extra blurring by increasing the intermediate resolution, and then changed the region of the processed image. The reasonable question now is, how did these fixes affect the performance? Are we still that fast?
Yes. The trick is the benchmark graph above already took these factors into account when it was created! Let’s have another look:
The benchmark graph - reduce image size
To sum up
So, now you know how to speed up resizing while preserving the quality of the source image. Would you like to do this with all your images? I didn’t think so, as there is a lot of math, code, and plenty of edge cases. That’s why I'm glad to announce that starting from version 7.0.0 in Pillow, the Python imaging processing library, all of this works out of the box!
Yes GIF
If you’re using the thumbnail() method, you get reduced loading for JPEGs and box filter for the rest of the images. With both options, the outer rows and columns look great.
If you’re using the resize() method, you can engage box filter using the new argument reducing_gap.
As for Pillow-SIMD, box filter itself doesn’t improve resizing performance so much, but reduced loading still helps a lot.
An image processing engineer @ Uploadcare, author of the fastest image-resizing algorithm for x86 processors. One of the core developers of Pillow, and the author of Pillow-SIMD, its high-performance fork.