These days, PDF (short for portable document format) is a go-to solution to store and share your documents. According to research from PDF Association in 2018, about 85% of documents on the web are in PDF format, whereas DOC (a format used by Microsoft Word) represents around 10 percent of all documents present on the internet.
PDF has wide native support among modern browsers. There are lots of apps out there (both for desktops and mobile devices) to read this format.
While it may sound attractive to use PDF format for every electronic document you create, there could be many cases where you already have, say, a Microsoft Word (*.doc, *.docx) file that you’d like to show directly on your website. That’s where document conversion comes into play.
Uploadcare document conversion
Converting documents to PDF with Uploadcare is a matter of just a few HTTP requests; there’s no need to upload files with every request. The system handles files that have been already uploaded to Uploadcare servers, and can be referred to via unique identifiers.
PDF.js
PDF.js is a widely known Javascript library for rendering PDF documents on web pages. It’s community driven and supported by the Mozilla organization. In this article, we’re going to use it to display a converted document.
Step 1. Create an Uploadcare account and get API keys
Before digging into the process of document conversion itself, we need to pave the way and sign up for a new Uploadcare account. No fees at this point: there’s a 14-day free trial period so you can test everything and make sure it suits your needs. Follow these steps to get your account set up:
Register on the website and follow a link in the confirmation email.
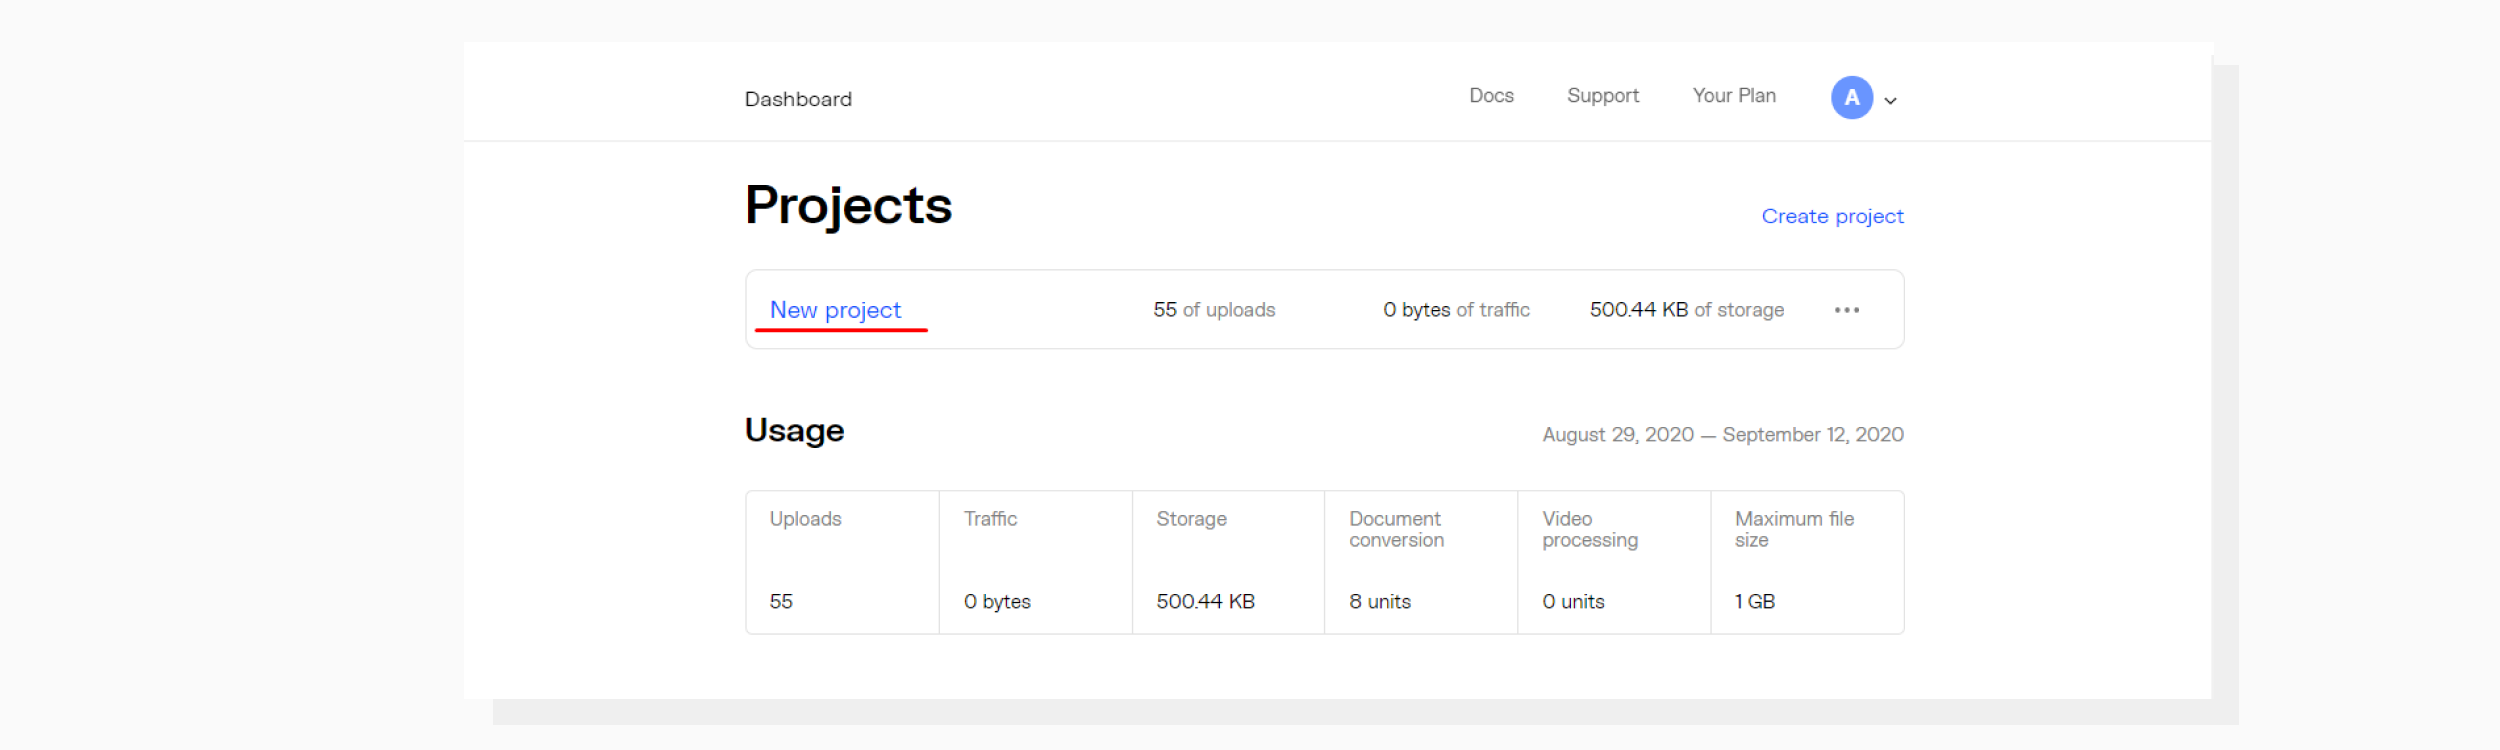
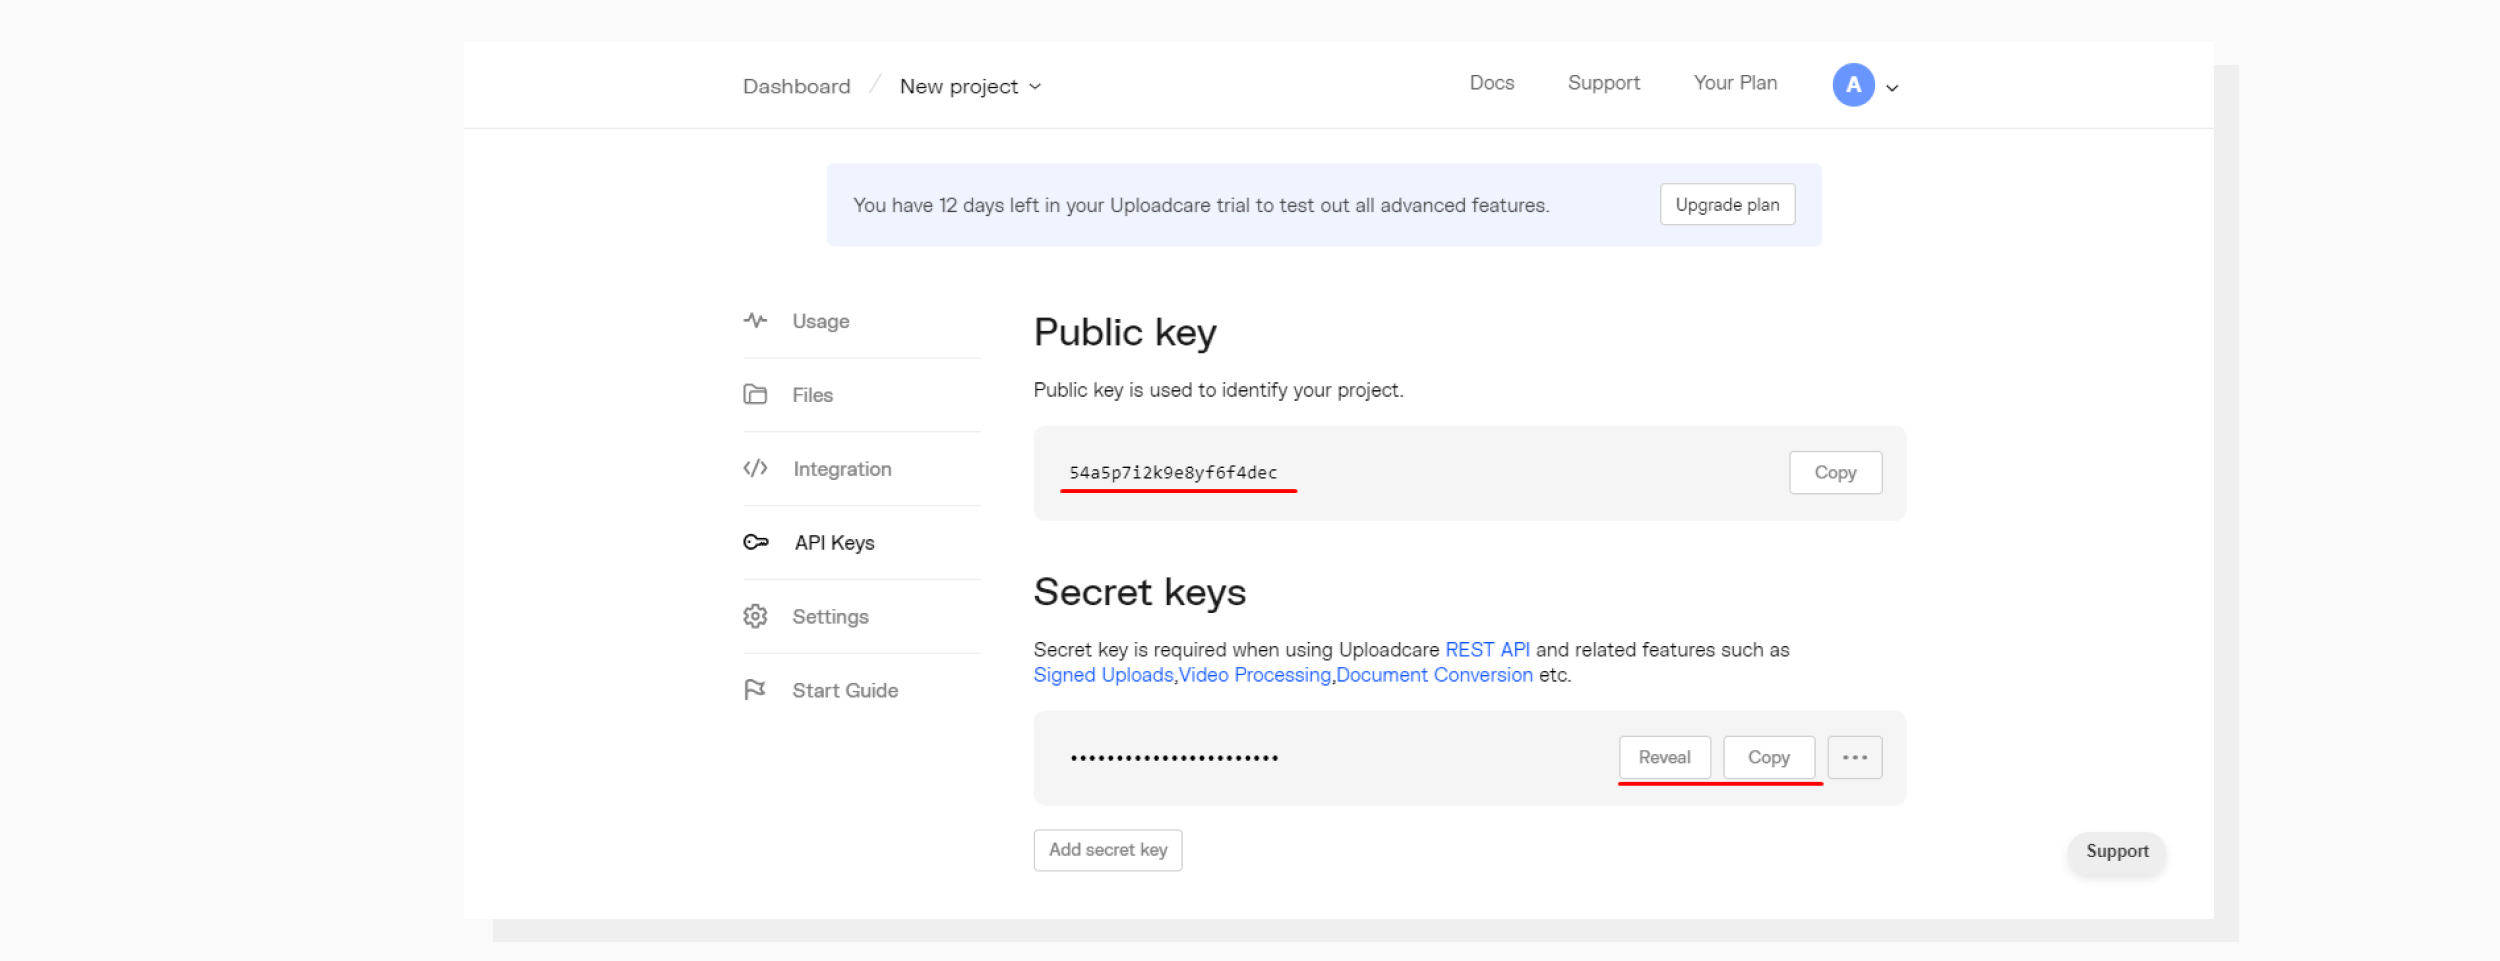
Then navigate to the API Keys tab to obtain your Public API Key and Private API Key. See the screenshots below to get a visual idea of the steps.
Dashboard with a project list. In our case, there is only one project.
Contents of the “API Keys” tab.
These keys will be used later when sending API requests.
Step 2. Uploading a source file
Possible ways to upload files
Currently, there are five major ways to upload files to Uploadcare:
Our feature-rich HTML5 File Uploader, which comes in the form of a typical library that can be included in your project
An Upload API - REST API that allows you to upload files without a user interface.
Integration with popular frameworks
Migrating existing media to Uploadcare without re-uploading it (Media Proxy)
CMS plugins and integrations (i.e., a non-coder ready solution)
Uploading a test file
It is absolutely up to you to decide how to upload files to your Uploadcare project. Since the purpose of this tutorial is to demonstrate the Document Conversion API, we will upload a test file via the dashboard.
To do this:
Navigate to your project in the dashboard (the same way as when obtaining API keys).
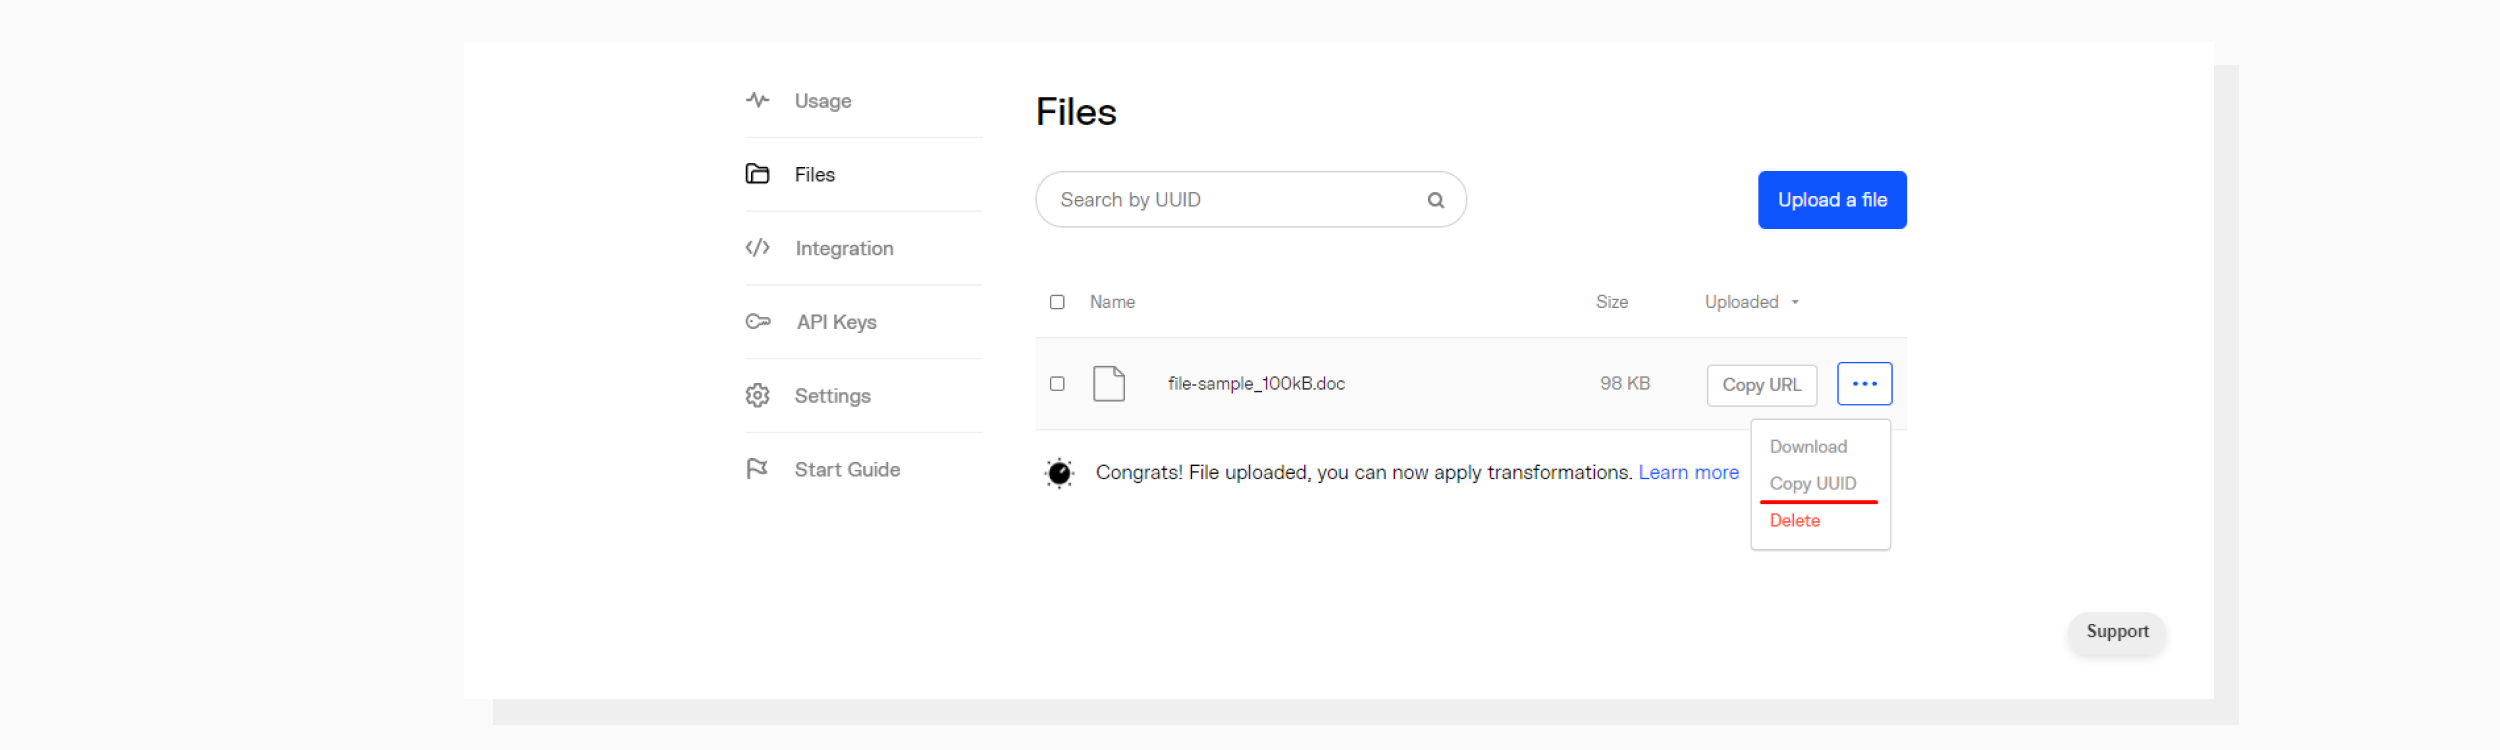
Go to the Files tab. Here is where you can manage your files.
After the file has been uploaded, copy its UUID — this is a unique identifier we use to refer to resources. See the screenshot below.
Dropdown menu where UUID can be copied from.
Step 3. Set up a web page
In this tutorial, we’re building a simple static web app to demonstrate the basic capabilities of the Document Conversion API. Our project will consist of two files:
index.html — an HTML file with the PDF.js library included.
script.js — a Javascript file to make API calls and render converted PDF.
Markup review
<!DOCTYPEhtml><htmllang="en"><head><metacharset="UTF-8"><metaname="viewport"content="width=device-width, initial-scale=1.0"><title>Converting to PDF and rendering on a webpage</title></head><body><h1>Converting to PDF and rendering on a webpage</h1><canvasid="the-canvas"></canvas><scriptsrc="https://mozilla.github.io/pdf.js/build/pdf.js"></script><scriptsrc="./script.js"></script><style>canvas{border: 1px solid black;}</style></body></html>
Step 4. Posting a conversion job
The process of conversion starts with posting a conversion job. This is done by making a REST API request, providing credentials and a file identifier with params. This is where we need our keys and the UUID we acquired before.
Important notice
Here, we’re storing the secret API key in a front-end file (script.js) purely for testing purposes, but please make sure not to keep private credentials in publicly available code.
At this point, we’ve prepared headers for the upcoming request, defining the content type and authorization parameters. Replace your_public_key, your_private_key and your-document-uuid with the corresponding values from your project.
Sending a request
To post a job, we need to make a request with the API endpoint provided in the “fetch” method.
We’ll talk about the response fields in the next chapter.
Now, Uploadcare knows that you want to convert a specific document to PDF. Let’s proceed to checking the conversion status.
Step 5. Checking conversion status
Uploadcare converts documents asynchronously. You can track progress by subscribing to certain events via WebHooks.
But since our test app is just a static HTML+JS available only in our local file system, we’re going to poll the server every 3 seconds to check if the document conversion has been finished. The code continues:
fetch(/* ... */)// previous code chain goes here.then(async(jobRequestResponse)=>{
console.log(`Job has been posted, converted file ID is: ${jobRequestResponse.result[0]["uuid"]}, job token is: ${jobRequestResponse.result[0]["token"]}, waiting for result`);
conversionJobToken = jobRequestResponse.result[0]['token'];awaitcheckStatus(conversionJobToken,10);return jobRequestResponse;})
Getting conversion identifiers
To log the whole workflow, let’s write to the console. As you can see, here we’re using the uuid and token that were provided in the response to the previous request. The token plays an important role: this is the ID of the current conversion, which is used for tracking the progress.
Waiting for the conversion to complete
Before sending the value of the jobRequestResponse variable further, we need to wait for the conversion to finish. Otherwise, we might stumble upon a 404 error if the file hasn’t finished converting when we refer to it later.
/* Draft function that repeats job status polling in a non-blocking fashion until job is finished */asyncfunctioncheckStatus(token, repeatCount){while(true&& repeatCount){awaitnewPromise((resolve, reject)=>setTimeout(resolve,3000));let response =awaitfetch(`https://api.uploadcare.com/convert/document/status/${token}/`,{method:'GET',headers: headers,});let jsonResult =await response.json();if(jsonResult.status =='finished'){break;}
repeatCount--;
console.log(`The job with token ${token} hasn't been finished yet. Tries left: ${repeatCount}`);}}
Let’s take a look at the checkStatus() function. In a nutshell, here’s what it does: every 3000 milliseconds (3 seconds) it sends a request to the following API endpoint:
The loop goes on until the conversion is finished or until we exceed the number of tries.
Step 6. Displaying the converted file
At this point, we can refer to the converted file via the CDN URL, for example https://{subdomain}.ucarecd.net/uuid/. Let’s take a look at the following piece of code.
Where {subdomain} is the unique subdomain for your Uploadcare project and can be found in your project’s Delivery Settings
Once we know that the conversion job has finished, we can use the uuid of the converted file from our first request to get the file. Since the file is now available for direct download, let’s pass it to the renderPDF function. Now it’s time for PDF.js to do its job.
Rendering the PDF
functionrenderPDF(pathToPDF){var url = pathToPDF;var pdfjsLib = window['pdfjs-dist/build/pdf'];
pdfjsLib.GlobalWorkerOptions.workerSrc ='https://mozilla.github.io/pdf.js/build/pdf.worker.js';// Asynchronous download of PDFvar loadingTask = pdfjsLib.getDocument(url);
loadingTask.promise.then(function(pdf){
console.log('PDF loaded');// Fetch the first pagevar pageNumber =1;
pdf.getPage(pageNumber).then(function(page){
console.log('Page loaded');var scale =1.5;var viewport = page.getViewport({scale: scale });// Prepare canvas using PDF page dimensionsvar canvas = document.getElementById('the-canvas');var context = canvas.getContext('2d');
canvas.height = viewport.height;
canvas.width = viewport.width;// Render PDF page into canvas contextvar renderContext ={canvasContext: context,viewport: viewport,};var renderTask = page.render(renderContext);
renderTask.promise.then(function(){
console.log('Page rendered');});});},function(reason){// PDF loading error
console.error(reason);});}
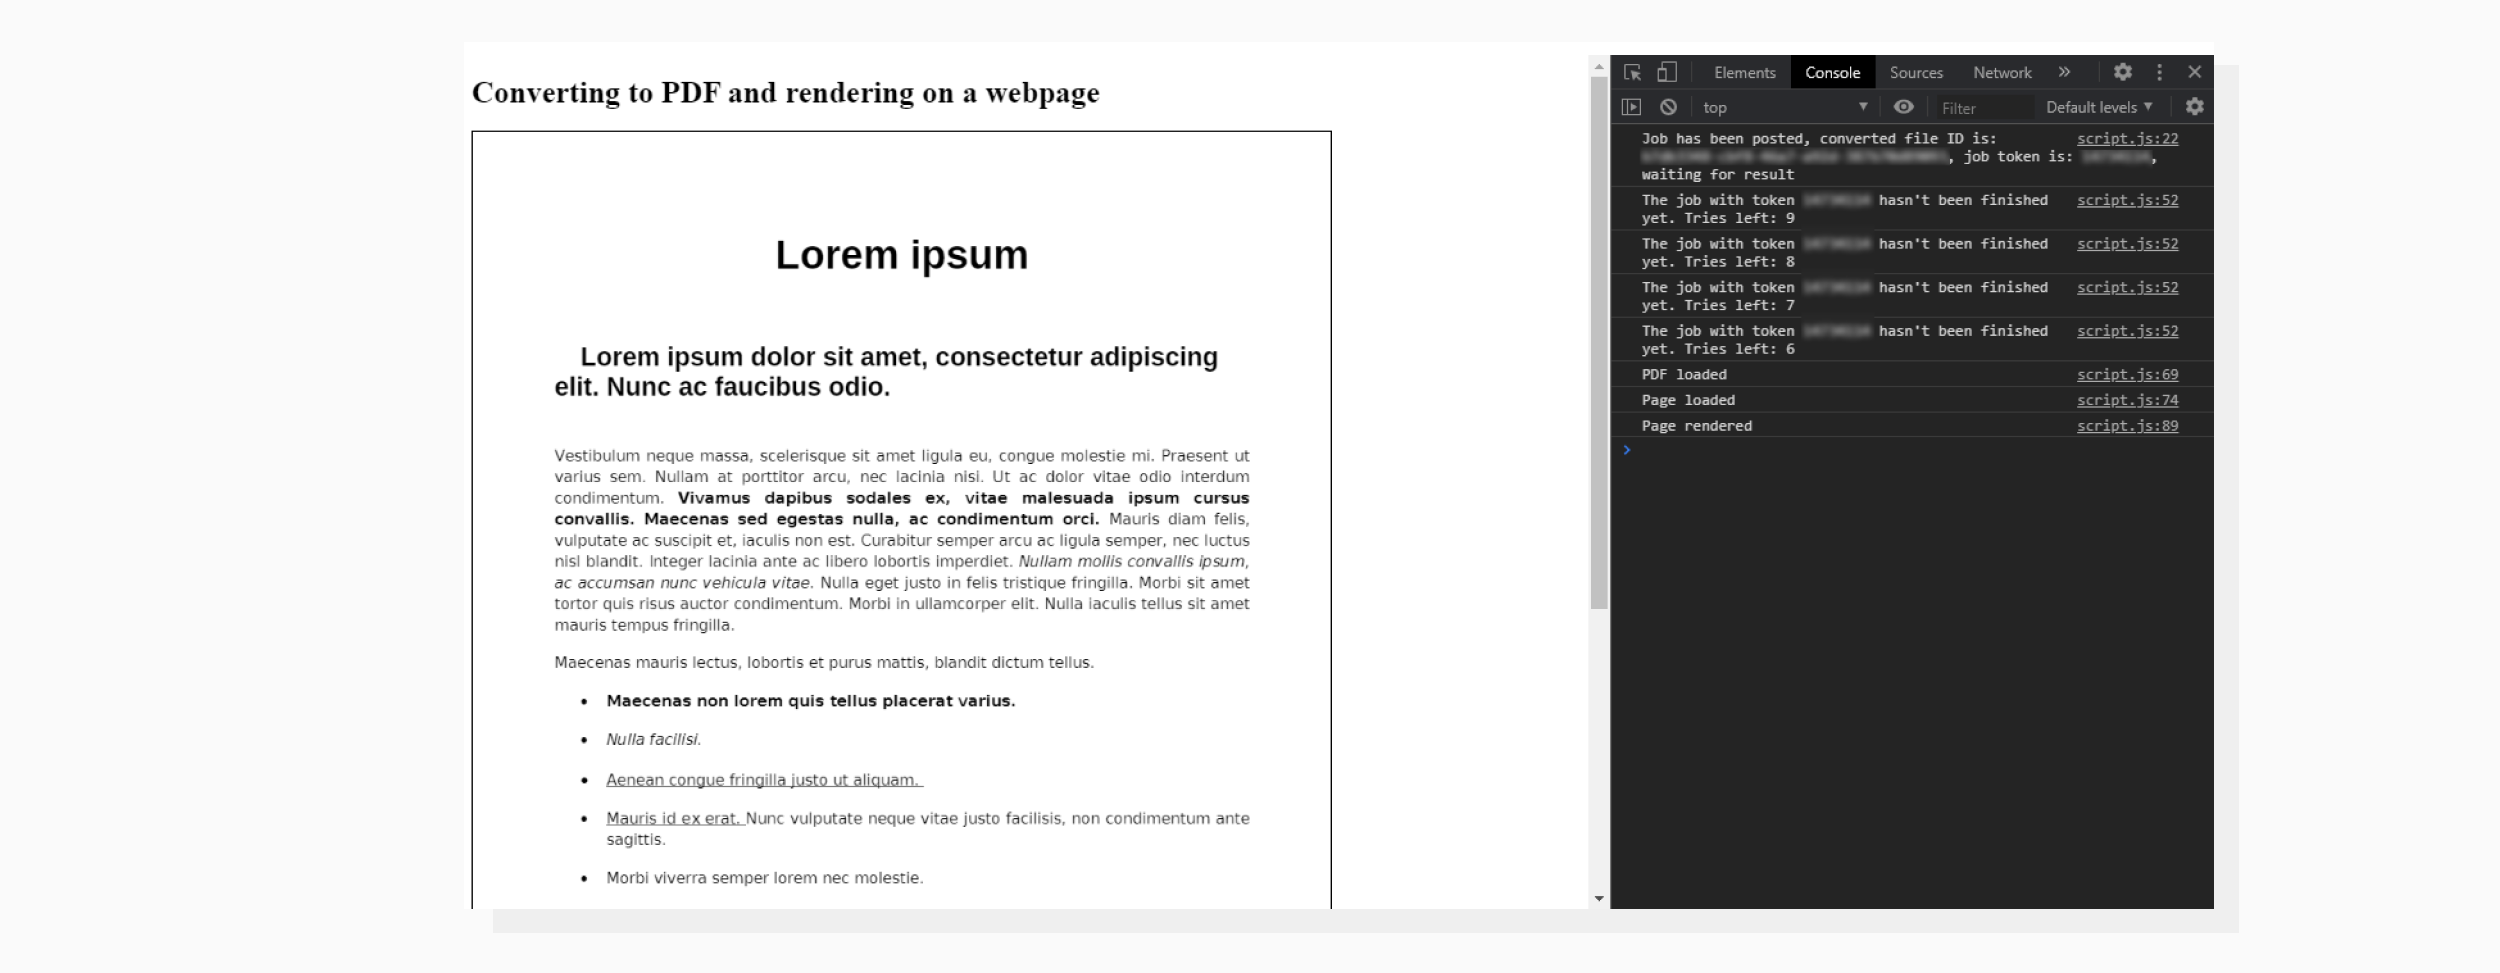
While it could look a bit overwhelming, this code just sets up a canvas in which to draw our PDF and renders the first page of the file as a demo.
And there you go!
Here is how our web page looks.
When you get down to the nuts and bolts, document conversion may not look so easy, but with a self-explanatory API and documentation, Uploadcare makes it simple to convert documents from one format to another.
With just a few lines of code, you have your DOC(x) file converted to PDF, hosted on the reliable Uploadcare CDN, and correctly displayed in your browser.
Arthur Khayrullin is a web developer with over a decade of experience. His clients are international start-ups and companies that want to stand firmly on their feet on the Web, while focusing on the business operations.