Sharpness isn’t added detail, it’s amplified perception.
It tricks the eye into seeing crisper textures and cleaner lines without any additional info from the image.
This article explains the tools, shows before/after examples, and compares practical methods —
from Photoshop’s Smart Sharpen to CDN URLs that sharpen images on the fly.
What is image sharpening?
Image sharpening is an umbrella term for different image processing methods that make images appear sharper.
Although methods differ, each increases the contrast around the edges, providing more acutance
to finer details.
The image below is an example of a strongly sharpened image.
Look closely at the finer details, such as the license plate and car model name,
and well-lit areas with sharp color transitions:
Comparison of two images, one normal (left) and the other digitally sharpened (right). Photo by: Rubén Bonilla Tanco
Common use cases
Many industries need sharpened images for different purposes. Here are some popular use cases.
E-commerce
Unlike text-driven websites, where images may pass as “just placeholders”, e-commerce requires detailed photos
that help to describe a product.
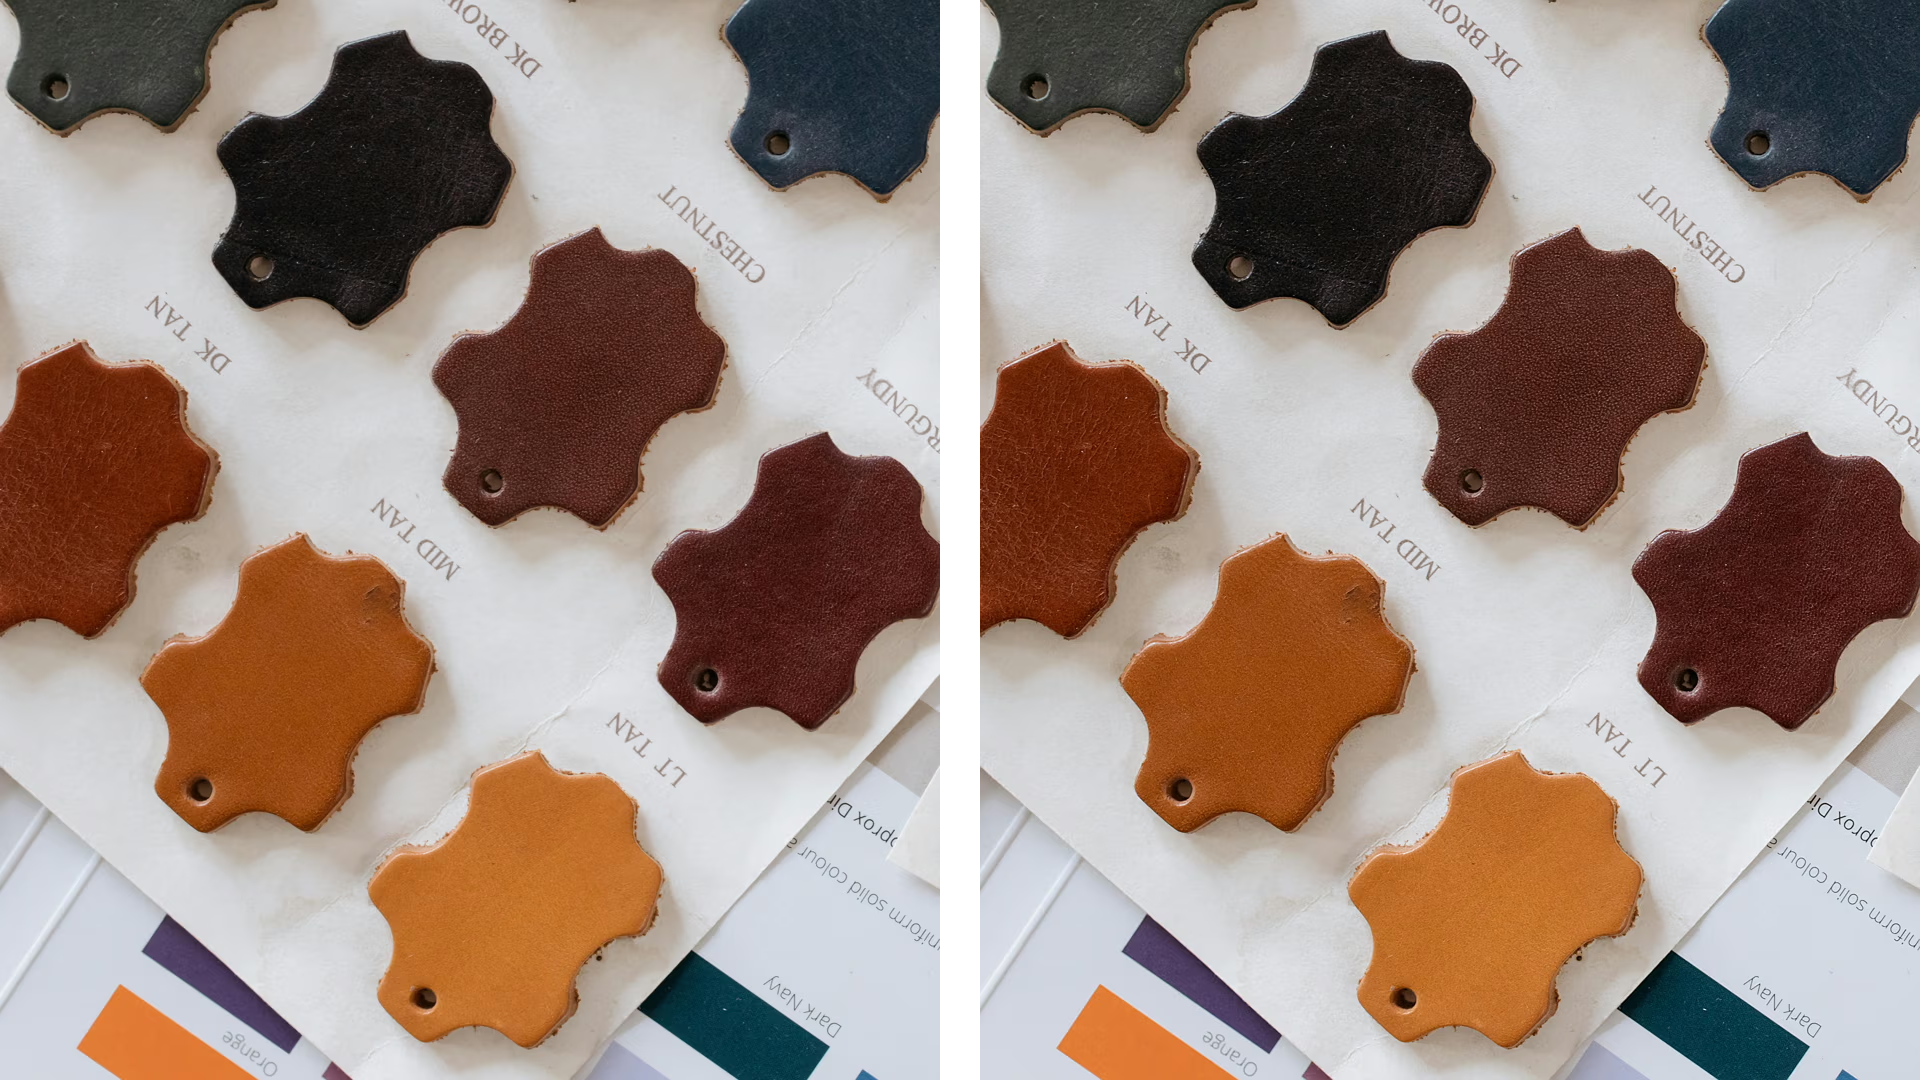
Let’s say you sell leather and want to accentuate the texture or remove lens blur.
Leather pieces for E-commerce, original on the left, sharpened on the right
The effect is exaggerated here for demonstration purposes. Sharpening makes the texture more prominent.
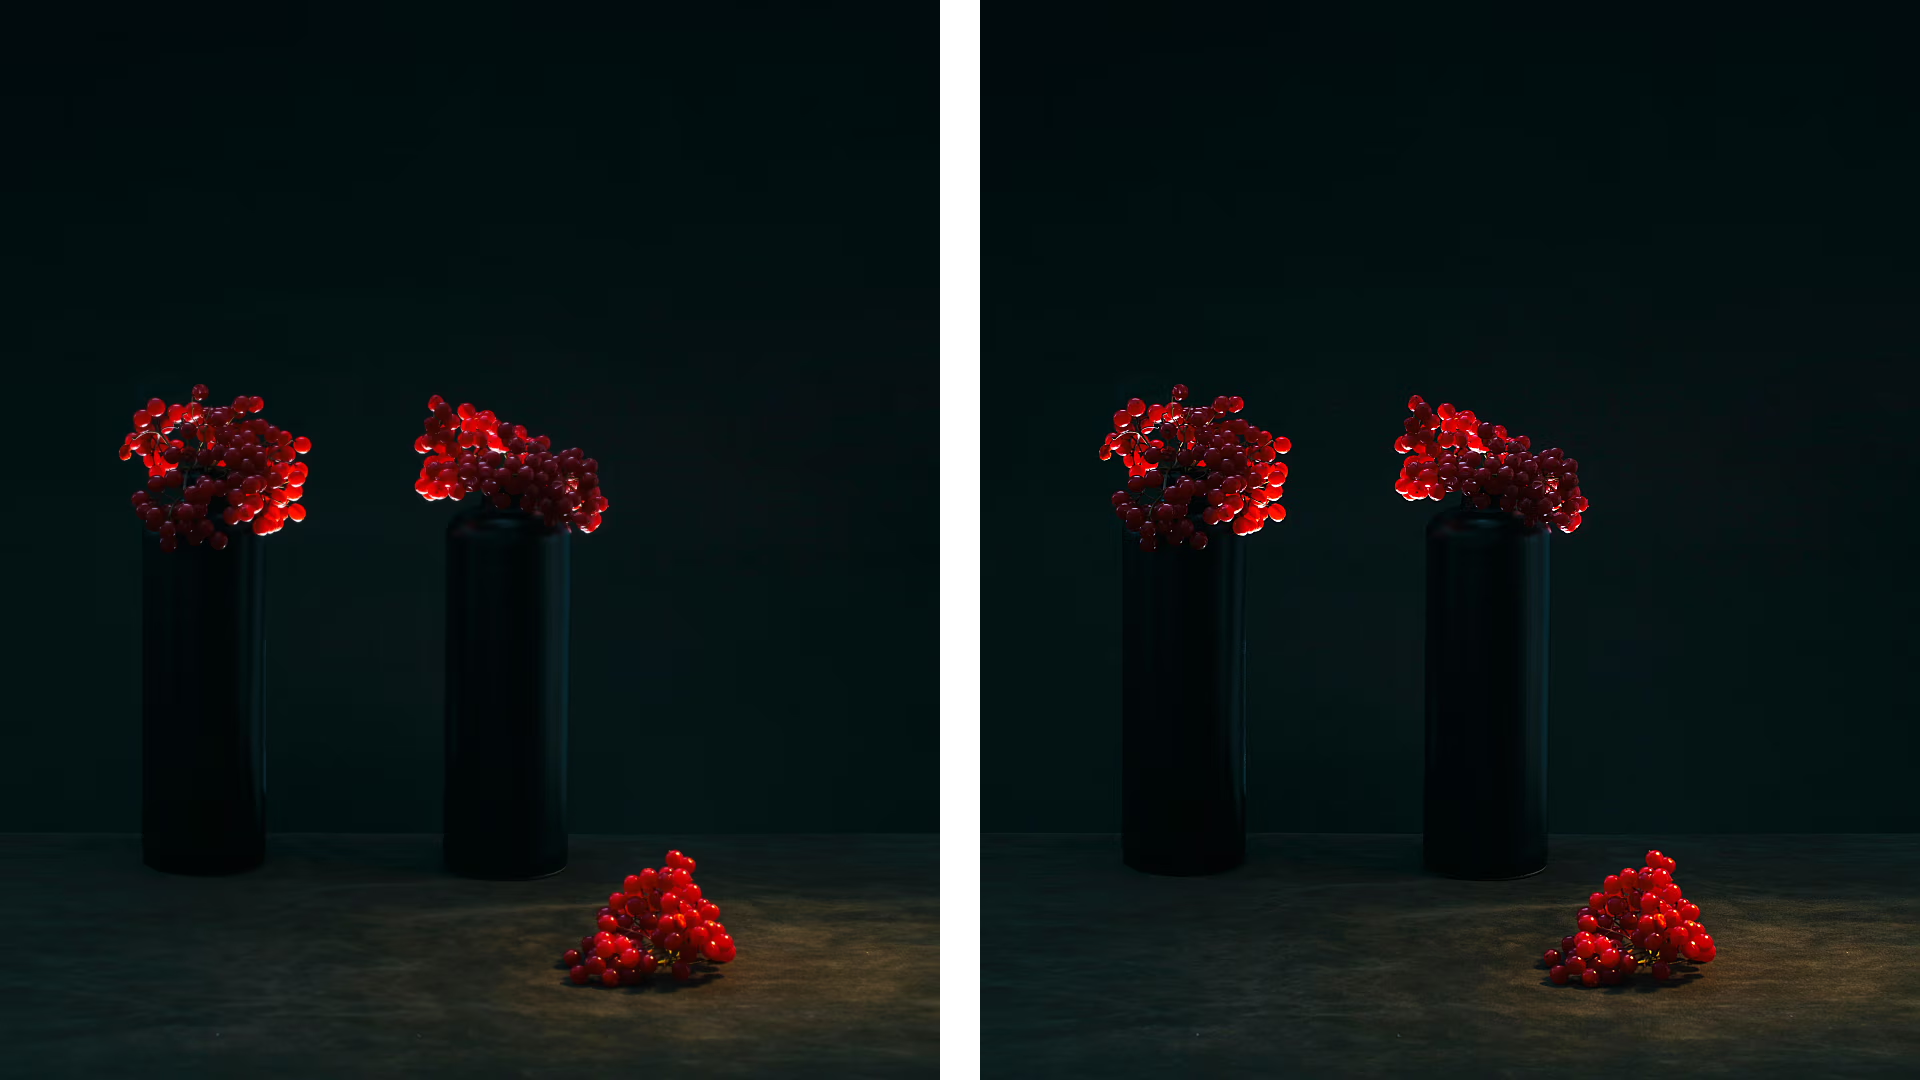
With more traditional product e-commerce photography, sharpening helps define edges,
especially when the background is not highly contrasted with the subject.
Black bottles on a dark background. Original on the left, sharpened on the right
This time, the effect is more subtle.
Zoom into the image to see the difference more closely: enhanced edges on the berries, and stronger definition for the bottles.
When zoomed out, the image on the right looks less blurred overall.
Publishing and printing
Perceived sharpness differs when you transfer an image across different media.
This is especially true for printing, as it introduces additional factors:
Paper surface
Printer resolution: lower DPI leads to softening as printers get less accurate when spreading the ink.
Viewing distance: Unlike computer monitors, a printed booklet is viewed from different distances and angles,
altering the perceived sharpness.
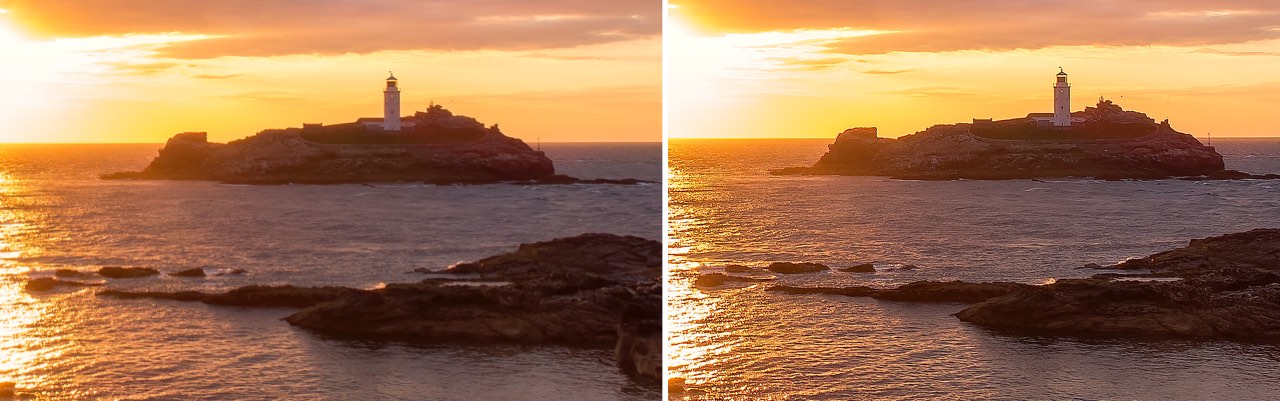
For printers that produce slightly blurred pictures, a general rule of thumb is
to make images look oversharpened on the monitor so they look just right when printed, like in the demo below:
Initial image on the left, sharpened for printing on the right
Luckily, you don’t need to go through a tedious trial-and-error process without computer aid.
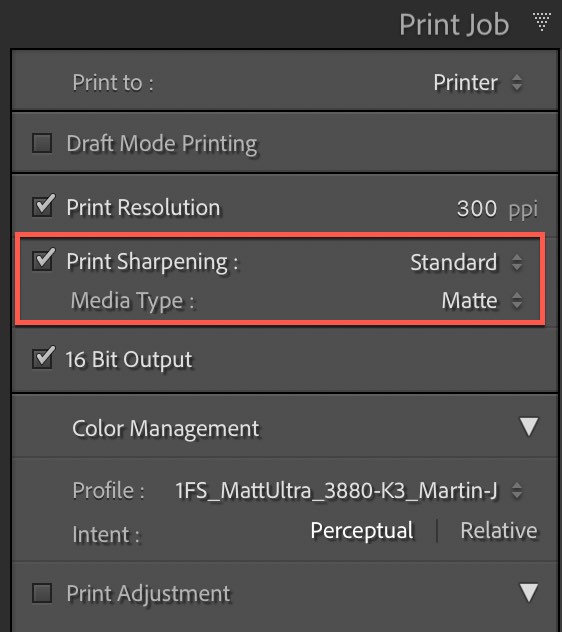
Photo editing software offers specific printing-related options to control sharpness.
For example, see how to apply sharpening in Lightroom
and Nik Sharpener.
Print sharpening options in Lightroom
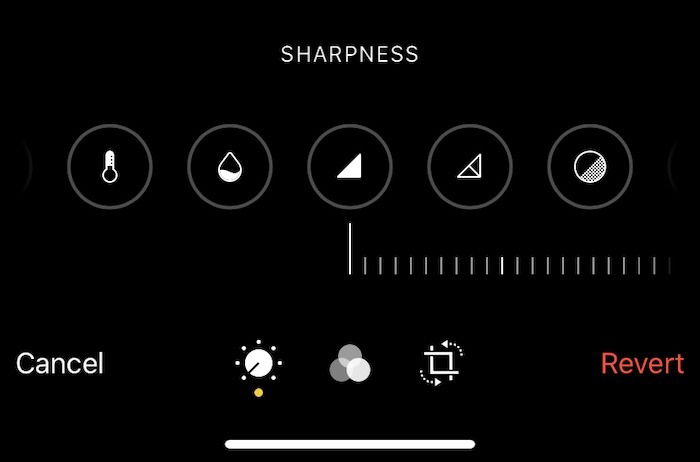
Mobile apps and user-generated content
Image sharpening is a valuable tool for end users.
Users of mobile apps like messengers or social media often don’t take perfectly sharp images.
This results in motion blur and out-of-focus pictures.
Including image sharpening either as a separate adjustment knob or as a part of some broad filter like “Enhance”
helps users get the most out of the pictures they have:
"Sharpness" tool in iOS
Prep work before sharpening an image
The use cases above show the impact sharpening can have across different scenarios.
Before we dive into the tools, there’s one guideline: sharpening works best when it’s the final adjustment.
Applying it too early can amplify noise, introduce halos around the edges, and make later steps look worse.
Complete everything else first, including these steps:
Remove noise
Finish retouching
Resize to the final dimensions
Only then apply sharpening. This order ensures clean, natural-looking results.
Manual sharpening tools
Tools from this category are designed to work on a per-image basis.
Using manual tools gives you more control because you can literally see the sharpening process as you tweak the image.
They work great for one-time image alterations and cases where you select the sharpening method for each image separately.
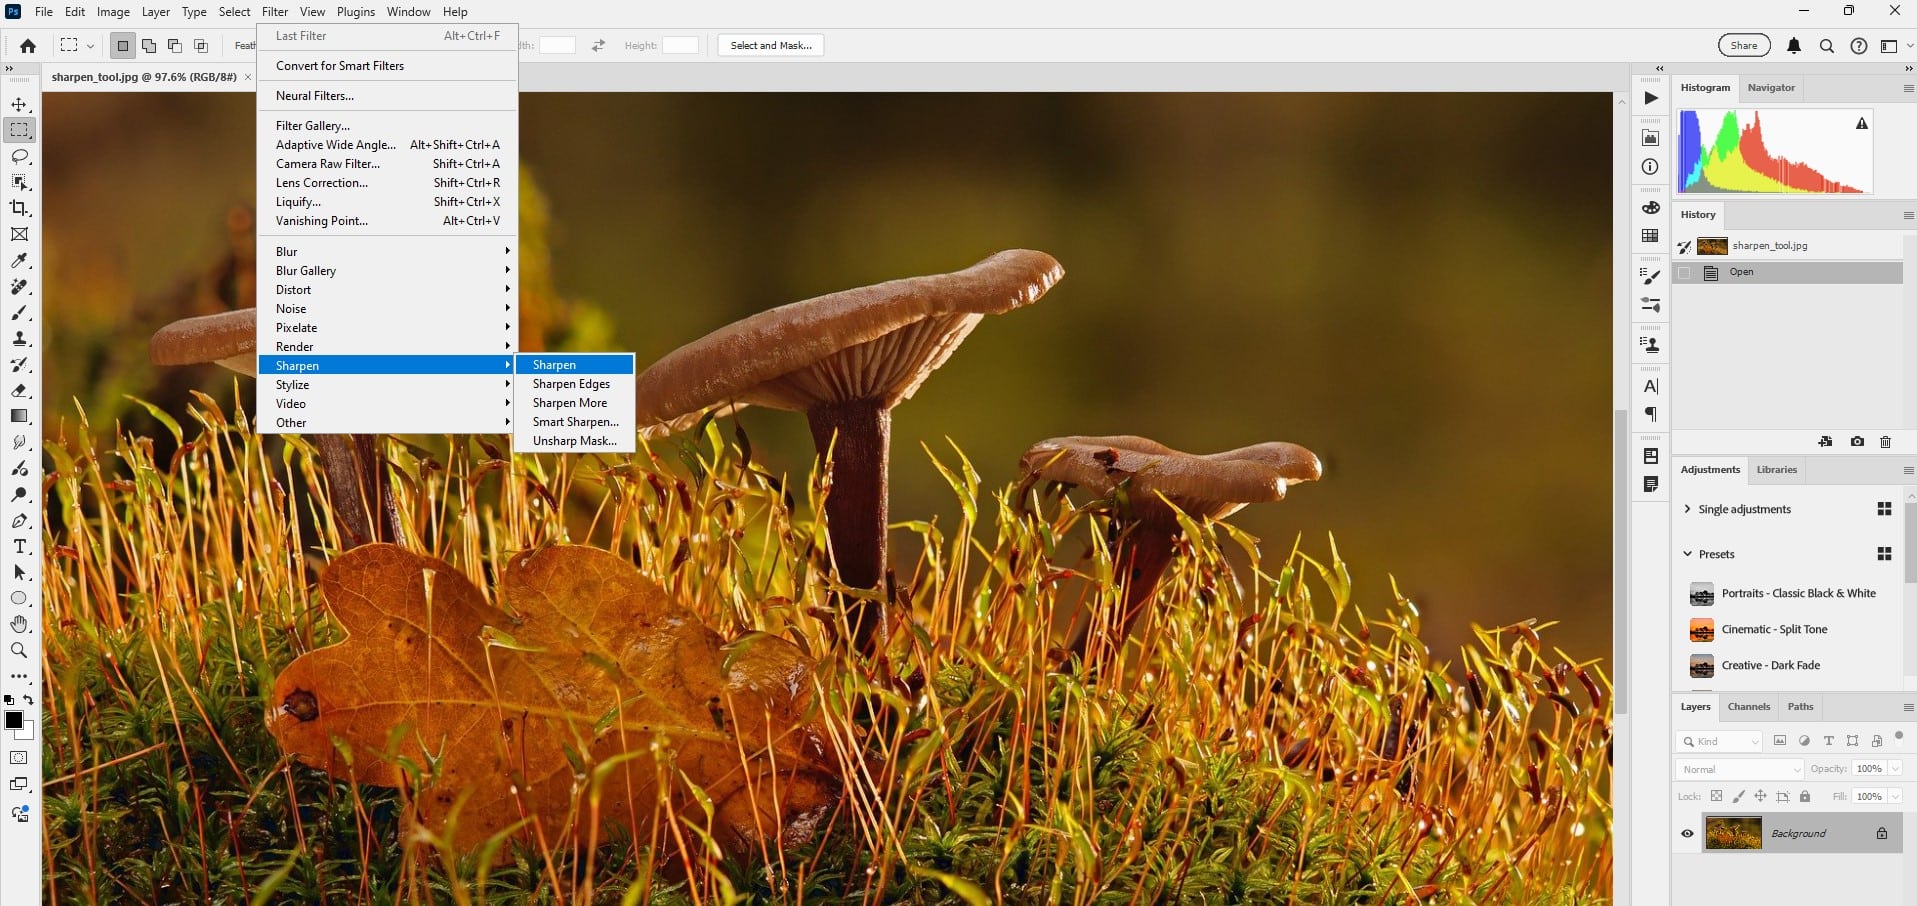
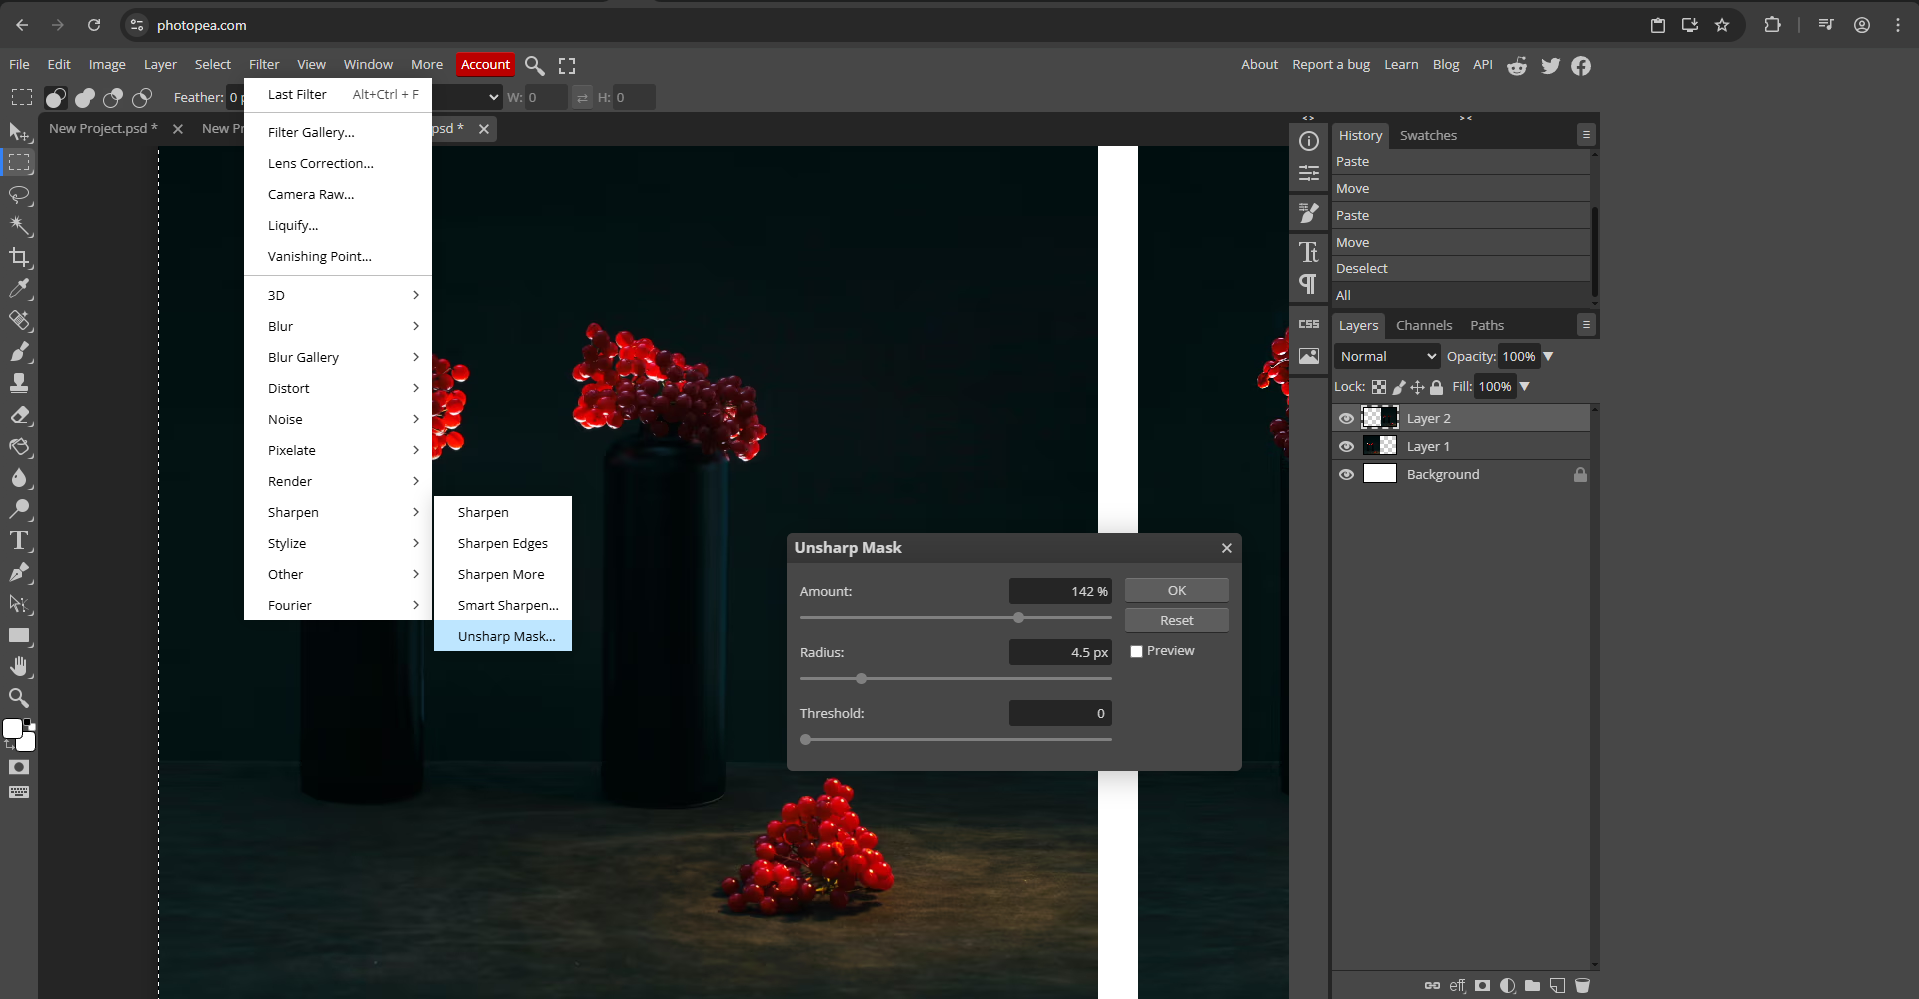
Photoshop
Photoshop offers a set of sharpening filters that vary slightly based on the use case under the Filter → Sharpen menu.
For the quickest one-click sharpening, use the Sharpen filter. But when you need to change the parameters,
head over to Smart Sharpen.
Sharpening filters in Photoshop
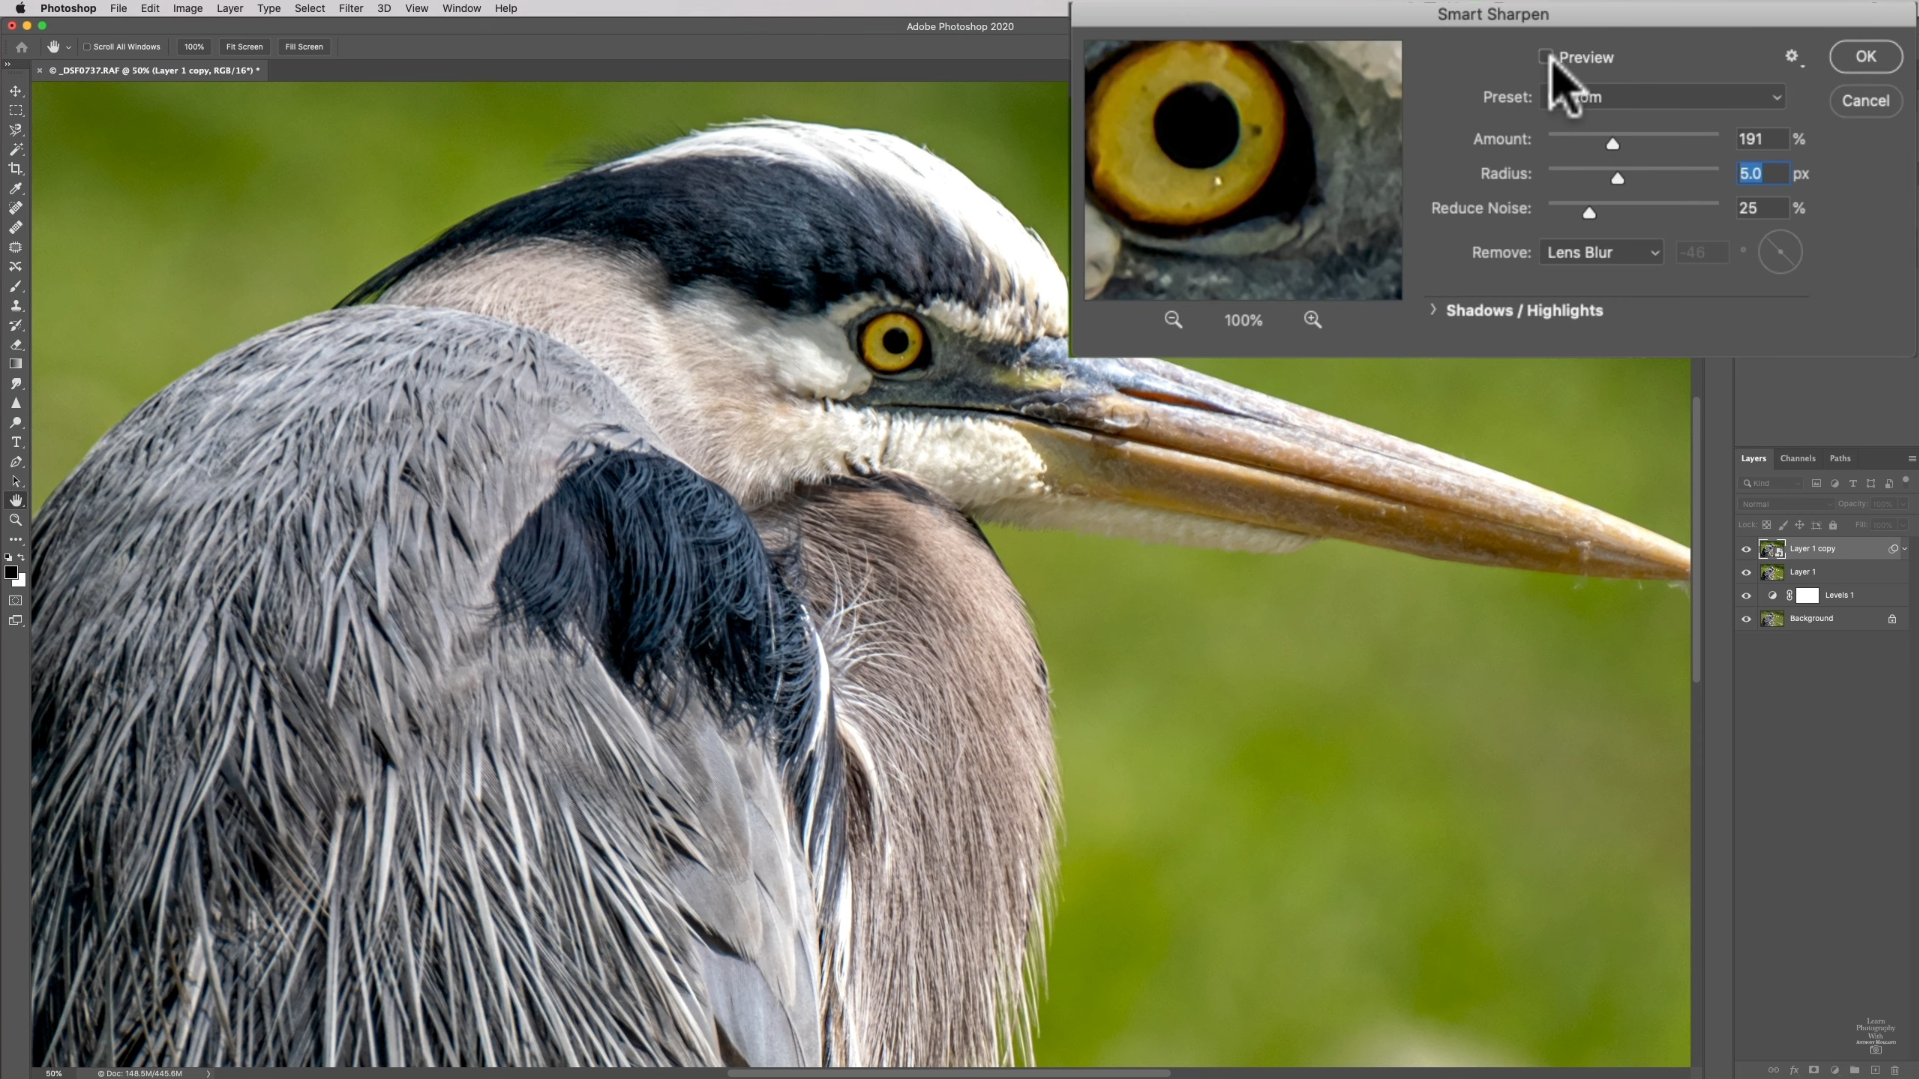
Smart Sharpen is a tool that lets you adjust the intensity and mode of the sharpening.
Also, it has built-in noise reduction, so you don’t need to denoise the image beforehand.
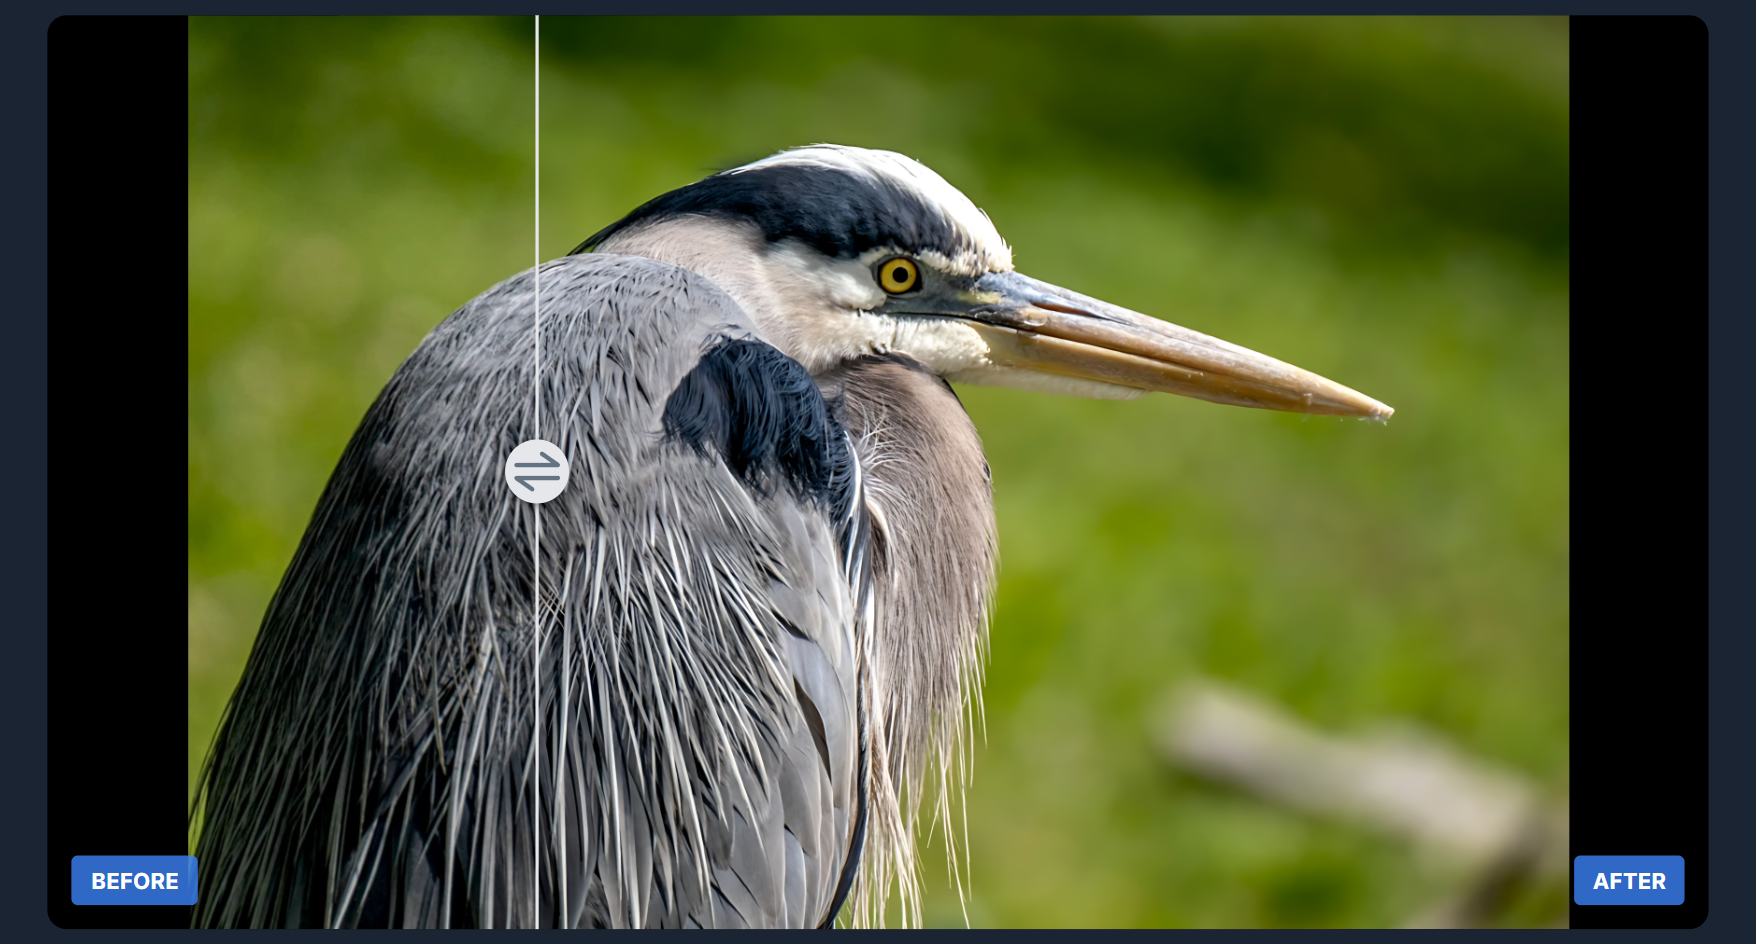
A photo of a bird opened in Photoshop, “Smart Sharpen” is bypassed
A photo of a bird opened in Photoshop, “Smart Sharpen” is active
The tool offers a set of adjustable parameters found in many other sharpening tools, plus other helpful features.
Amount:
Allows you to control how strongly the sharpening effect is applied to your image.
Increasing this value enhances contrast along the edges, making details stand out more.
Lowering the value results in a subtler, more natural sharpening effect.
Radius:
This setting determines how many pixels around each edge will be affected by the sharpening effect.
Using a smaller radius value sharpens fine details and delicate textures, while a larger radius affects broader areas,
resulting in a more pronounced outline and thicker edges.
Reduce Noise:
Suppress grain and artifacts while sharpening for a cleaner result.
The Remove dropdown accounts for different types of blur that make an image unsharp.
This is the “smart” part of the filter:
Gaussian Blur:
Provides basic sharpening similar to Unsharp Mask, affecting the entire image evenly.
Lens Blur:
Targets edges and fine details, delivering crisper sharpening with fewer halos or artifacts.
Motion Blur:
Reduces blur caused by movement, helping recover clarity from camera shake or subject motion.
You can find additional controls under the Shadows/Highlights dropdown menu.
They follow the same logic but treat highlights and shadows separately.
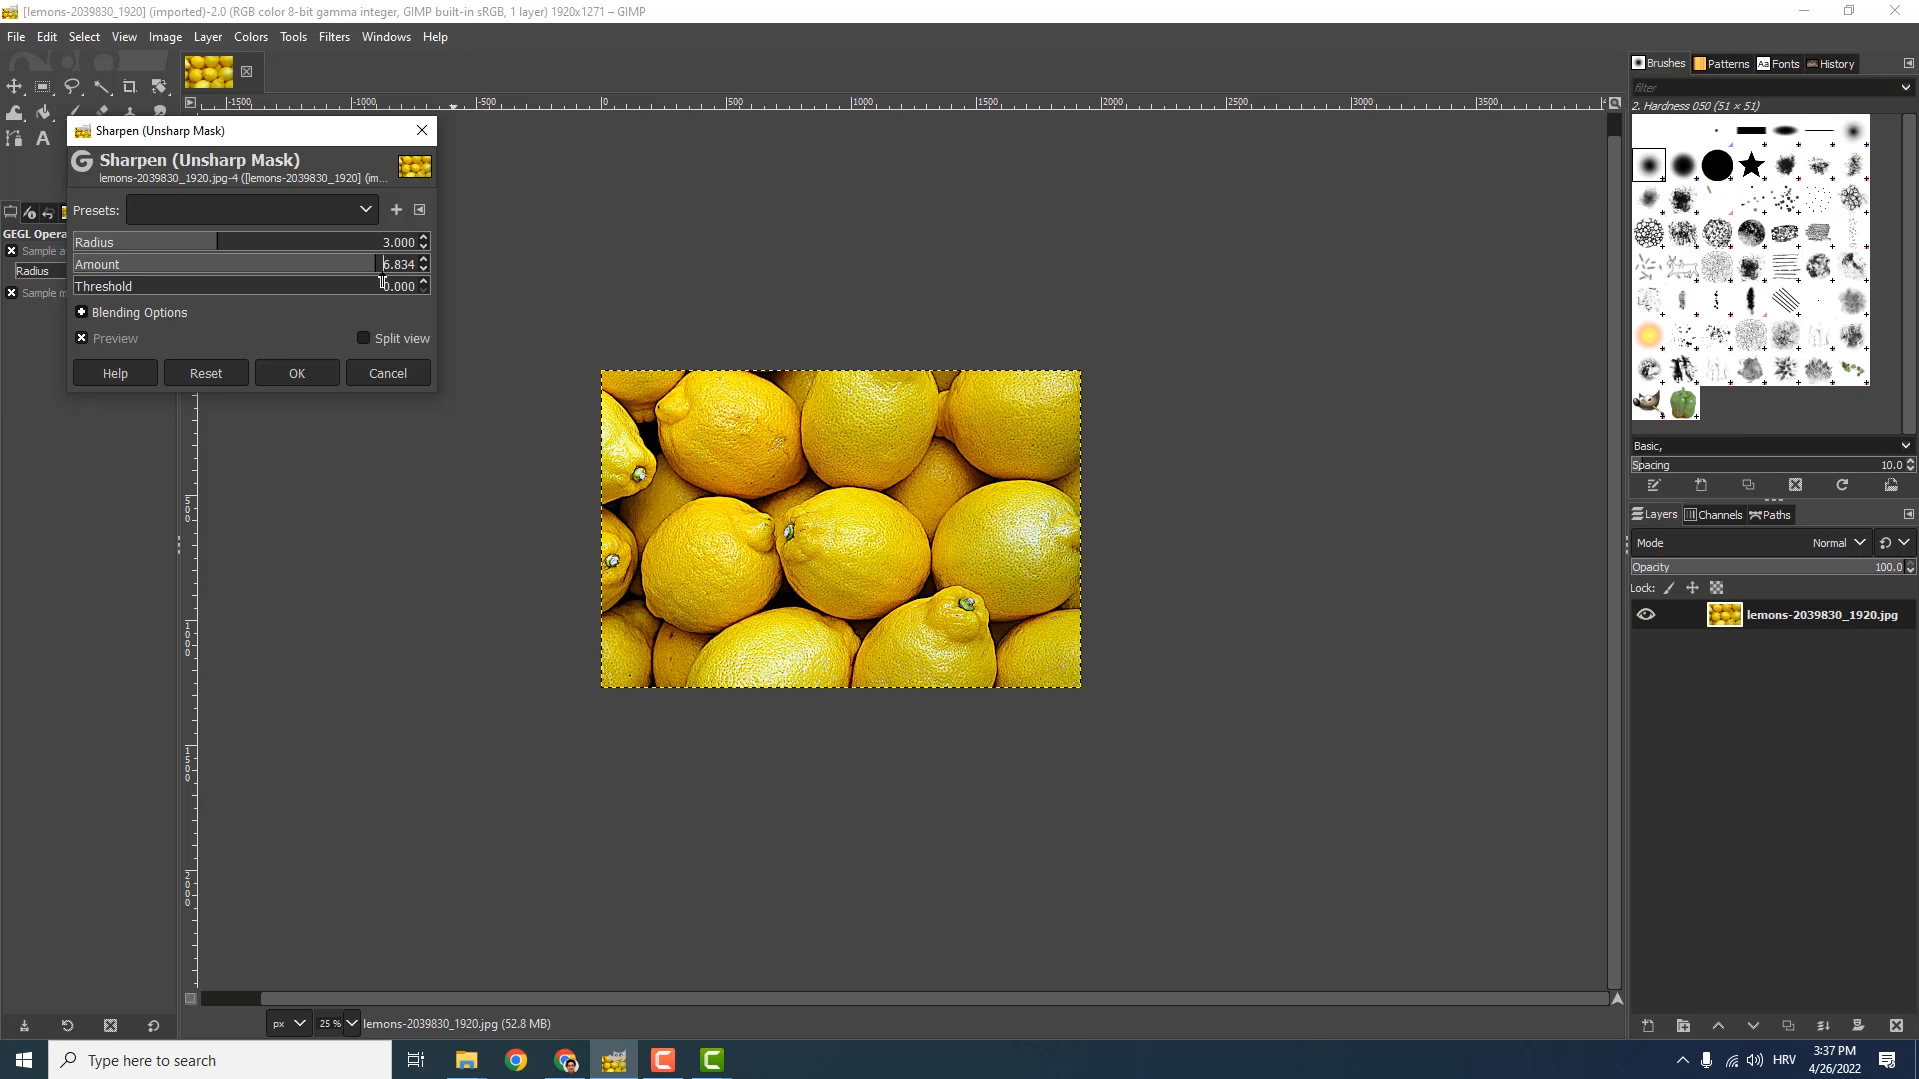
GIMP, Photopea, etc
The process is not significantly different in other image editing software,
since the underlying sharpening methods stay mostly the same.
"Sharpen (Unsharp Mask)" dialog in GIMP
In GIMP, the sharpening settings are located under the Enhance → Sharpen (Unsharp Mask) menu.
There’s another parameter, though: Threshold. It sets the contrast difference required for edge detection.
If you don’t want to install any software, check Photopea.
It offers lots of useful features that desktop apps have, but in the form of an online editor.
Find the sharpening tool under Filter → Sharpen → Unsharp Mask.
Photopea interface with “Unsharp Mask” dialog open
Online tools
Plenty of online tools offer drag-and-drop image sharpening.
Some of them provide more control, while others don’t offer any input possibilities whatsoever.
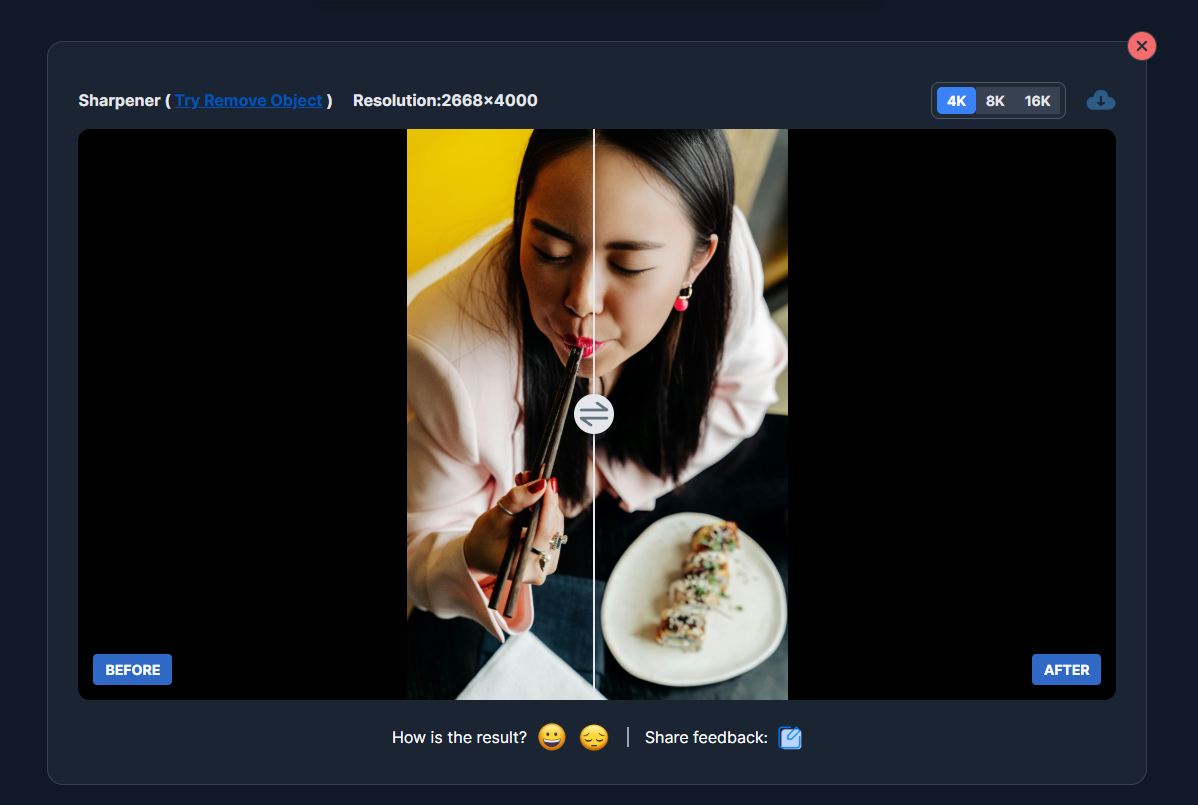
Let’s start by testing ImgUpscaler, one of the many image upscalers available online.
Before and after sharpening comparison using ImgUpscaler
The tool uses AI to sharpen images. While the image above looks good,
the sharpened part looks different from the one sharpened in the previous section.
An online AI sharpening tool smooths an image instead of sharpening
Here’s another example. In this case, the tool makes the image smoother and introduces some AI artifacts (look at the earring).
This tool interprets sharpness differently from traditional apps.
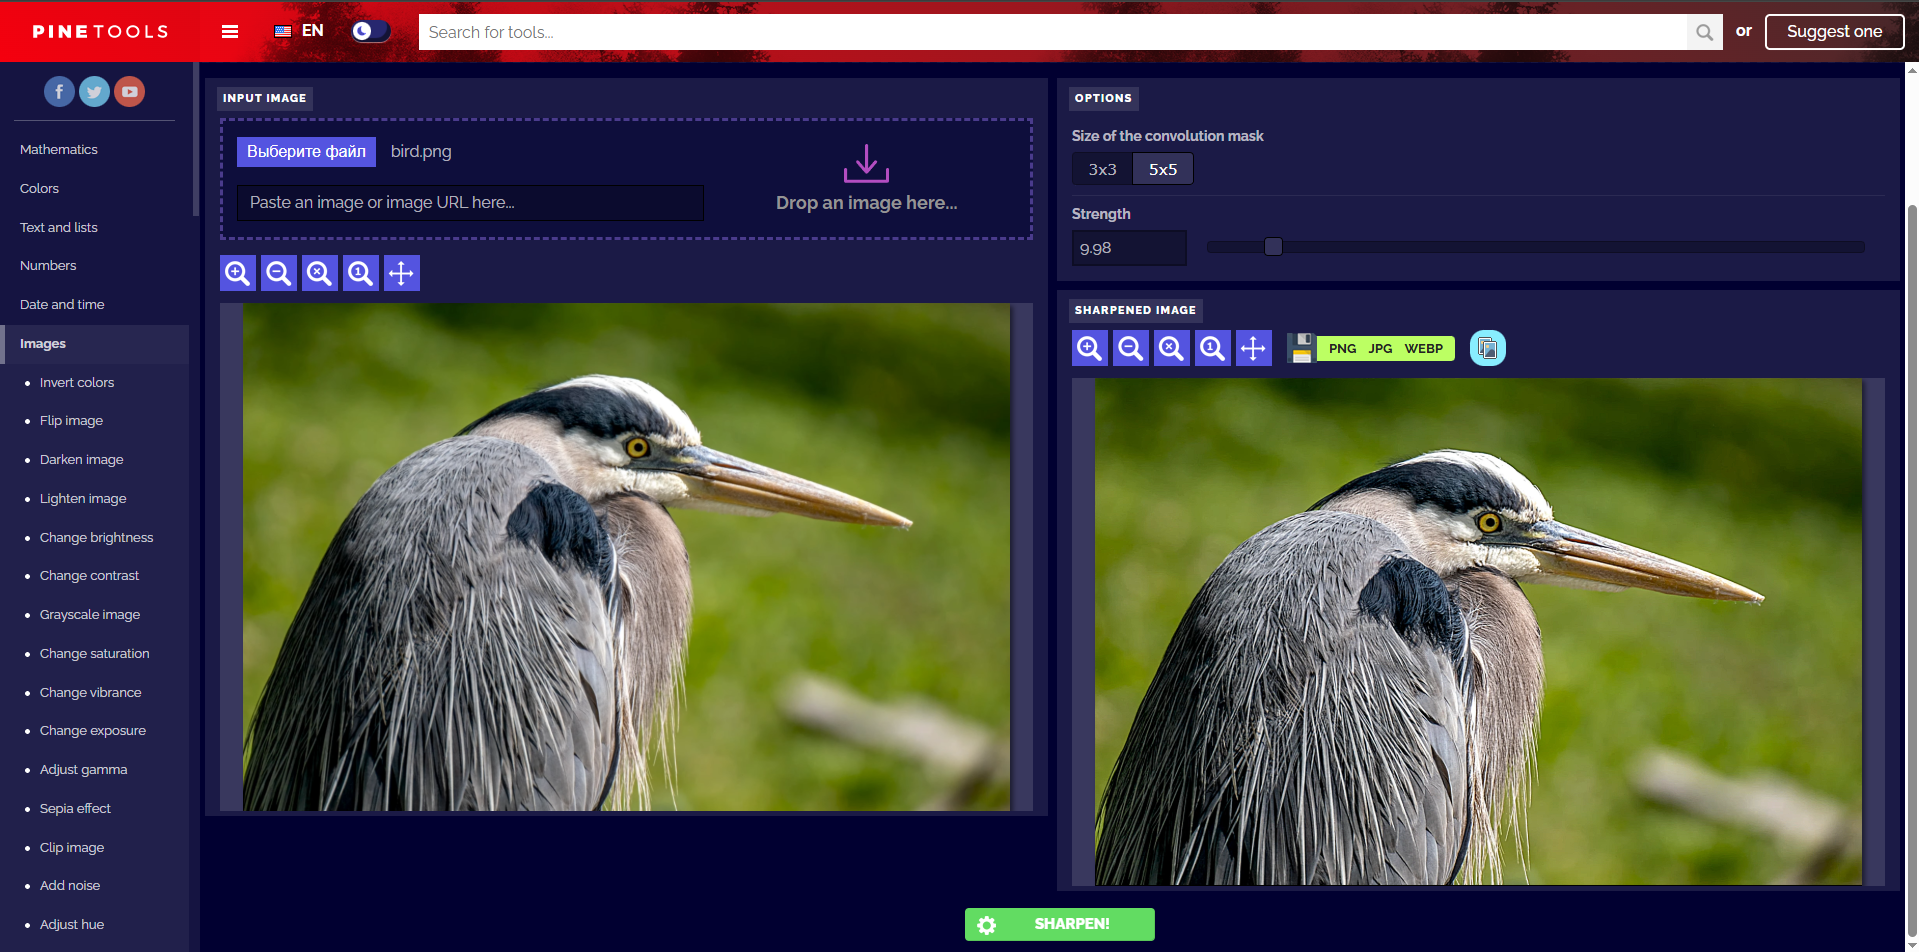
There are also non-AI options among online tools.
The one from PineTools offers more controls and outputs an image that actually looks sharpened.
Before and after sharpening comparison using PineTools
Notice that it uses the Strength control slider. It mimics the previously mentioned Amount parameter.
Getting more technical, there’s the Size of the convolution mask selector,
which defines how many surrounding pixels to consider when calculating each pixel of the resulting image.
5×5 means that for each pixel, the nearest 2 pixels in each direction affect the result.
See more on convolution here.
Limitations of manual tools
Manual image sharpening tools like Photoshop, Photopea,
and many online sharpeners require processing images one by one, which can be very time-consuming.
While these tools offer detailed fine-tuning for each image, this individualized approach limits scalability and efficiency,
especially when dealing with large volumes of assets.
Automated image sharpening
For power users and developers, automating image processing is a viable option to minimize tedious work.
Bulk image processors
Tools like ImBatch let you combine multiple image processing tasks
(like resizing, sharpening, adding shadows, etc.) and run these in bulk on your machine.
The settings are usually the same for all images — good for efficiency, but may require more testing to find universal values.
ImBatch app interface
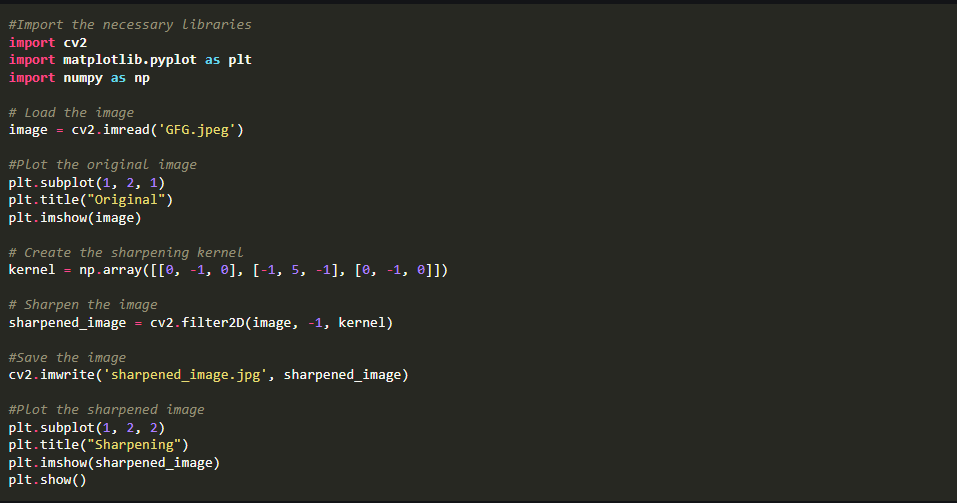
Image processing libraries
Image processing libraries are usually the go-to solution for developers when it comes to processing images locally.
The most popular and reliable options are OpenCV
and ImageMagick (to be used with a command-line interface).
An example of Python code that sharpens an image using OpenCV
Image CDNs
The automated solutions explained above are far more convenient than going through heaps of images one by one,
but they still only get you so far. While these methods perform the initial image sharpening well,
they lack the surrounding methods for image storage, optimization, and delivery.
After sharpening, these images remain offline, and you need to deliver them to the end user.
Image CDNs solve this problem by providing the infrastructure needed for complete image delivery.
APIs are a part of this infrastructure — you can upload many images at once to a CDN’s server
and then include sharpened versions into your app via a URL.
How to sharpen images with Uploadcare
Uploadcare offers image sharpening as a part of its image transformation toolkit.
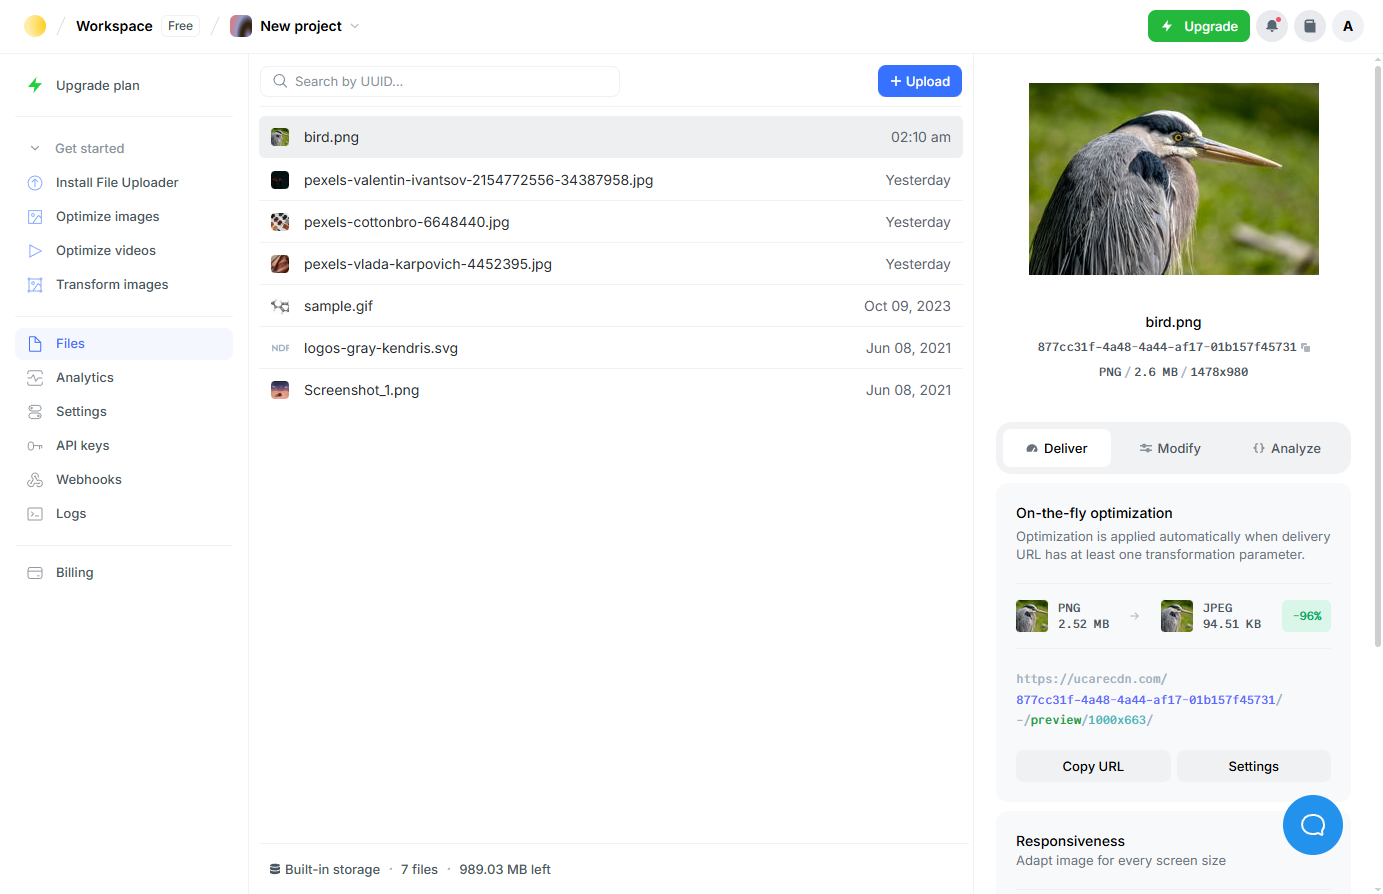
To start using it, sign up for an Uploadcare account and upload a picture to a project.
On the right, you will see a string just under the filename; this is the unique handle (UUID) that is used
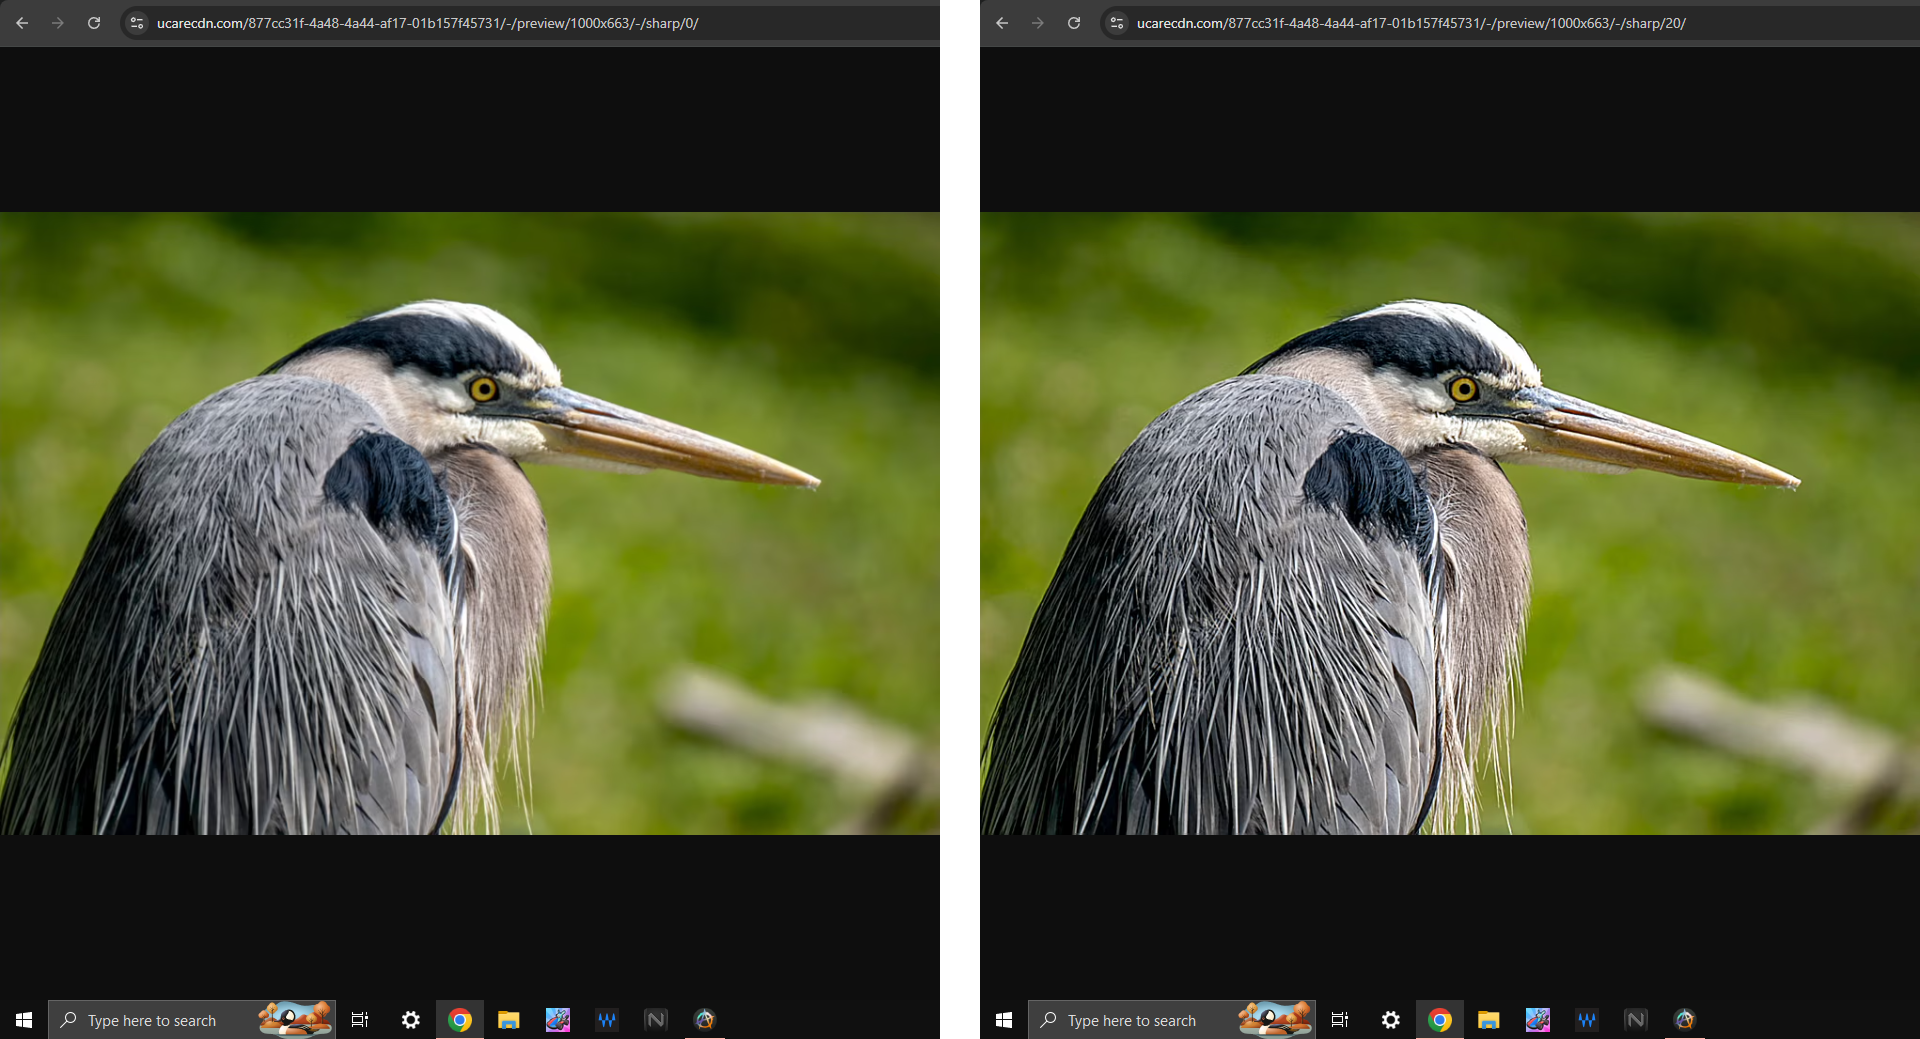
to reference the original image when creating a sharpened one. Let’s use the bird example again:
Uploadcare Dashboard after an image got uploaded
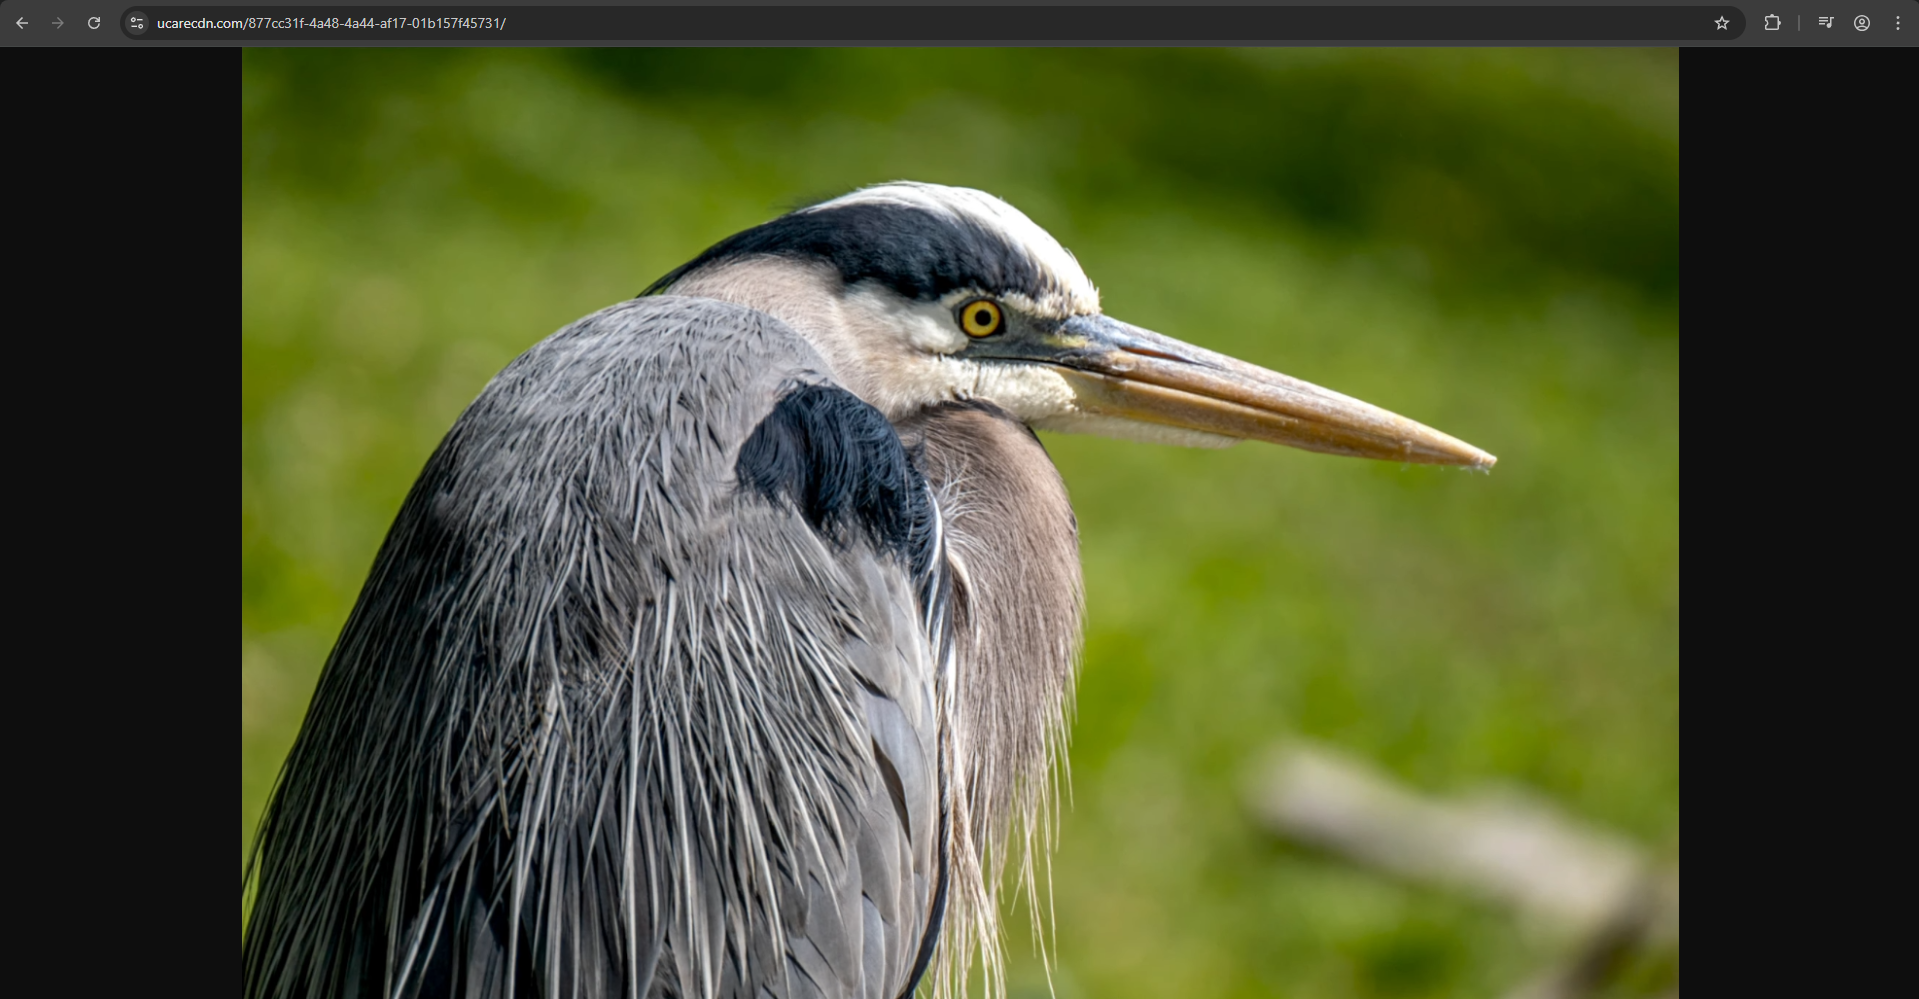
You can access the original image using https://ucarecd.net/<UUID>/.
An example of accessing the original file on Uploadcare using UUID
To get the sharpened version, use the following URL:
Here sharpness_level is a value between 0 and 20, and defaults to 5.
/-/ is a divider — its purpose is to separate chained transformations.
Here is a demonstration where you generate the preview and apply the sharpness transformation within the same URL:
Before and after comparison for Uploadcare’s Image Sharpening
From here, you can treat it as a regular image: download it for further use, or use it on your website/app via the URL.
Once the image is transformed, it gets cached, and further URL hits do not affect usage statistics.
Sharpening at scale: developer advantage
Image CDNs like Uploadcare are built for scalability.
For each sharpened image, you don’t need to worry about storage, networking, uptime, and transformation performance —
the CDN takes care of all of that. This is crucial for content-heavy websites,
like e-commerce catalogs and media-heavy websites.
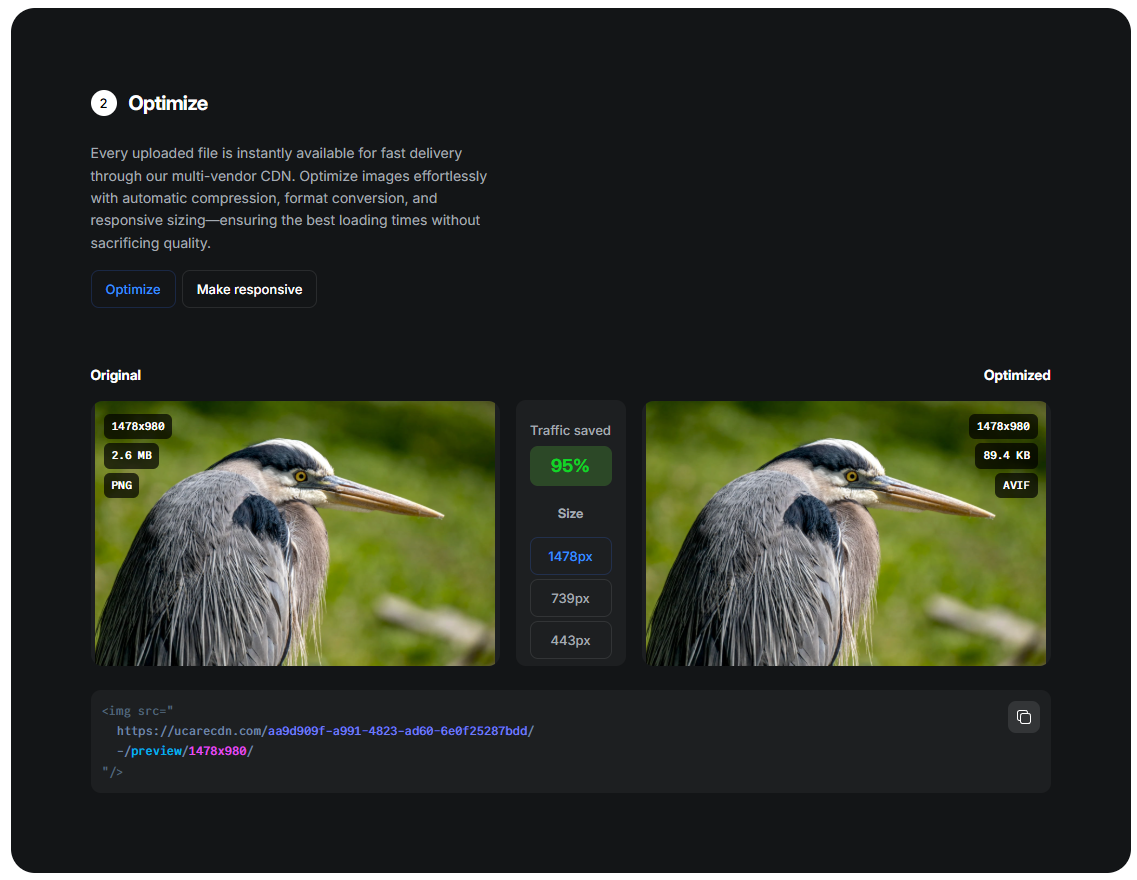
CDNs automatically optimize file size, image compression, and format based on the visitor’s browser capabilities
to ensure performance and UX benefits.
Before and after comparison for Uploadcare’s image optimization
To automate your image processing workflow, check the Uploadcare API Overview —
you can upload your existing images via the Upload API and then refer to them using UUIDs via URL API or REST API,
based on your architecture — the same as in the example above, but at a larger scale.
Sharpening increases local contrast along edges to make details appear clearer.
It doesn’t add new information; it enhances perceived sharpness so textures, text, and edges look crisper.
Can Uploadcare fix a blurry photo?
Uploadcare can improve perceived clarity using its sharpening transformation and related adjustments (e.g., resize, quality, contrast).
It won’t recover missing details from severe motion blur, but it can make soft images look noticeably crisper.
How do I sharpen images with Uploadcare?
Use Uploadcare’s on-the-fly transformations. Append the sharpening parameter to your delivery URL or apply it in your integration.
Example (pseudo-URL): https://ucarecdn.com/<file-uuid>/-/sharpness/10/.
You can combine it with resize, quality, and format for optimal results.
What sharpness level should I use?
Start conservatively (e.g., 20–40% of the maximum value) and preview on real product or content pages.
Over-sharpening can introduce halos and noise, especially on compressed or low-resolution images.
Adjust by context (e.g., thumbnails may benefit from slightly higher values than full-size views).
Should I sharpen before or after resizing/compression?
Sharpening is most effective after resizing, just before delivery.
With Uploadcare, transformations are applied on the edge, so you can resize and then sharpen in the same URL,
ensuring crisp results at the final display size.
When should I avoid sharpening?
Avoid aggressive sharpening on already noisy or heavily compressed images, which can amplify artifacts.
For portraits or skin tones, use subtle values. Test across devices and backgrounds to prevent halos around high-contrast edges.
Arthur Khayrullin is a web developer with over a decade of experience. His clients are international start-ups and companies that want to stand firmly on their feet on the Web, while focusing on the business operations.