The complete guide to file uploads in Astro applications
Astro is a web framework that can be used for static site generation (SSG) and for building server-side rendering (SSR) applications. One of its main selling points is that you can use it with the JavaScript framework of your choice, such as React, Angular, or Vue.
In this tutorial, you’ll build an Astro file upload feature from scratch — first using just TypeScript and then recreating it with a frontend framework like Preact.
Astro file upload. Step-by-step guide
You’ll begin by setting up an Astro project and building an Astro file upload form that works with multiple files and includes validation, status messages, and metadata previews. Once the core functionality is in place, you’ll rebuild the same uploader using Preact to explore how Astro works with UI frameworks.
Prerequisites before uploading files in Astro
Before you begin, you’ll need:
Install Astro
To kick things off, set up a new Astro project using the command below:
npm create astro@latest astro-file-uploaderWhen prompted on the configurations to choose, select the following:
How would you like to start your new project?
         ● A basic, helpful starter project (recommended)
Install dependencies? (recommended)
         ● Yes  ○ No
Initialize a new git repository? (optional)
         ○ Yes  ● No
This will install a new Astro project named astro-file-uploader and install all the required dependencies.
Open the project in a code editor of your choice to start building with Astro.
Create an Astro file upload component
With the project opened in your editor, navigate to the src directory and inside the components directory create a new file named FileUploader.astro with the following content:
---
---

<form class="upload-form" method="post" enctype="multipart/form-data">
  <input class="file-input" name="file" type="file" multiple />
  <button type="submit">Upload</button>
</form>

<p id="status"></p>

<div id="file-info-list"></div>
This is a simple form with a file input and a button for submitting the form.
There is also a paragraph with an ID of status that shows the current status of the file uploading process,
as well as a div element with the ID file-info-list that displays the details of the uploaded files.
To display the form, go to the pages directory and inside the index.astro file update the content with the following code to render the FileUploader component you just created:
---
import FileUploader from '../components/FileUploader.astro';
import Layout from '../layouts/Layout.astro';
---

<Layout>
  <section>
    <h1>File Uploading from Astro Application</h1>
    <FileUploader />
  </section>
</Layout>
The code above imports the FileUploader component and renders it to the page.
Let’s also add some CSS styling to make the application look more appealing.
While still inside the index.astro file, add the following style tag with the CSS code inside:
<style is:global>
  html {
    font-family: Arial, sans-serif;
    background-color: #f0f0f0;
  }

  h1 {
    margin-top: 20px;
    text-align: center;
    font-size: 2em;
  }

  section {
    display: flex;
    flex-direction: column;
    align-items: center;
  }

  .file-input {
    width: 300px;
    margin-bottom: 10px;
    padding: 10px;
    font-size: 16px;
    border: 1px solid #ccc;
    border-radius: 5px;
  }

  .upload-form button {
    padding: 15px 40px;
    font-size: 16px;
    border-radius: 5px;
    border: none;
    background-color: #0070f3;
    color: white;
    cursor: pointer;
  }

  .upload-form button:disabled {
    background-color: #77b6ff;
    cursor: not-allowed;
  }

  .info-list {
    padding: 0;
    margin: 0;
    list-style-type: none;
  }
</style>
To display the component, run the command npm run dev on your terminal,
and you should have your Astro project running at http://localhost:4321/
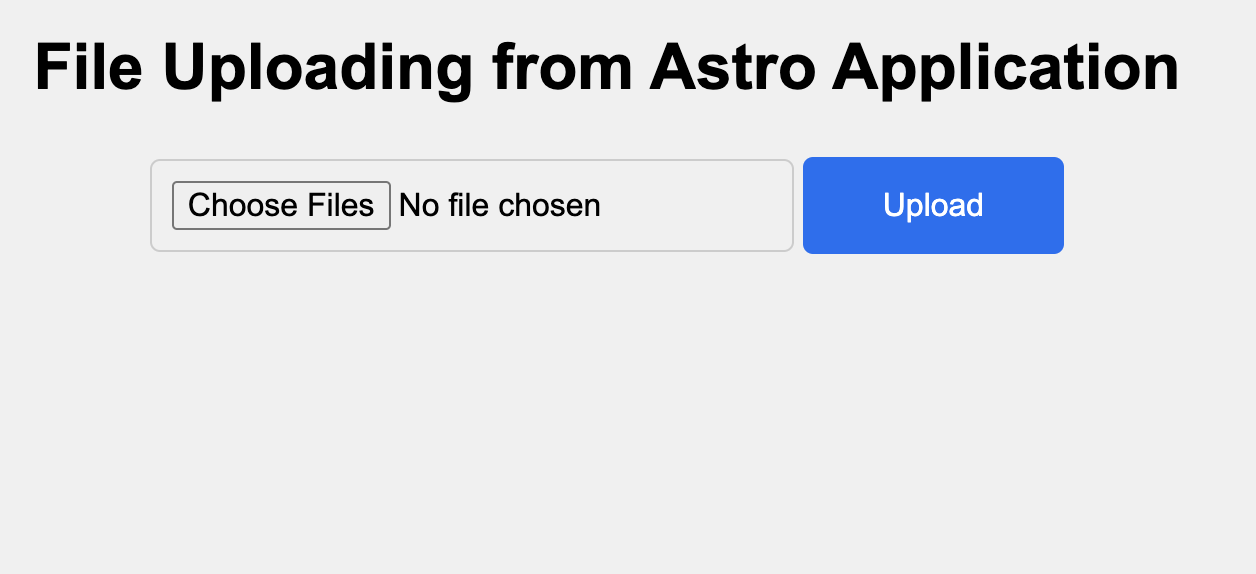 Astro landing page with file upload form
Implementing the file upload functionality
With the form working as expected, let’s add the ability to upload a file.
To implement the upload functionality, first, you’ll need to get the elements from the HTML markup.
Update the FileUploader.astro component to include the following script tag with TypeScript code:
<script>
const form = document.querySelector('form') as HTMLFormElement;
const status = document.getElementById('status') as HTMLParagraphElement;
const fileInput = document.querySelector(`input[type='file']`) as HTMLInputElement;
const button = document.querySelector('button') as HTMLButtonElement;
const fileInfoList = document.getElementById('file-info-list') as HTMLDivElement;
</script>
The code above retrieves the form, status, input, form button, and file info elements. With this, can now add event listeners to listen for changes on the page.
To upload a file, you need to create an uploadFiles function:
async function uploadFiles(formData: FormData): Promise<void> {
  try {
    const response = await fetch('https://httpbin.org/post', {
      method: 'POST',
      body: formData,
    });

    if (!response.ok) {
      throw new Error('Network response was not OK');
    }

    const data = await response.json();
    console.log('Files uploaded successfully:', data);
  } catch (error) {
    console.error('Uploading files failed', error);
  }
}
The function above accepts a formData parameter and sends it to a test server URL using the Fetch API.
You can replace this URL with your own server’s URL to receive the file.
To use the uploadFiles function, create another function that will handle the file submission called handleSubmit:
function handleSubmit(event: SubmitEvent): void {
  event.preventDefault();

  const formData = new FormData(form);
  uploadFiles(formData);
}
The code above:
- Prevents the default behavior of the browser refreshing the page when a form is submitted
- Creates a new
FormDatainstance using the information from the form - Fires up the
uploadFiles()function, passing theformData
You can now attach the handleSubmit function to an event listener for the form:
form.addEventListener('submit', handleSubmit);Open your browser and go to the console to inspect the page. When you try uploading a file, you should have a message in the log that looks like this:
 Astro file upload form logs
The uploader you created can now upload files, but you can improve its experience.
Displaying a status message for file uploads
Currently, when someone uploads a file, they cannot tell if it was uploaded successfully or failed. Let’s fix that by adding a status message to display the file upload status on the browser.
To do this, update the TypeScript code in the FileUploader component to have an updateStatusMessage
that will update the content of the status paragraph on the page with a message:
function updateStatusMessage(message: string): void {
  status.textContent = message;
}
Next, to show the message, you need to update the content of the status element when the form is about to be submitted, when it is submitted and is successful, and also when the form submission fails.
To show the message before uploading the files, call the updateStatusMessage just before calling the uploadFiles() function:
function handleSubmit(event: SubmitEvent): void {
	// ↓ here ↓
  updateStatusMessage('⏳ Uploading file(s)...');

  uploadFiles(formData);
}
Now update the uploadFiles function itself to show a message after the fetch request is made and when the fetch request fails:
async function uploadFiles(formData: FormData): Promise<void> {
  try {
    //some previous code here

    const data = await response.json();
    console.log('File(s) uploaded successfully:', data);

    // ↓ add message here ↓
    updateStatusMessage('✅ File(s) uploaded successfully.');
  } catch (error) {
    console.error('Uploading files failed', error);

    // ↓ and here ↓
    updateStatusMessage('❌ Uploading file(s) failed.');
  }
}
Head back to the browser and try uploading a file. You should have a status message showing when uploading a file:
Astro file upload status message
Display the metadata of the uploaded files
To display information about the files being uploaded, let’s retrieve basic details from each file, such as the file name, type, and size.
Inside the handleSubmit function, just before uploading the files, add the following code:
// Clear any content existing
fileInfoList.innerHTML = '';

// Loop through files and log/display metadata
const files = formData.getAll('file') as File[];

files.forEach((file, i) => {
  const listItem = document.createElement('ul');
  const title = document.createElement('p');
  title.textContent = files.length > 1
    ? `File details number ${i + 1}:`
    : 'File details:';

  listItem.innerHTML = `
    <li>📄Name: ${file.name}</li>
    <li>Type: ${file.type || 'unknown'}</li>
    <li>Size: ${(file.size / 1024).toFixed(2)} KB</li>
  `;

  fileInfoList.appendChild(title);
  fileInfoList.appendChild(listItem);
});
The code above:
- Loops through all the files being uploaded and gets their details
- Creates a paragraph that says “File details” or “File details number N”, depending on the number of files being uploaded
- Creates an unordered list element
ulto display the file details - Attaches the created element to the
fileInfoListon the page
With this, you can now upload files and view their details before uploading them.
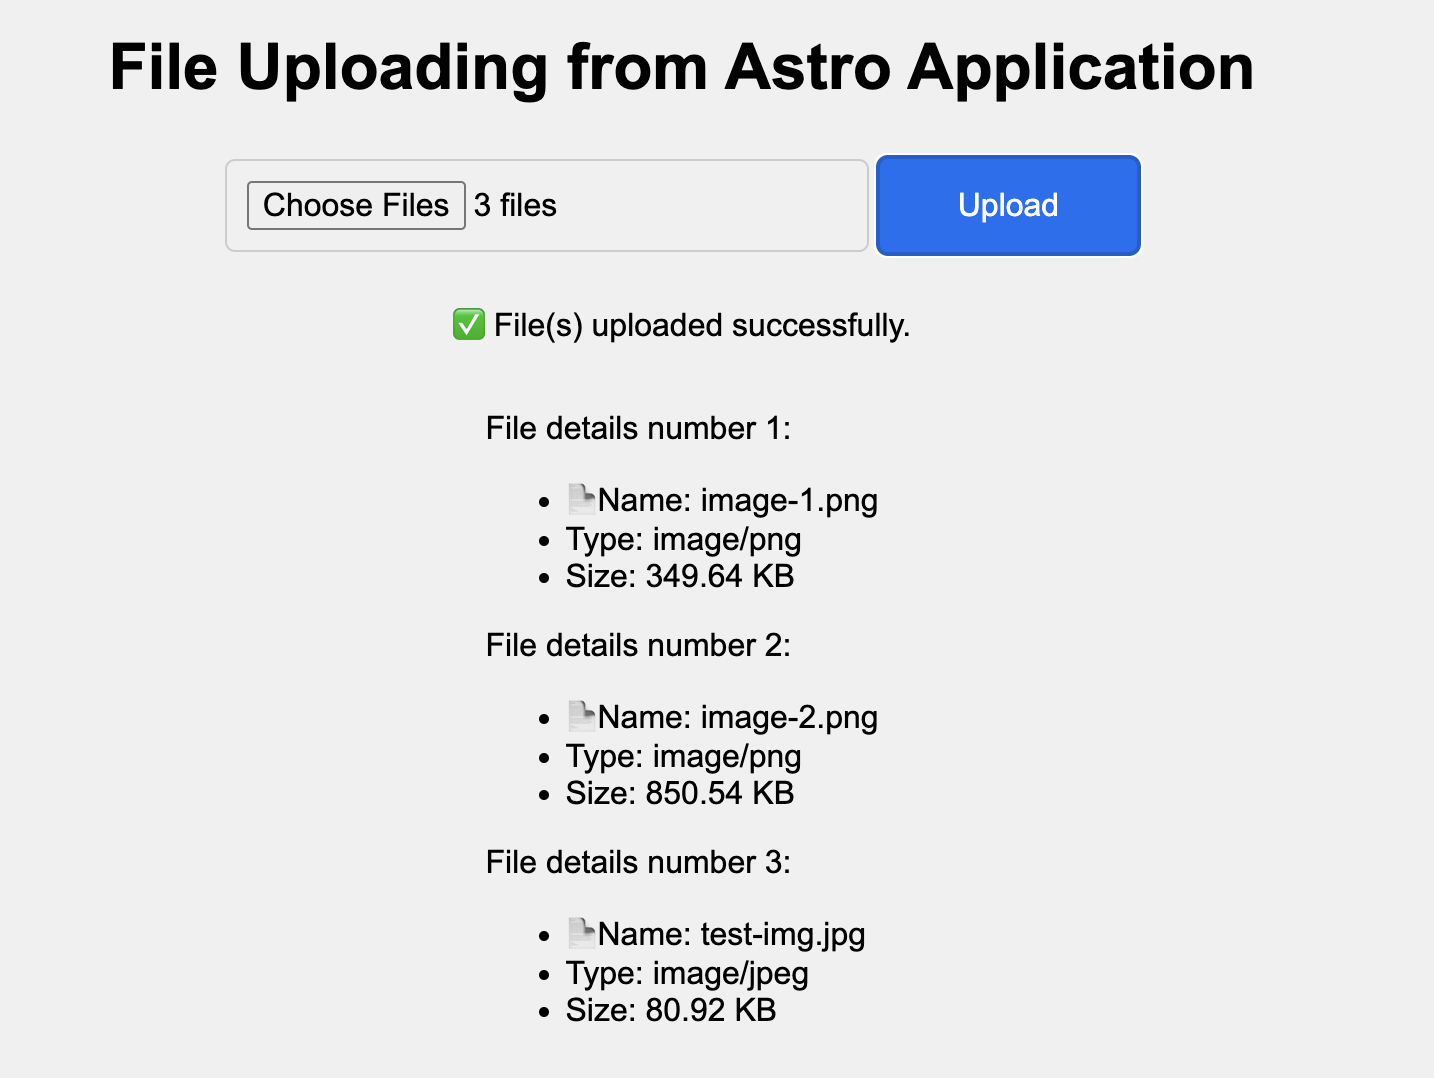 File details of files uploaded in Astro
Validating files before uploading
In some scenarios, you may want to restrict users to uploading only specific file types,
for example, images (PNG, JPEG, etc.) or documents (PDF, DOC, etc.).
To achieve this, you can add an accept attribute to the input element to allow only specific MIME types.
Update the input in the FileUploader component to include the accept attribute.
<input
  class="file-input"
  name="file"
  type="file"
  multiple
  accept="image/*"
/>
This will allow only image files to be uploaded. You can also specify multiple MIME types by separating them with a comma, like this:
<input
  class="file-input"
  name="file"
  type="file"
  multiple
  accept="image/jpeg, image/png"
/>
This will allow only JPEG and PNG files to be uploaded.
Note that the accept attribute doesn’t strictly validate the selected files.
Instead, it serves as a way to guide users toward choosing the correct file types by providing hints to the browser.
It is still possible for users to override this guidance by modifying options in the file chooser.
That’s why you should validate the expected requirement on the server side.
Let’s add a function to the JavaScript code to validate any file before they are uploaded:
function validateFiles(files: FileList | File[]): void {
  const validTypes = ['image/jpeg', 'image/png'];
  for (const file of files) {
    if (!validTypes.includes(file.type)) {
      throw new Error(
        `❌ File '${file.name}' could not be uploaded. Only images with the following types are allowed: JPEG, PNG.`
      );
    }
  }
}
The code above checks the uploaded files against the validTypes array
and throws an error if any of the uploaded files are of these file types.
Now that the validation logic is ready, create a new function called handleInputChange that listens for any changes
when the file is selected with the file input.
function handleInputChange(): void {
  try {
    if (fileInput.files) {
      validateFiles(fileInput.files);
    }
  } catch (err: any) {
    updateStatusMessage(err.message);
    return;
  }

  button.disabled = false;
}
To use this function, add an event listener for the fileInput element:
fileInput.addEventListener('change', handleInputChange);When you try uploading a file that is not an image, you should see a message saying that the file could not be uploaded.
 Astro file error for invalid file types
If you pick an unsupported file, the uploader will show an error.
However, if you select the correct file, the uploader won’t remove the error.
To fix this, create a function called resetFormState and call it when the file changes.
Also, it would be a good idea to disable the submission button since the form is being reset:
function resetFormState(): void {
button.disabled = true;
updateStatusMessage(`🤷♂ Nothing's uploaded`);
}You can then call this function in handleInputChange before validating the files:
function handleInputChange(): void {
  resetFormState();
  //some previous code here
}
You can now validate files being uploaded to the file uploader.
Let’s also add one more validation for file size.
File size validation
Say you want to allow users to upload files of a maximum size, say 1 MB. You don’t want them to finish uploading the file before telling them that the file size is invalid.
It would be a better user experience to validate the file size before uploading it,
and you can add this validation to the validateFiles function.
Inside the validateFiles function, create a new variable called maxSize as the maximum size of a file that can be uploaded,
and add another if case:
function validateFiles(files: FileList | File[]): void {
  const maxSize = 1024 * 1024; // 1 MB

  for (const file of files) {
    //some previous code here

    if (file.size > maxSize) {
      throw new Error(
        `❌ File '${file.name}' is too large. Maximum size is 1 MB.`
      );
    }
  }
}
The uploader will now throw an error if any file being uploaded is larger than 1 MB, thereby canceling the upload.
 Astro file error for file size validation error
That’s a lot of work, but it is worth the effort! You now have a file uploader that can upload multiple files, validate them before uploading, and display status messages during the uploading process.
All of this was done using TypeScript; however, Astro also supports using a UI framework like React, Vue.js, or Solid.js. For a list of all the UI frameworks that Astro supports, visit the Astro documentation.
Now, let’s rebuild the Astro file upload functionality using Preact to see how interactive components work within Astro’s island architecture.
Rebuilding the file uploader with Preact
Preact is a lightweight JavaScript library alternative to React. It uses the same API as React but is much lighter than React for building web applications that require minimal functionality.
To use Preact in Astro, run the following command in your terminal to install it:
npx astro add preactThis would install preact and also update astro.config.mjs file to integrate preact to Astro.
Next, in the components directory, create a FileUploader.tsx file with the content:
import { useState } from 'preact/hooks';
const FileUploader = () => {
const [statusMessage, setStatusMessage] = useState(`🤷♂ Nothing's uploaded yet`);
const [files, setFiles] = useState<FileList | null>(null);
const updateStatusMessage = (message: string) => {
setStatusMessage(message);
};
const resetFormState = () => {
updateStatusMessage(`🤷♂ Nothing's uploaded yet`);
};
const handleInputChange = (event: Event) => {
resetFormState();
const target = event.target as HTMLInputElement;
const selectedFiles = target.files;
setFiles(selectedFiles);
try {
if (selectedFiles) {
validateFiles(selectedFiles);
}
} catch (err: any) {
updateStatusMessage(err.message);
return;
}
};
const handleSubmit = async (event: Event) => {
event.preventDefault();
if (!files) {
updateStatusMessage('❌ No files selected.');
return;
}
const formData = new FormData();
Array.from(files).forEach((file) => formData.append("file", file));
try {
validateFiles(files);
} catch (err: any) {
updateStatusMessage(err.message);
return;
}
updateStatusMessage('⏳ Uploading file...');
await uploadFiles(formData);
};
const uploadFiles = async (formData: FormData) => {
try {
const response = await fetch('https://httpbin.org/post', {
method: 'POST',
body: formData,
});
if (!response.ok) {
throw new Error('Network response was not OK');
}
const data = await response.json();
console.log('File uploaded successfully:', data);
updateStatusMessage('✅ File uploaded successfully.');
} catch (error) {
console.error('File upload failed:', error);
updateStatusMessage('❌ File upload failed.');
}
};
const validateFiles = (files: FileList | File[]) => {
const validTypes = ['image/jpeg', 'image/png'];
const maxSize = 1024 * 1024; // 1 MB
for (const file of files) {
if (!validTypes.includes(file.type)) {
throw new Error(
`❌ File '${file.name}' could not be uploaded. Only images with the following types are allowed: JPEG, PNG.`
);
}
if (file.size > maxSize) {
throw new Error(
`❌ File '${file.name}' is too large. Maximum size is 1MB.`
);
}
}
};
return (
<div>
<form
class="upload-form"
method="post"
encType="multipart/form-data"
onSubmit={handleSubmit}
>
<input
class="file-input"
name="file"
type="file"
multiple
onChange={handleInputChange}
/>
<button type="submit" disabled={!files}>
Upload
</button>
</form>
{statusMessage && (
<p id="status">{statusMessage}</p>
)}
{files && [...files].map((file, i) => (
<div key={i}>
<p>{files.length > 1 ? `File details number ${i + 1}:` : 'File details:'}</p>
<ul>
<li>📄Name: {file.name}</li>
<li>Type: {file.type || 'unknown'}</li>
<li>Size: {(file.size / 1024).toFixed(2)} KB</li>
</ul>
</div>
))}
</div>
);
};
export default FileUploader;That’s a lot of code, right? Fret not!
The code above is the same file uploader you built in the previous steps of this tutorial, but only as a preact component instead of Astro.
To display this component in Astro, update the index.astro file in the pages directory to reflect this new component:
---
// import FileUploader from '../components/FileUploader.astro';
import FileUploader from '../components/FileUploader';
import Layout from '../layouts/Layout.astro';
---

<Layout>
  <section>
    <h1>File Uploading from Astro Application</h1>
    <FileUploader client:load />
  </section>
</Layout>
Notice that the new FileUploader import has a client:load directive when rendering.
This is because, by default, Astro renders all applications as static HTML pages on the server.
If you need to implement an interactive component that requires client-side interaction,
you need to add the client:load directive to tell Astro to load the component on the client side.
This is just a minimal version of a file uploader. If you want it to be usable in production and provide a pleasant experience, there are a lot of things you’d need to implement on your own, like a drag and drop feature, editing files before uploading, securing file uploads, and authenticating users before uploading a file. However, you can use an already baked solution that has all the capabilities and features you’d need like Uploadcare File Uploader.
Uploading files with Uploadcare file uploader
Uploadcare provides you with a free File Uploader that is framework agnostic and can be used in any web project, with all of the capabilities you’d need for uploading files.
The file uploader supports features such as drag and drop, MIME type filtering, signed uploads, an image editor, and more.
The best part is that you can integrate it in a few minutes into your Astro application. Let’s see how.
To start using the File Uploader, Uploadcare provides three solutions so you can choose one that best fits your needs.
For this tutorial, you will use the inline mode.
Navigate to the index.astro file in the pages directory and import the CSS styles for the File Uploader component:
<head>
  <link
    rel="stylesheet"
    href="https://cdn.jsdelivr.net/npm/@uploadcare/file-uploader@v1/web/uc-file-uploader-inline.min.css"
  />
</head>
Also, import the File Uploader library and initialize it on the page:
<script type="module">
	import * as UC from 'https://cdn.jsdelivr.net/npm/@uploadcare/file-uploader@v1/web/file-uploader.min.js';
	UC.defineComponents(UC);
</script>
Next, add the following markup to the HTML section of the page:
<uc-file-uploader-inline ctx-name="my-uploader"></uc-file-uploader-inline>

<uc-config
  ctx-name="my-uploader"
  pubkey="PUBLIC_KEY"
></uc-config>
The code above:
- Uses the
uc-file-uploader-inlineto initialize the inline version of the file uploader - The
uc-configelement is a configuration element for configuring the file uploader and enabling the features you want - The
PUBLIC_KEYis the Public key you need to specify the project you want to upload files to. Sign up for Uploadcare and create a new project. Under the API Keys section, you will find your Public key.
Adding the Public key to the page will render a File uploader that looks like this:
 Uploadcare file uploader in Astro
That’s it! You can now start uploading files in just a few minutes and with a few lines of code. Go ahead and try it to see how it uploads files.
Conclusion
In this article, you created a file uploader in an Astro application using TypeScript and Preact. You implemented features such as file type and size validation, as well as multiple uploads. You also learned how to quickly integrate an existing solution like Uploadcare without writing everything from scratch.
You can find the source code for this tutorial on GitHub.
Ready to improve the file uploading experience in your Astro applications? Check out Uploadcare’s File Uploader and save hours of development time.
Explore other tutorials, such as uploading files with React or uploading files with JavaScript, or consider various ways to optimize images on your website.