Uploading images to your website using Uploadcare
Last edited:
Integrating image uploads into your website can be tricky and time-consuming, especially when facing tight deadlines or working on small projects. Fortunately, with Uploadcare, you can set up an image uploader in just minutes. This tutorial will guide you through the process step by step. Let's get started!
An easy step-by-step image-uploading process
Step 1. Sign up and create an account
To start using Uploadcare, sign up and set up your account. You will access the Uploadcare file-handling magic less than a minute and completely free.
Step 2. Create a project and grab your Public Key
After setting up your account, create your first project from the dashboard.
On the API Keys tab, you’ll find the Public Key for your project. This key is needed to identify which account and project the uploaded file will belong to. Copy this key to use it next.
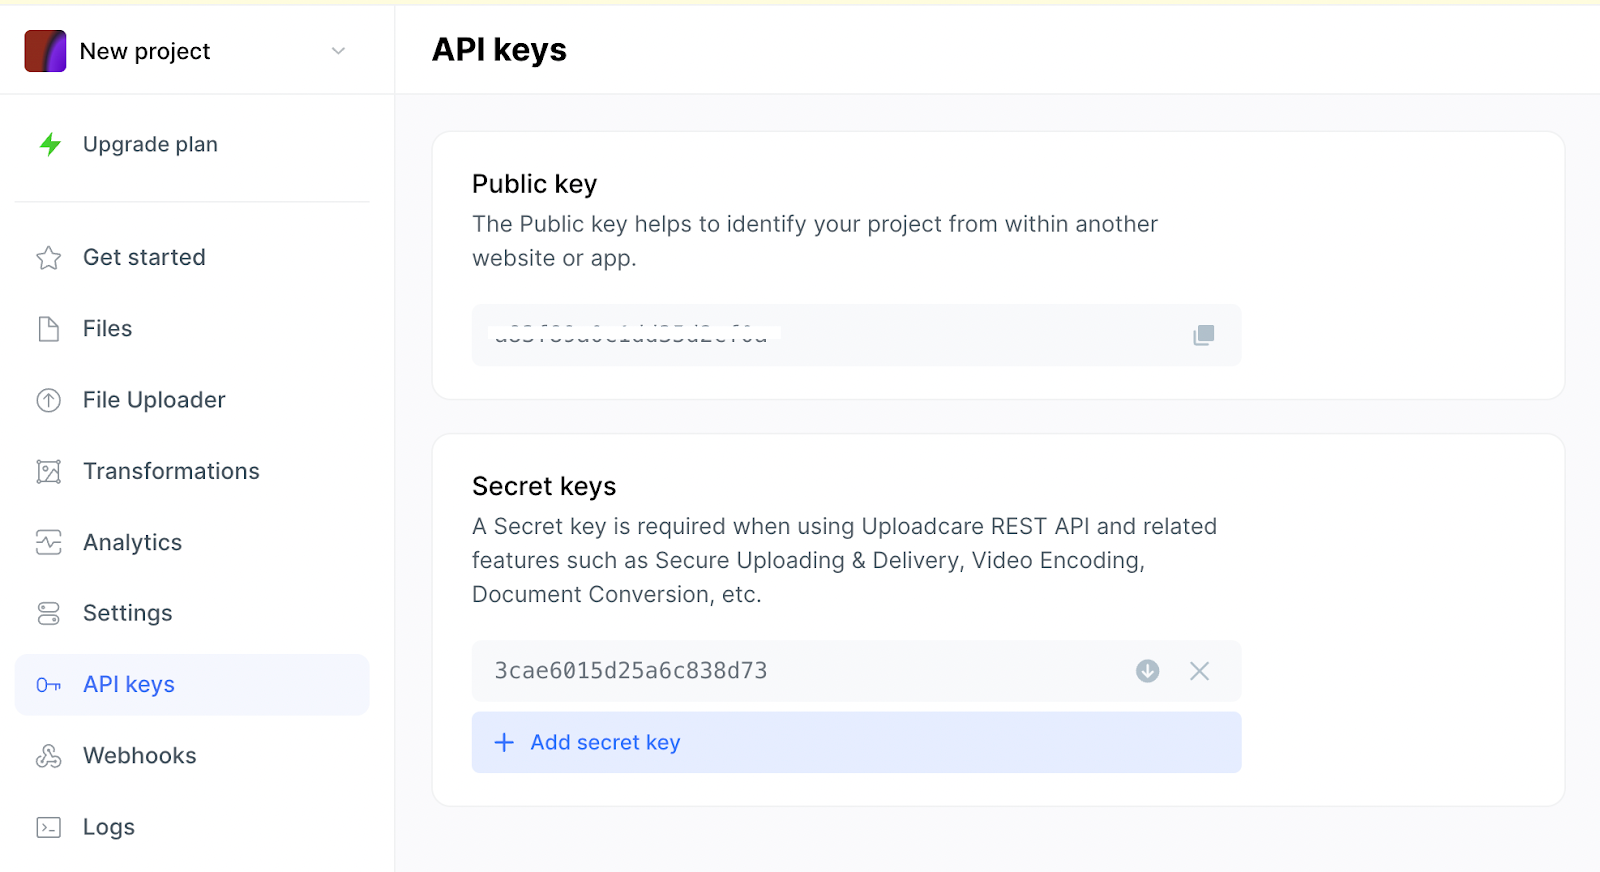 Copy it and jump to the next step
Step 3. Add a widget
To start using the widget, you’ll need to install Uploadcare File Uploader — a JavaScript library that provides web components, including an image editor and adaptive images, to easily handle uploads and image processing.
1. Start by connecting Uploadcare library to the document and register it:
<script type="module">
  import * as UC from 'https://cdn.jsdelivr.net/npm/@uploadcare/file-uploader@v1/web/file-uploader.min.js';
  UC.defineComponents(UC);
</script>
2. Include CSS for a inline uploader:
<link
  rel="stylesheet"
  href="https://cdn.jsdelivr.net/npm/@uploadcare/file-uploader@v1/web/uc-file-uploader-inline.min.css"
>
3. Configure the uploader by adding <uc-config> tag.
Don’t forget to put your public key to the pubkey attribute instead of the YOUR_PUBLIC_KEY placeholder:
<uc-config
  ctx-name="my-uploader"
  pubkey="YOUR_PUBLIC_KEY"
></uc-config>
4. Finally, add the File Uploader component to your markup. Uploadcare provides three solutions, so you can choose one that best fits your needs. As an example, let's try inline mode for which we've included CSS on step 2:
<uc-file-uploader-inline
  ctx-name="my-uploader"
></uc-file-uploader-inline>
This is it! Your file uploader is now ready to use.
You can continue to customize it. Among other options, you can set the maximum and minimum number of files that can be selected for a single upload, use a built-in cloud image editor, validate files by their format or size, and allow different types of files to be uploaded, not just images.
Moreover, you have the option to customize the uploader's appearance using CSS.
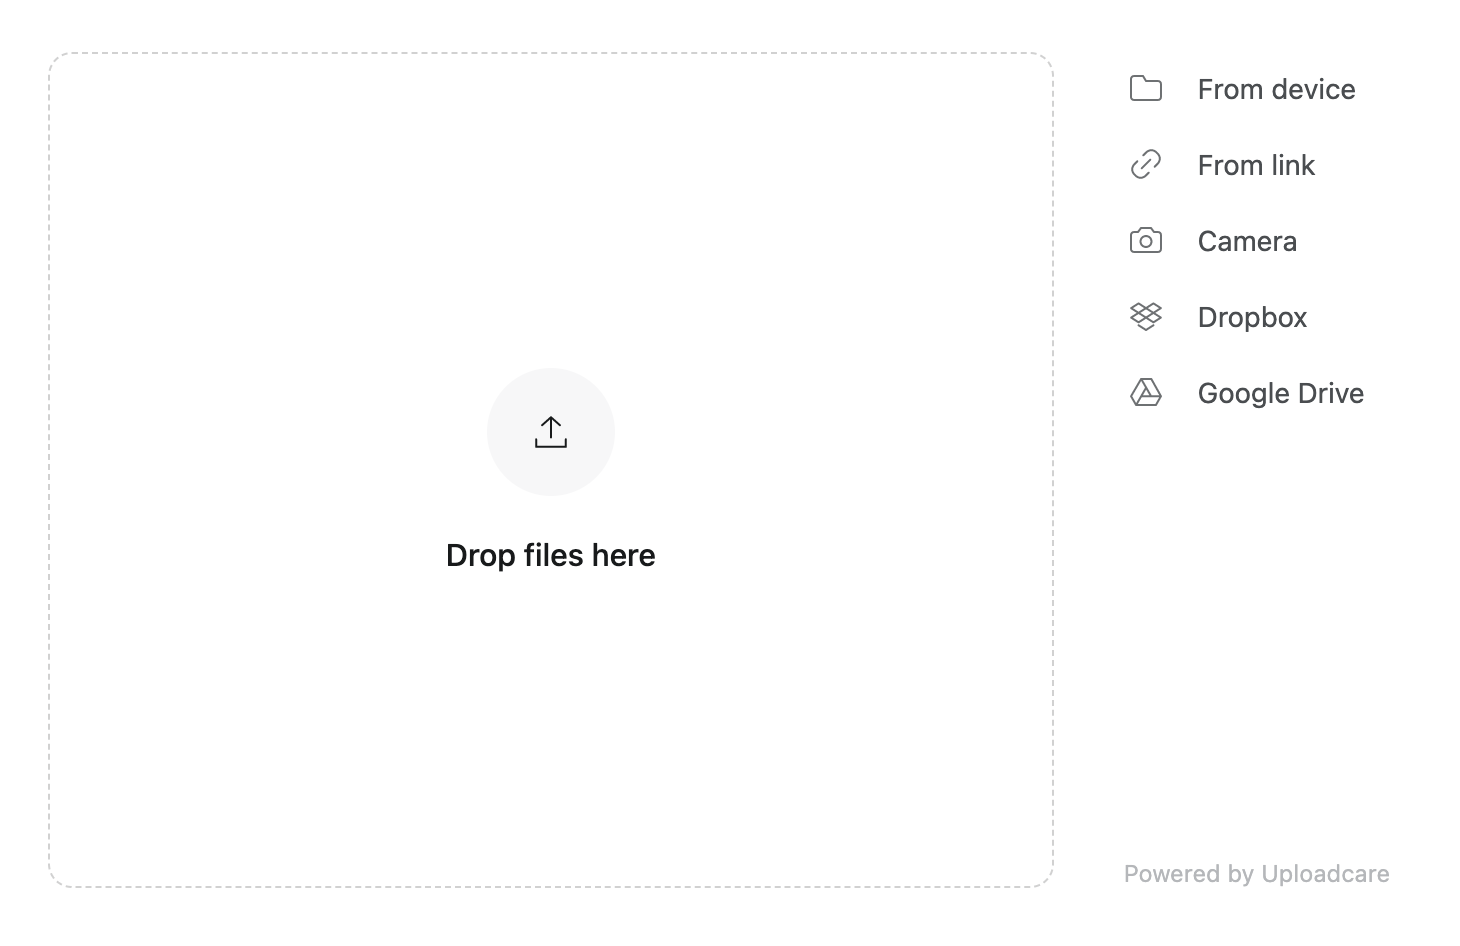 Here's what it looks like
And there you have it!
Uploadcare takes care of all your headaches related to picture uploading and adding images to your website or project: instead of spending hours or days developing your own solution from scratch, you can add a few lines to your code and get a ready-made, highly customizable image uploader in a matter of minutes.
This saves a ton of time and allows you to focus on the unique features of your app or website rather than reinventing the wheel again and again.
More Uploadcare image management capabilities
-
Uploadcare offers a comprehensive suite of image-handling services, covering image uploads, storage, delivery, transformations, and optimization.
-
Our CDN and robust cloud hosting infrastructure, allows every uploaded to Uploadcare Storage image to be delivered securely and reliably across 288K servers in 136+ countries and nearly 1,500 networks.
-
Uploadcare’s Upload API is user-friendly and accessible from both your backend and browser, enabling quick image uploads through our uploading network.
-
Uploadcare's progressive JPEG, adaptive quality, and auto-formatting features help boost performance and enhance user experience.
-
Uploadcare also allows you to resize, crop, rotate images and apply effects on the fly.
-
Built-in malware protection allows you to upload and store content completely securely.
Need more help with your image-uploading needs?
If you have additional questions about Uploadcare’s image-uploading service or want to dive deeper into the capabilities, you can read the documentation, ask the community, or just get in touch and schedule a demo.