Serverless signed uploads with Vercel
Today, we’ll discuss the security in media uploading and possible enhancements without additional coding simply by utilizing Signed Uploads from Uploadcare and Vercel Serverless Functions.
Every dev knows that giving free access to upload any media to your storage is a bad idea and a potential security risk. A user with malignant intentions can easily overflow your storage or upload malware to your server, leading to consequences from financial losses to potential legal problems.
Ensuring that only trusted users can upload media is a challenge that requires more than just secure upload mechanisms — it demands robust authentication. This article is the first in a series to address secure media transfer. Here, we’ve focused on the role of signed uploads, a method akin to a digital signature or seal, which adds a layer of verification to each upload, ensuring that only authorized content is transferred to your server.
In the upcoming second article, we will delve deeper into serverless authentication. Authentication acts as the first gatekeeper in the security framework, verifying the identity of a user before they even get to the point of uploading. Without stringent authentication, signed uploads may not be entirely secure. By implementing robust authentication processes, you can effectively ensure that only users with verified identities can obtain a signed token to upload media, thus completing the circle of security and maintaining the integrity and safety of your server’s content.
How do we allow only users we trust to upload media?
One effective method is using signed uploads. Think of them like a special handshake between your device and the website you’re uploading to. Before you send your file, the website gives you a unique code (or signature). This code confirms that you have permission to upload and ensures the file reaches its destination safely. Without this signature, the upload won’t be accepted. It’s a way to make sure only authorized files get uploaded.
Signature generation is an essential step in ensuring the security and authenticity of data transfers. Typically, generating these signatures requires a backend system. This is because the backend environment is secure and hidden from end users, making it more challenging for malicious users to tamper with or spoof these signatures. However, it can be a problem if you don’t have access to the backend or want your project to be serverless or zero code — running needed functions on-demand without the need to manage your infrastructure, provision servers, or upgrade hardware.
What are serverless functions?
Serverless functions are like on-the-fly mini-servers that you can use to run code for specific tasks, such as generating signatures for secure media uploads. Vercel, for instance, offers these serverless functions that spring into action only when needed — they execute the code when a user triggers an event. This optimizes costs and resources, as these functions only consume resources during execution and lie dormant otherwise.
In this guide, I’ll provide step-by-step instructions on deploying a Vercel serverless function to handle your uploads securely.
Setting up Vercel and GitHub accounts
-
Register for a free account at Vercel. Complete the sign-up and email verification.
-
If you don’t have a GitHub project, create one following GitHub’s instructions.
-
Fork our preconfigured project repository to your GitHub account. It allows you to start using serverless functions without any additional code. The forking repository instructions are in the official GitHub docs.
Connecting Vercel and GitHub accounts
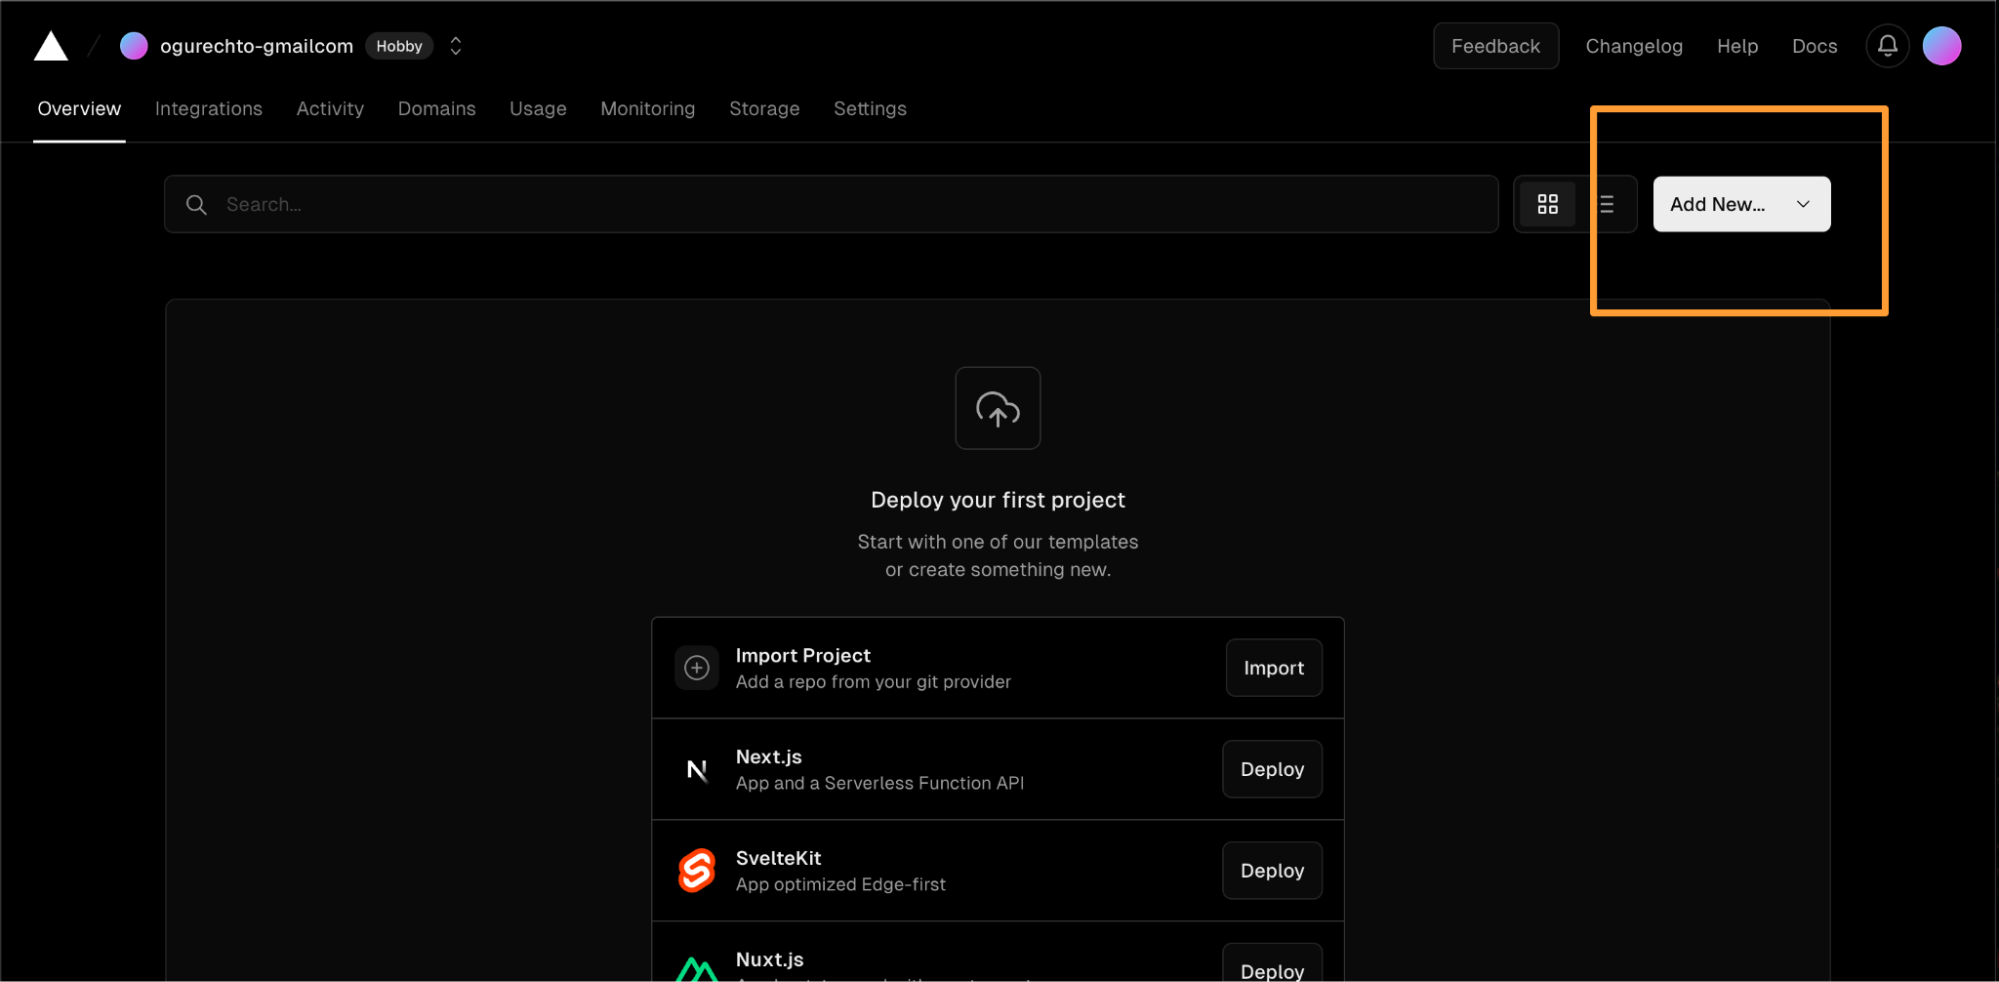
Once logged in to Vercel, navigate to the Add New Project area on your Vercel dashboard. Now, it’s time to connect your GitHub project to Vercel as a new project.
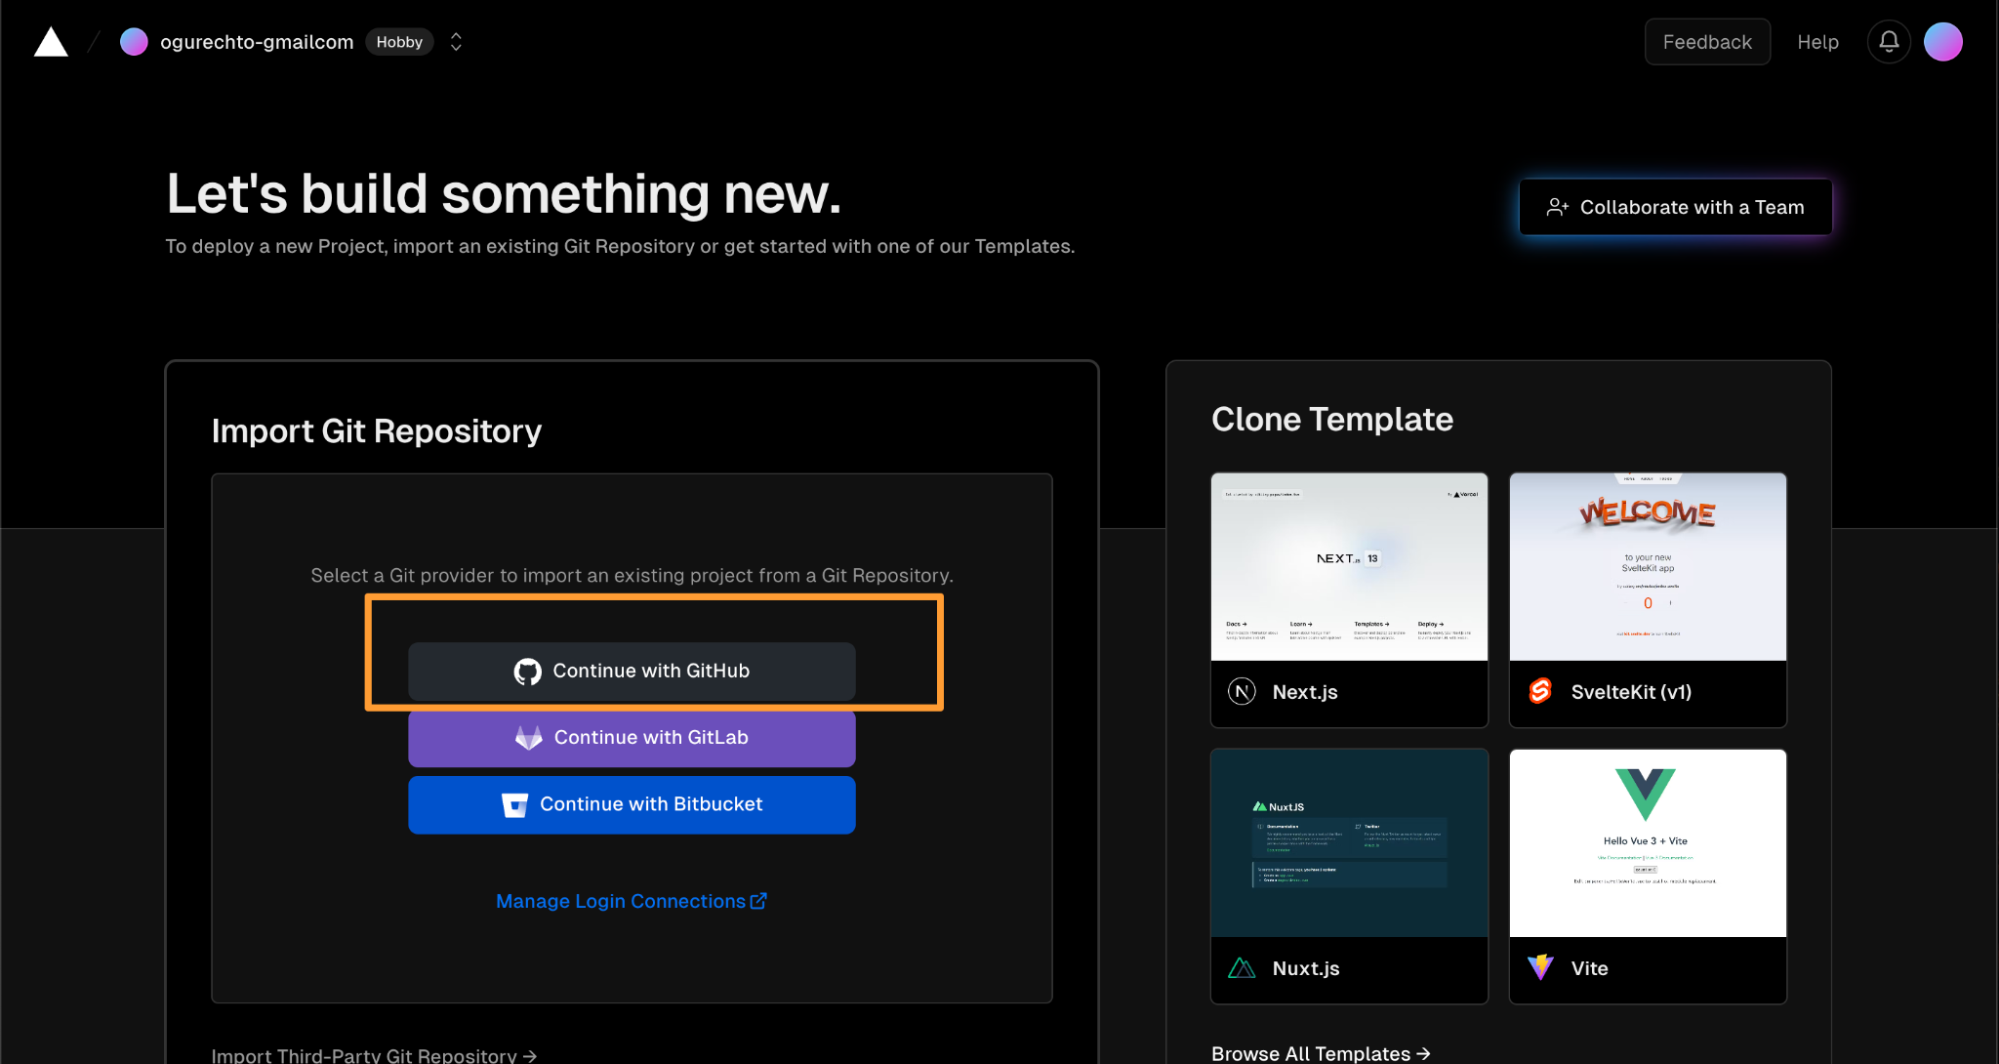
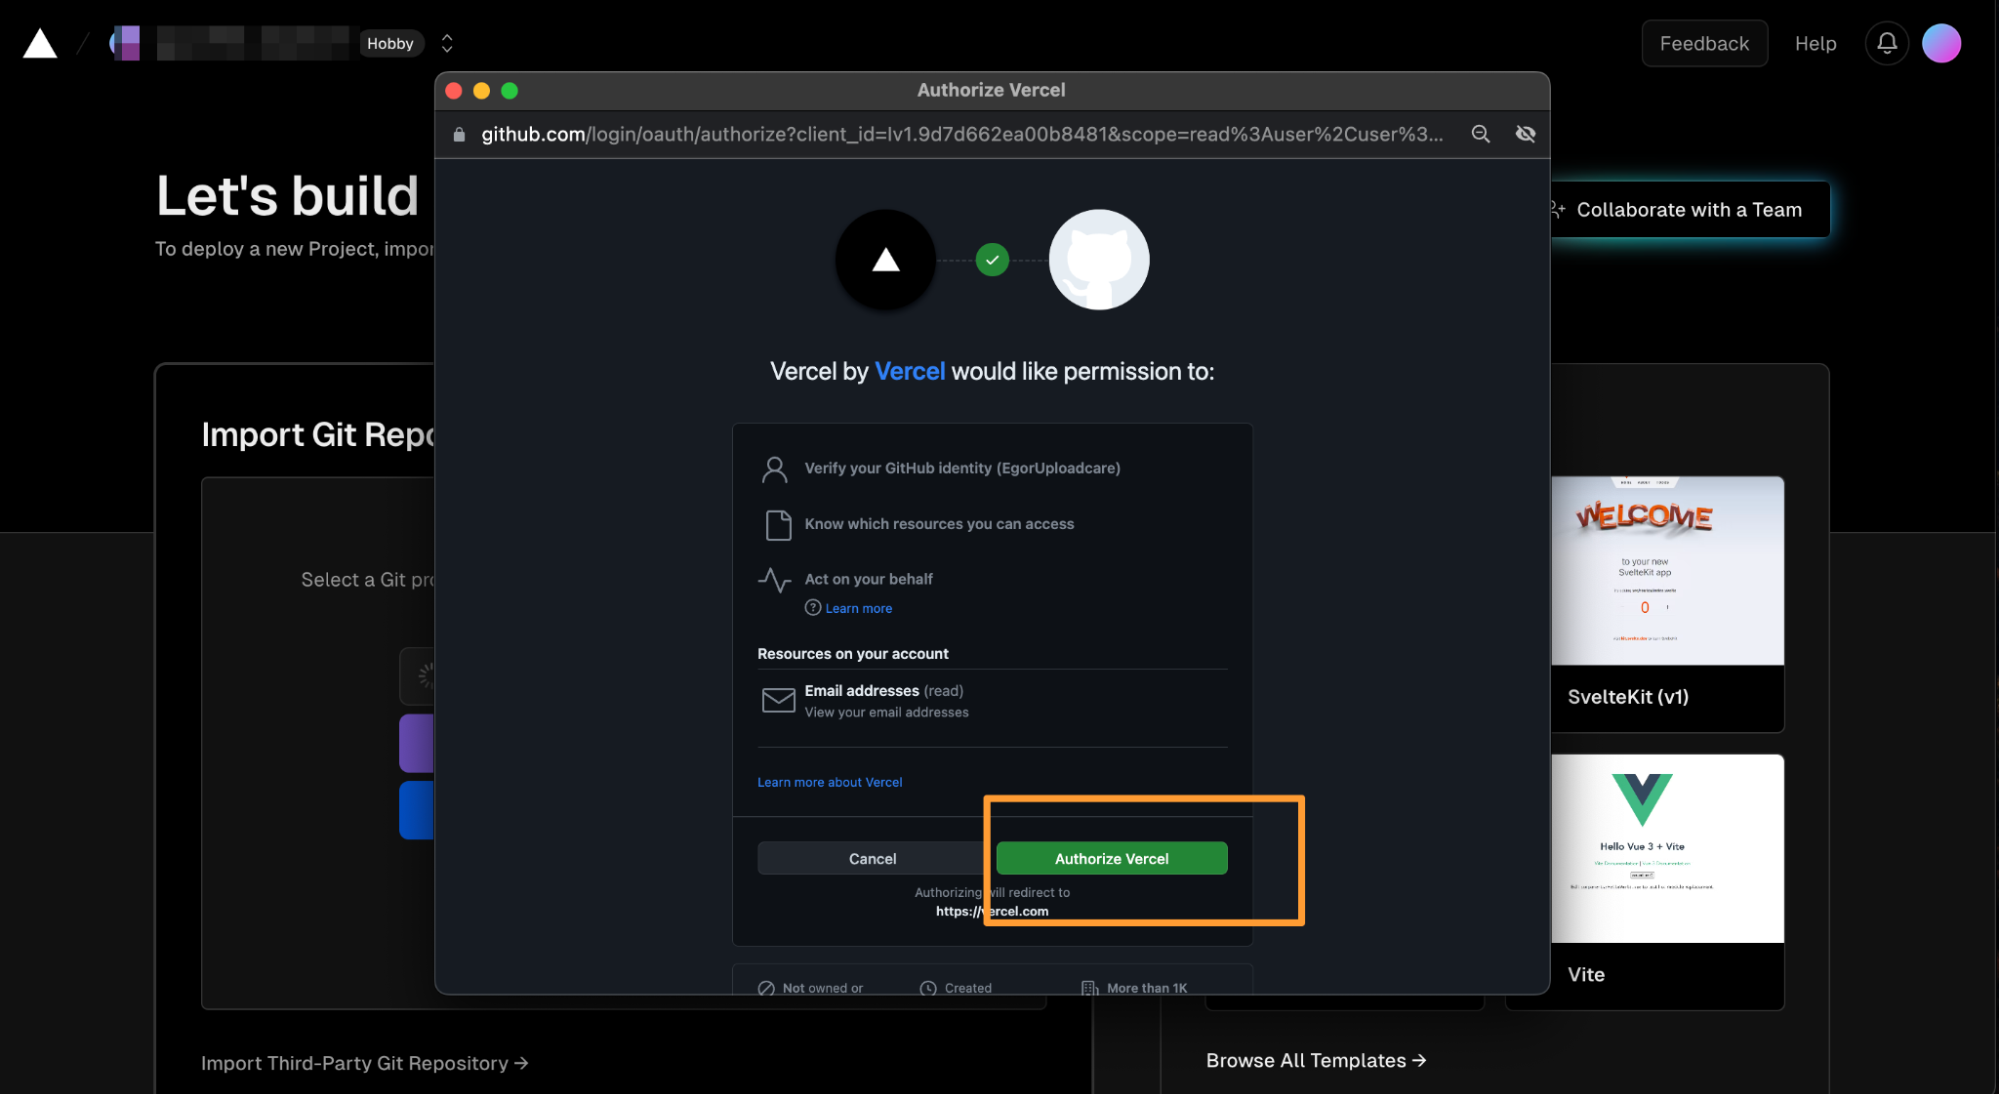
Authorize Vercel to get access to your GitHub project and the list of your projects to deploy as a serverless function.
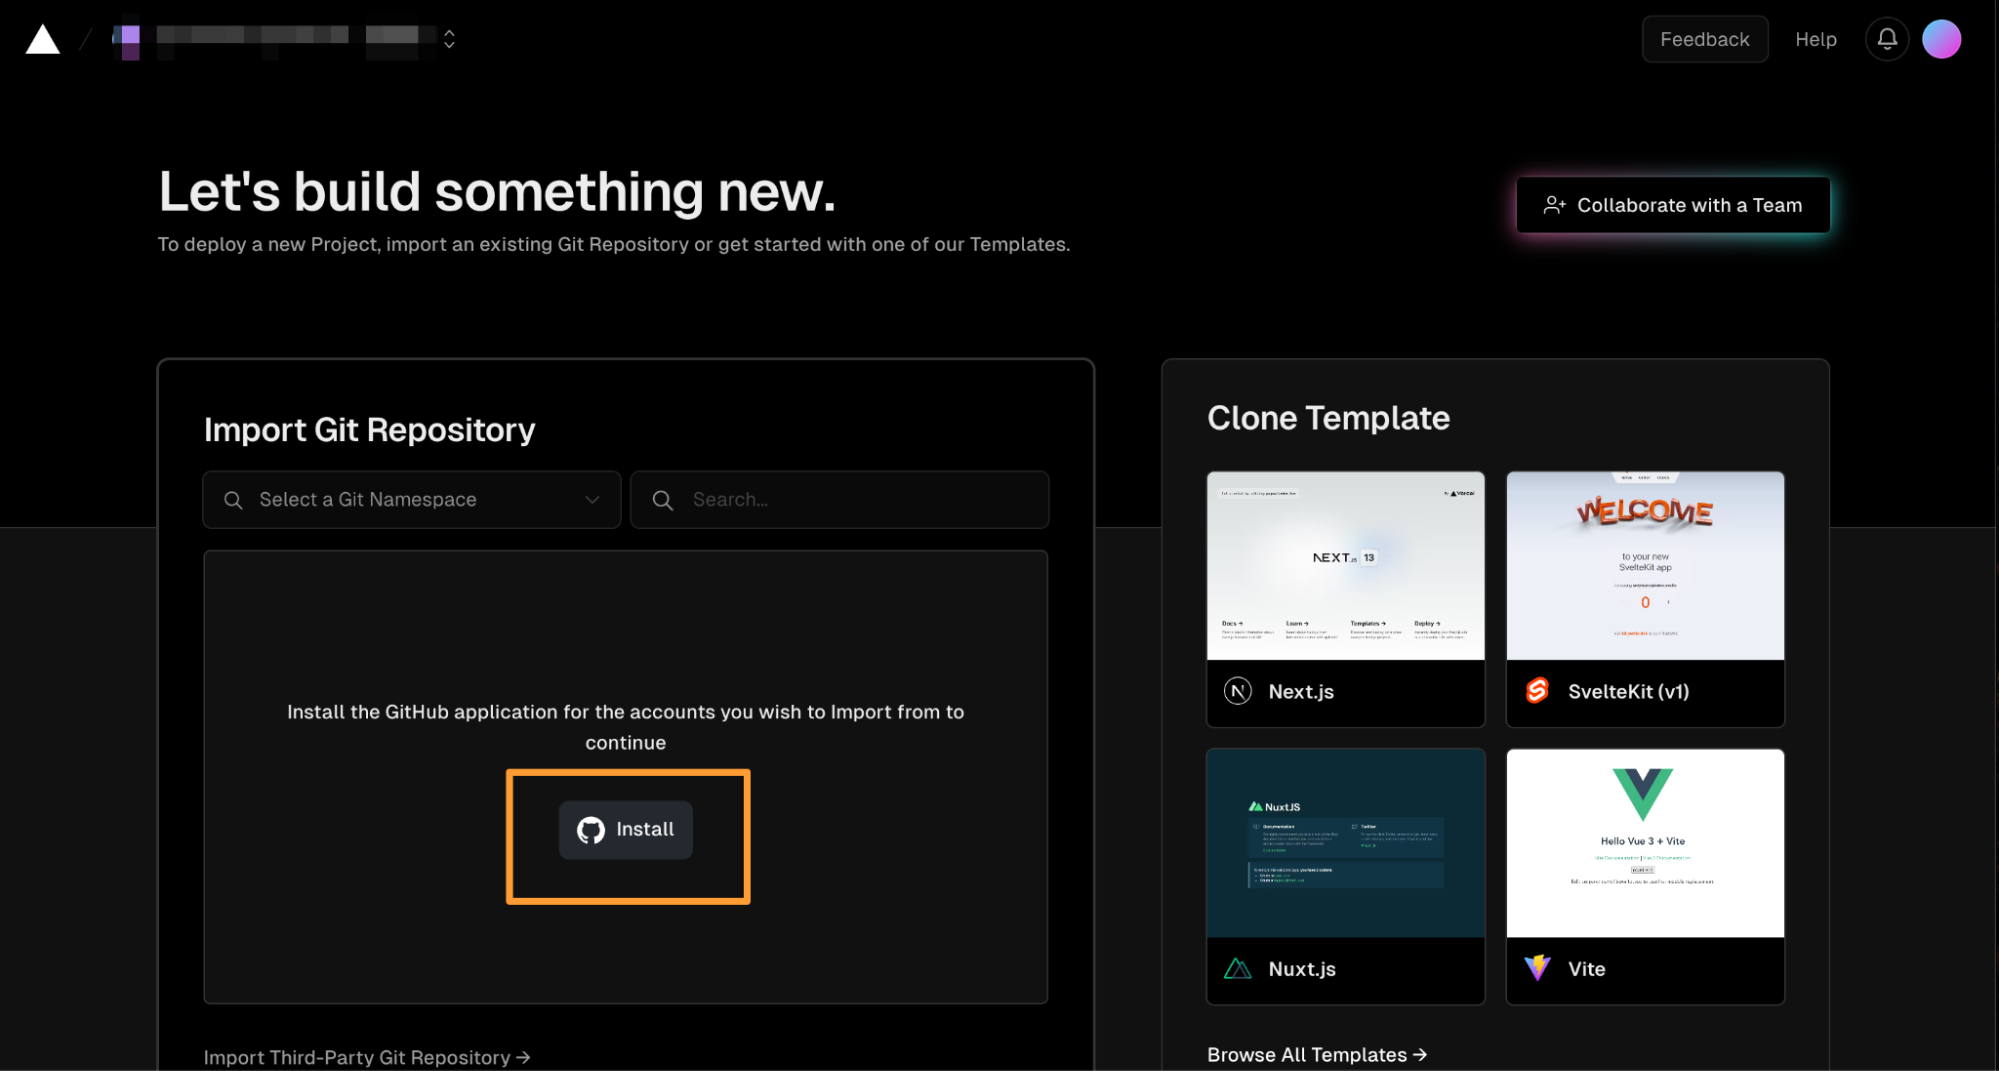
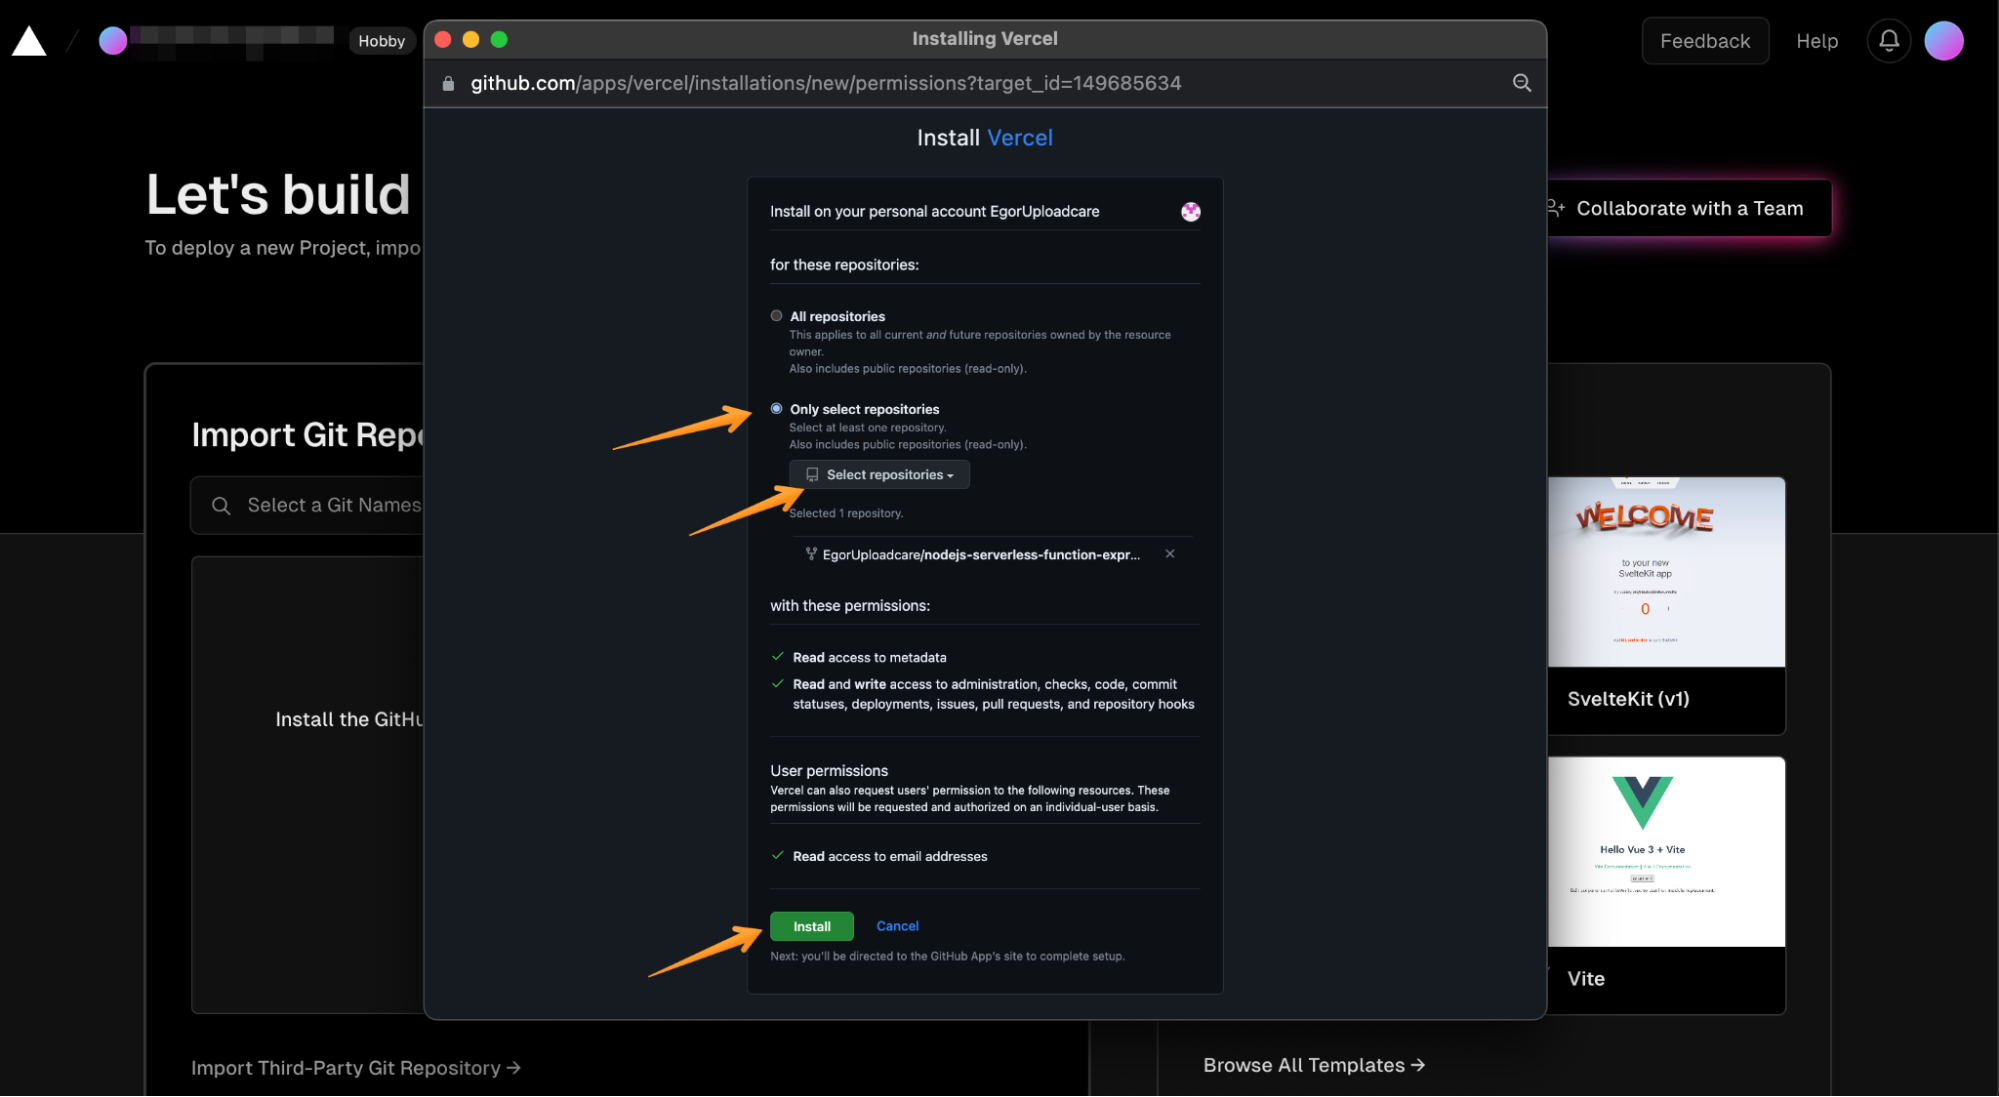
When Vercel asks you to install the Vercel application in your GitHub repository, authorize the installation in the Import Git Repository window.
Then you see a modal asking you to select if you want to install Vercel to all projects. In case you have other projects you don’t want to be connected to Vercel, click on Only select repositories and select the nodejs-serverless-function-express project that you previously forked.
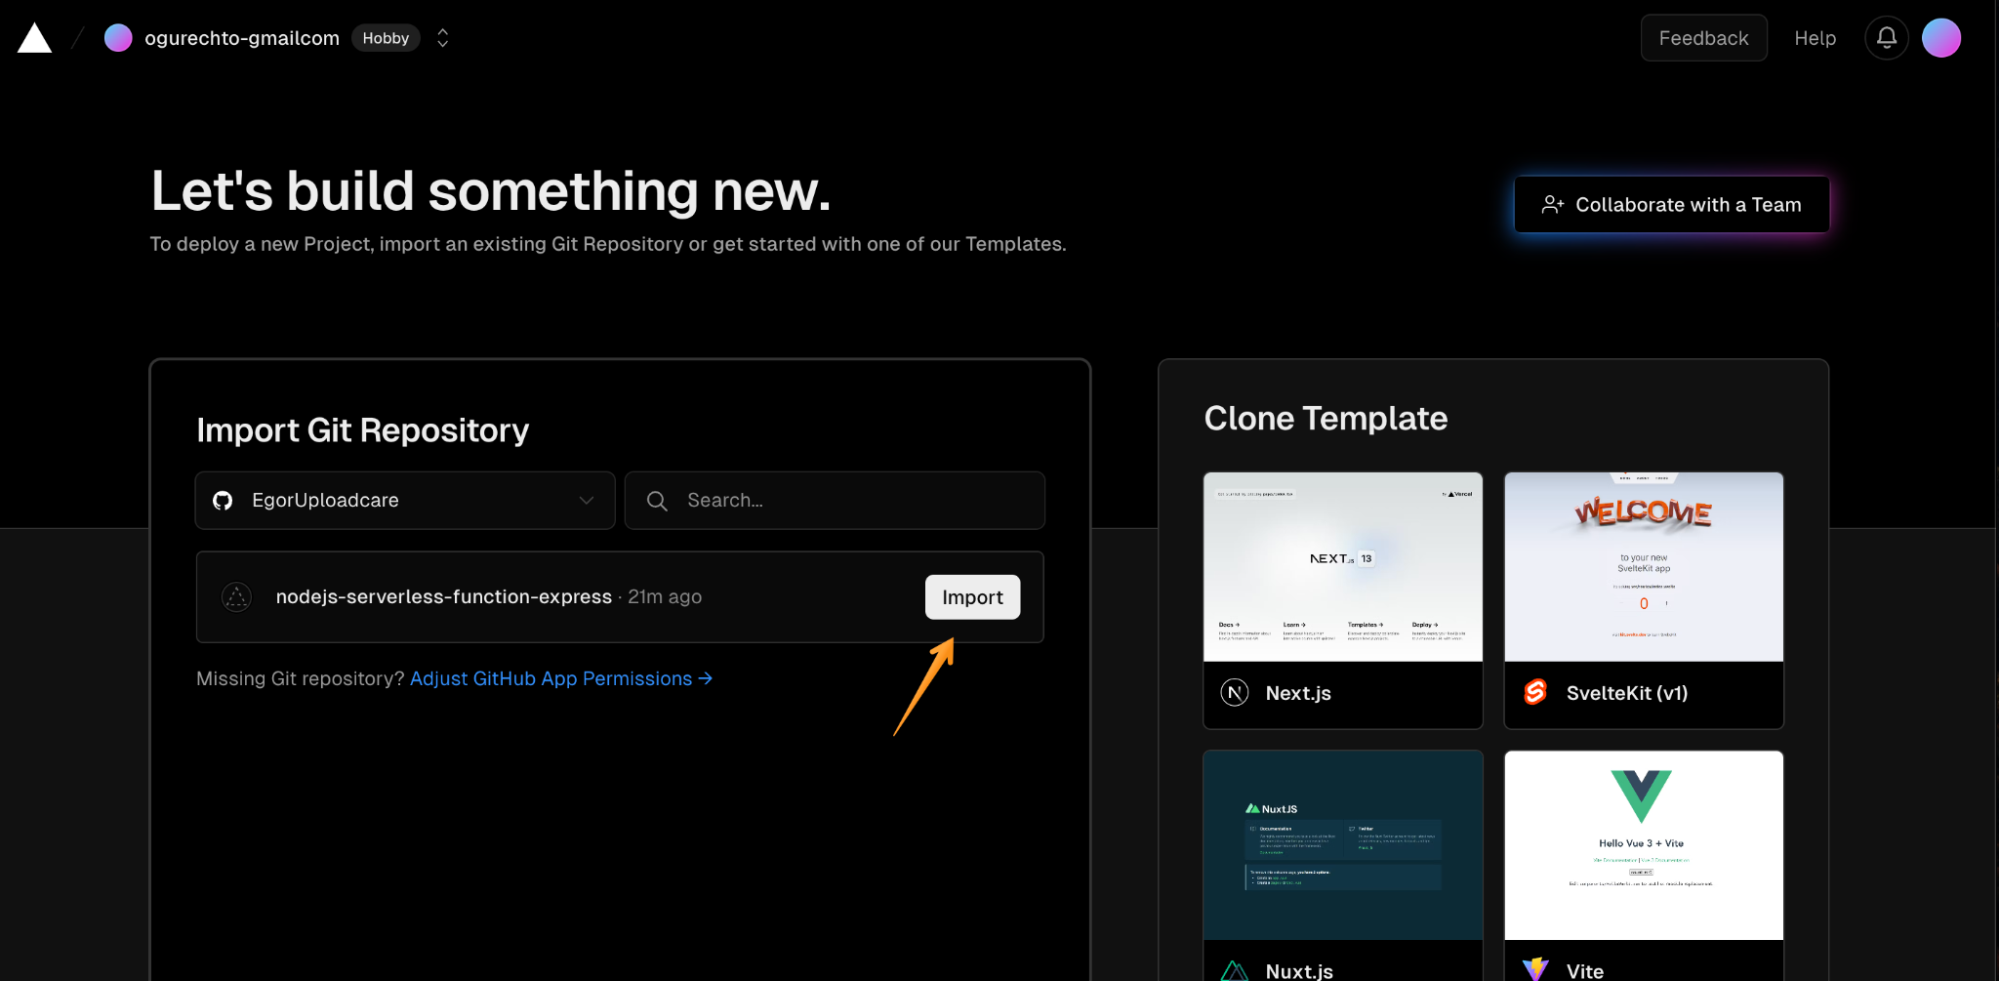
After the app is installed, you’ll see it in the list of repositories to be imported. Let’s click Import to provide the project to Vercel.
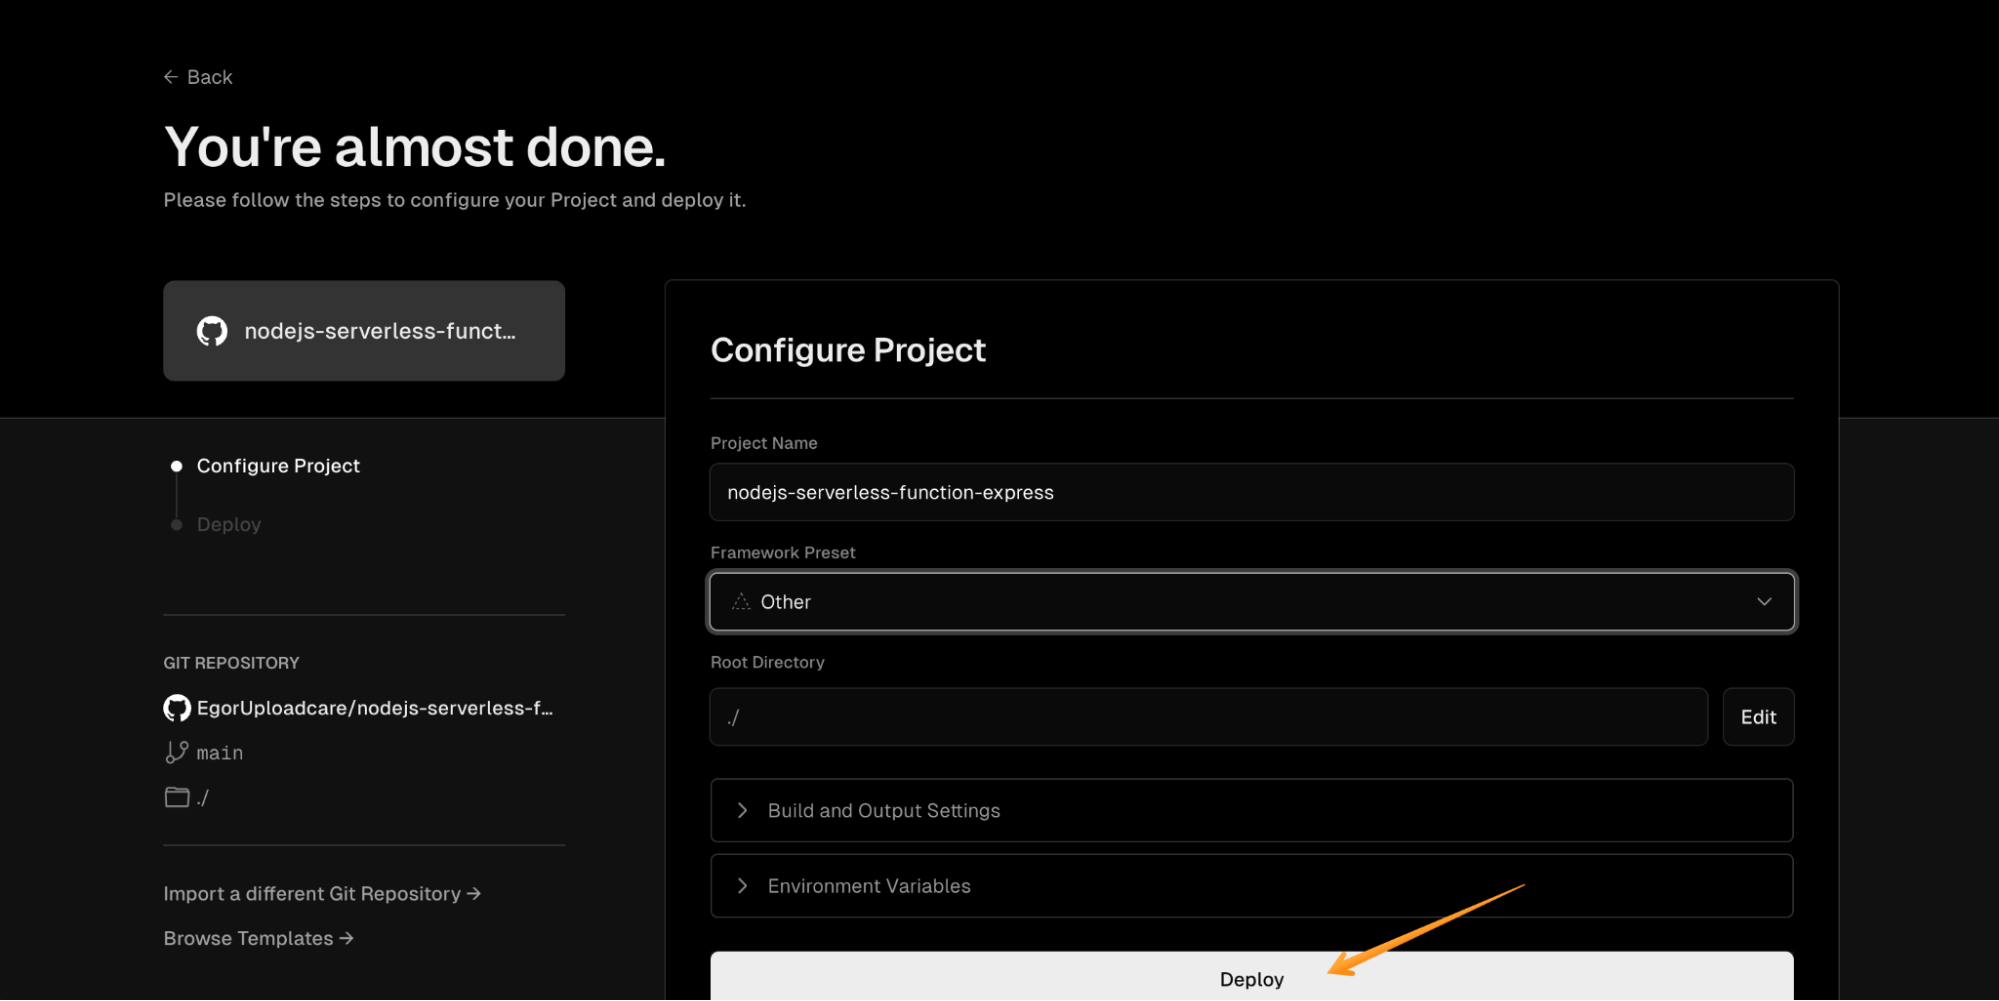
After being redirected to the Vercel project configuration screen, changing any setting is unnecessary. Click the Deploy button, and your project will be deployed to Vercel.
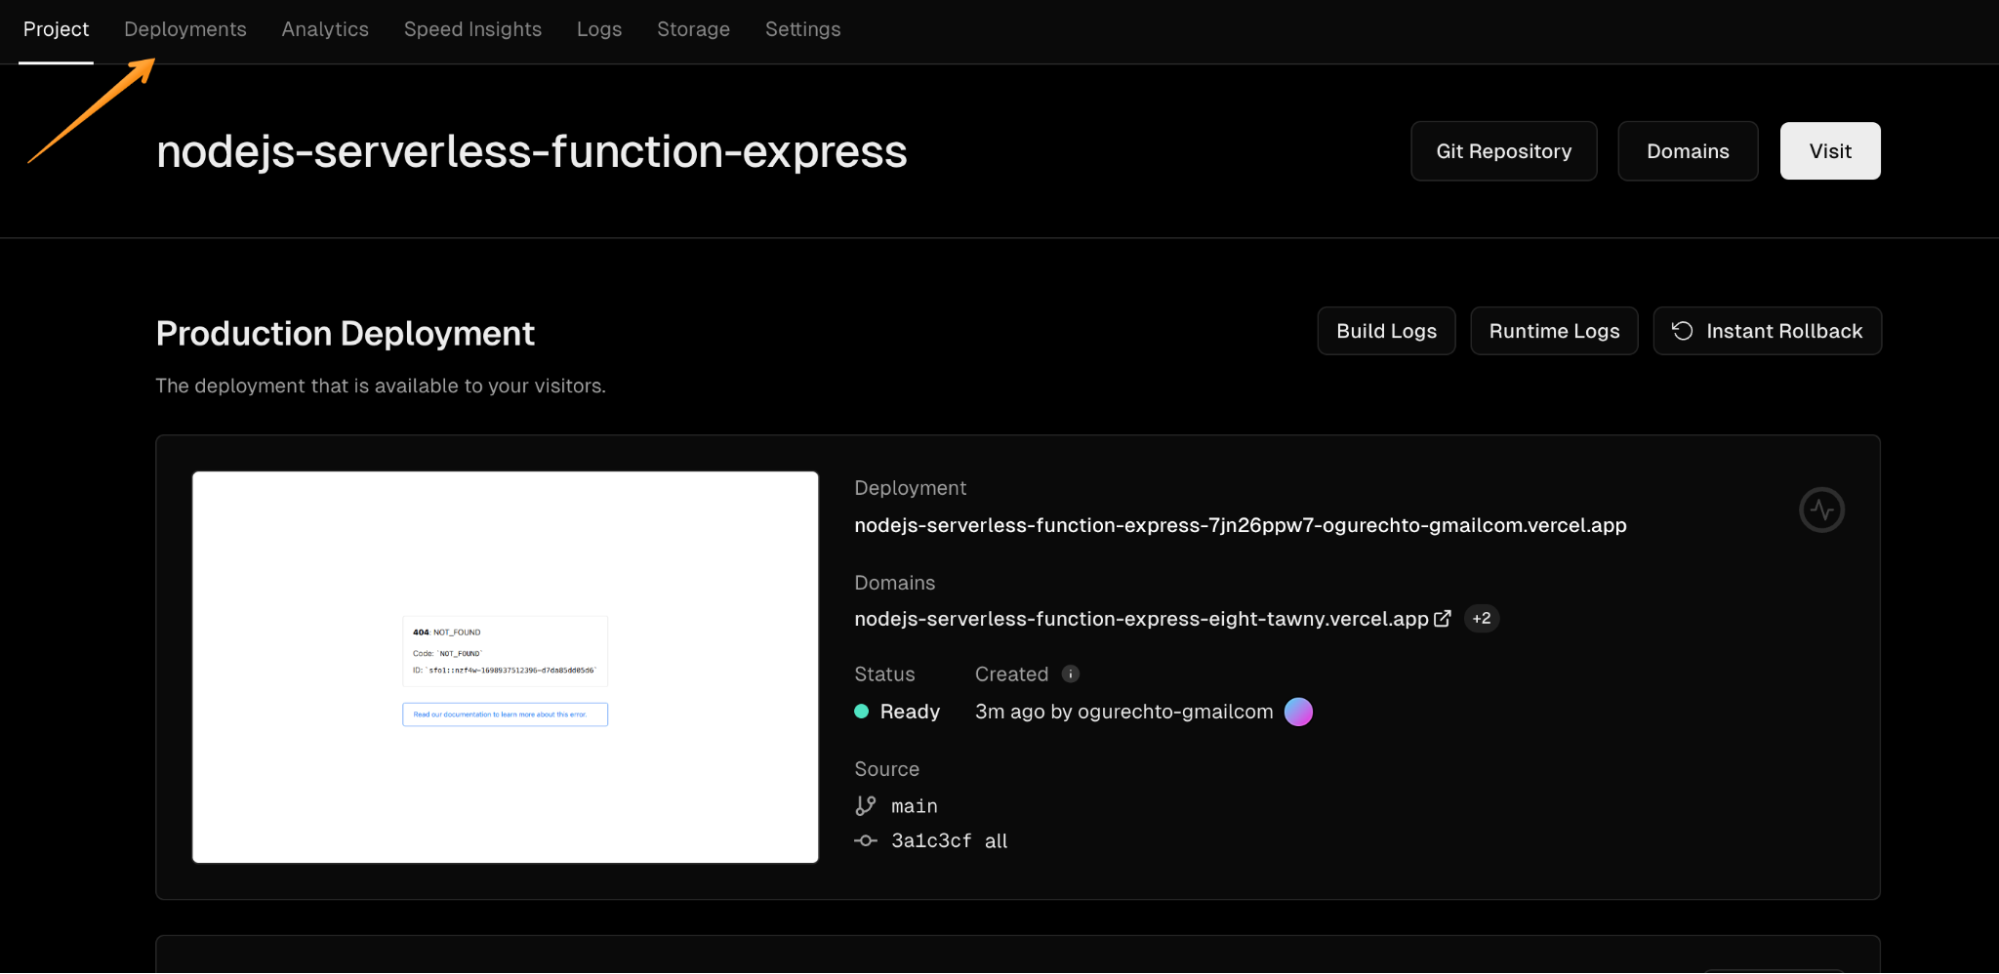
Return to the Vercel dashboard to check if your project is running.
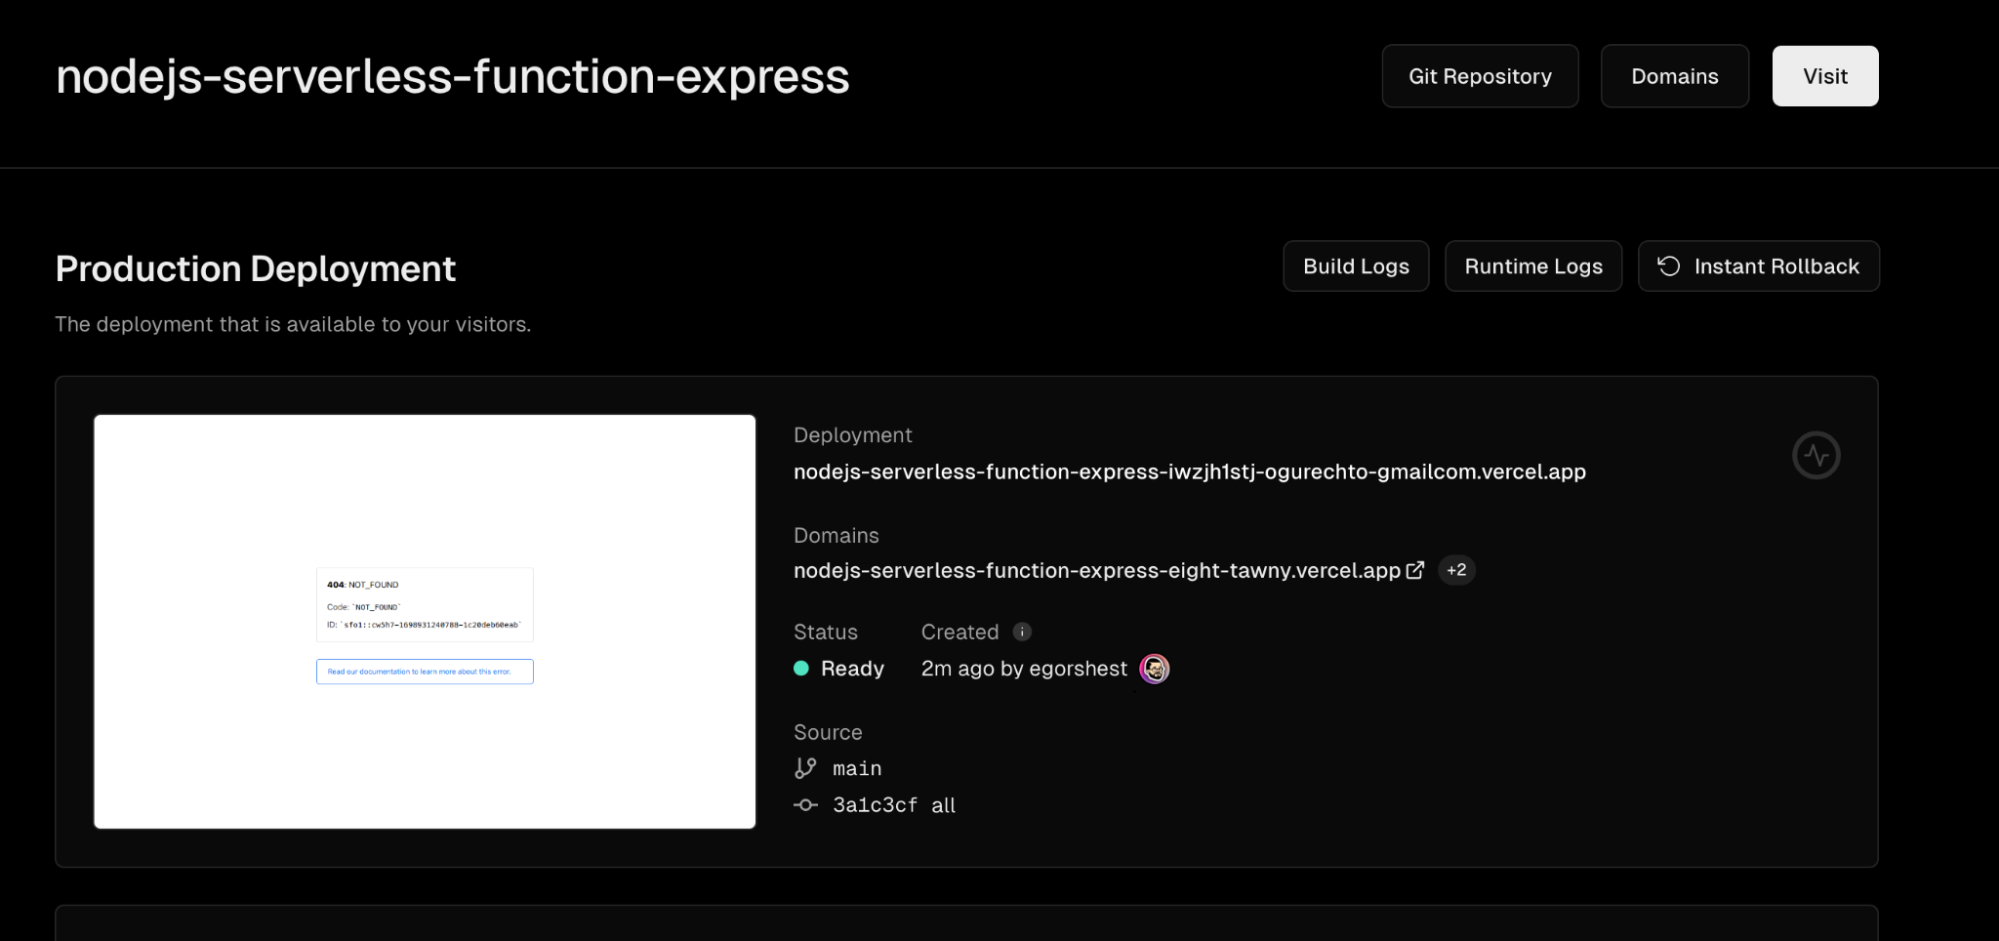
You can even visit the links and check your project. Don’t worry that the project displays a 404 error message — for now, it is ok.
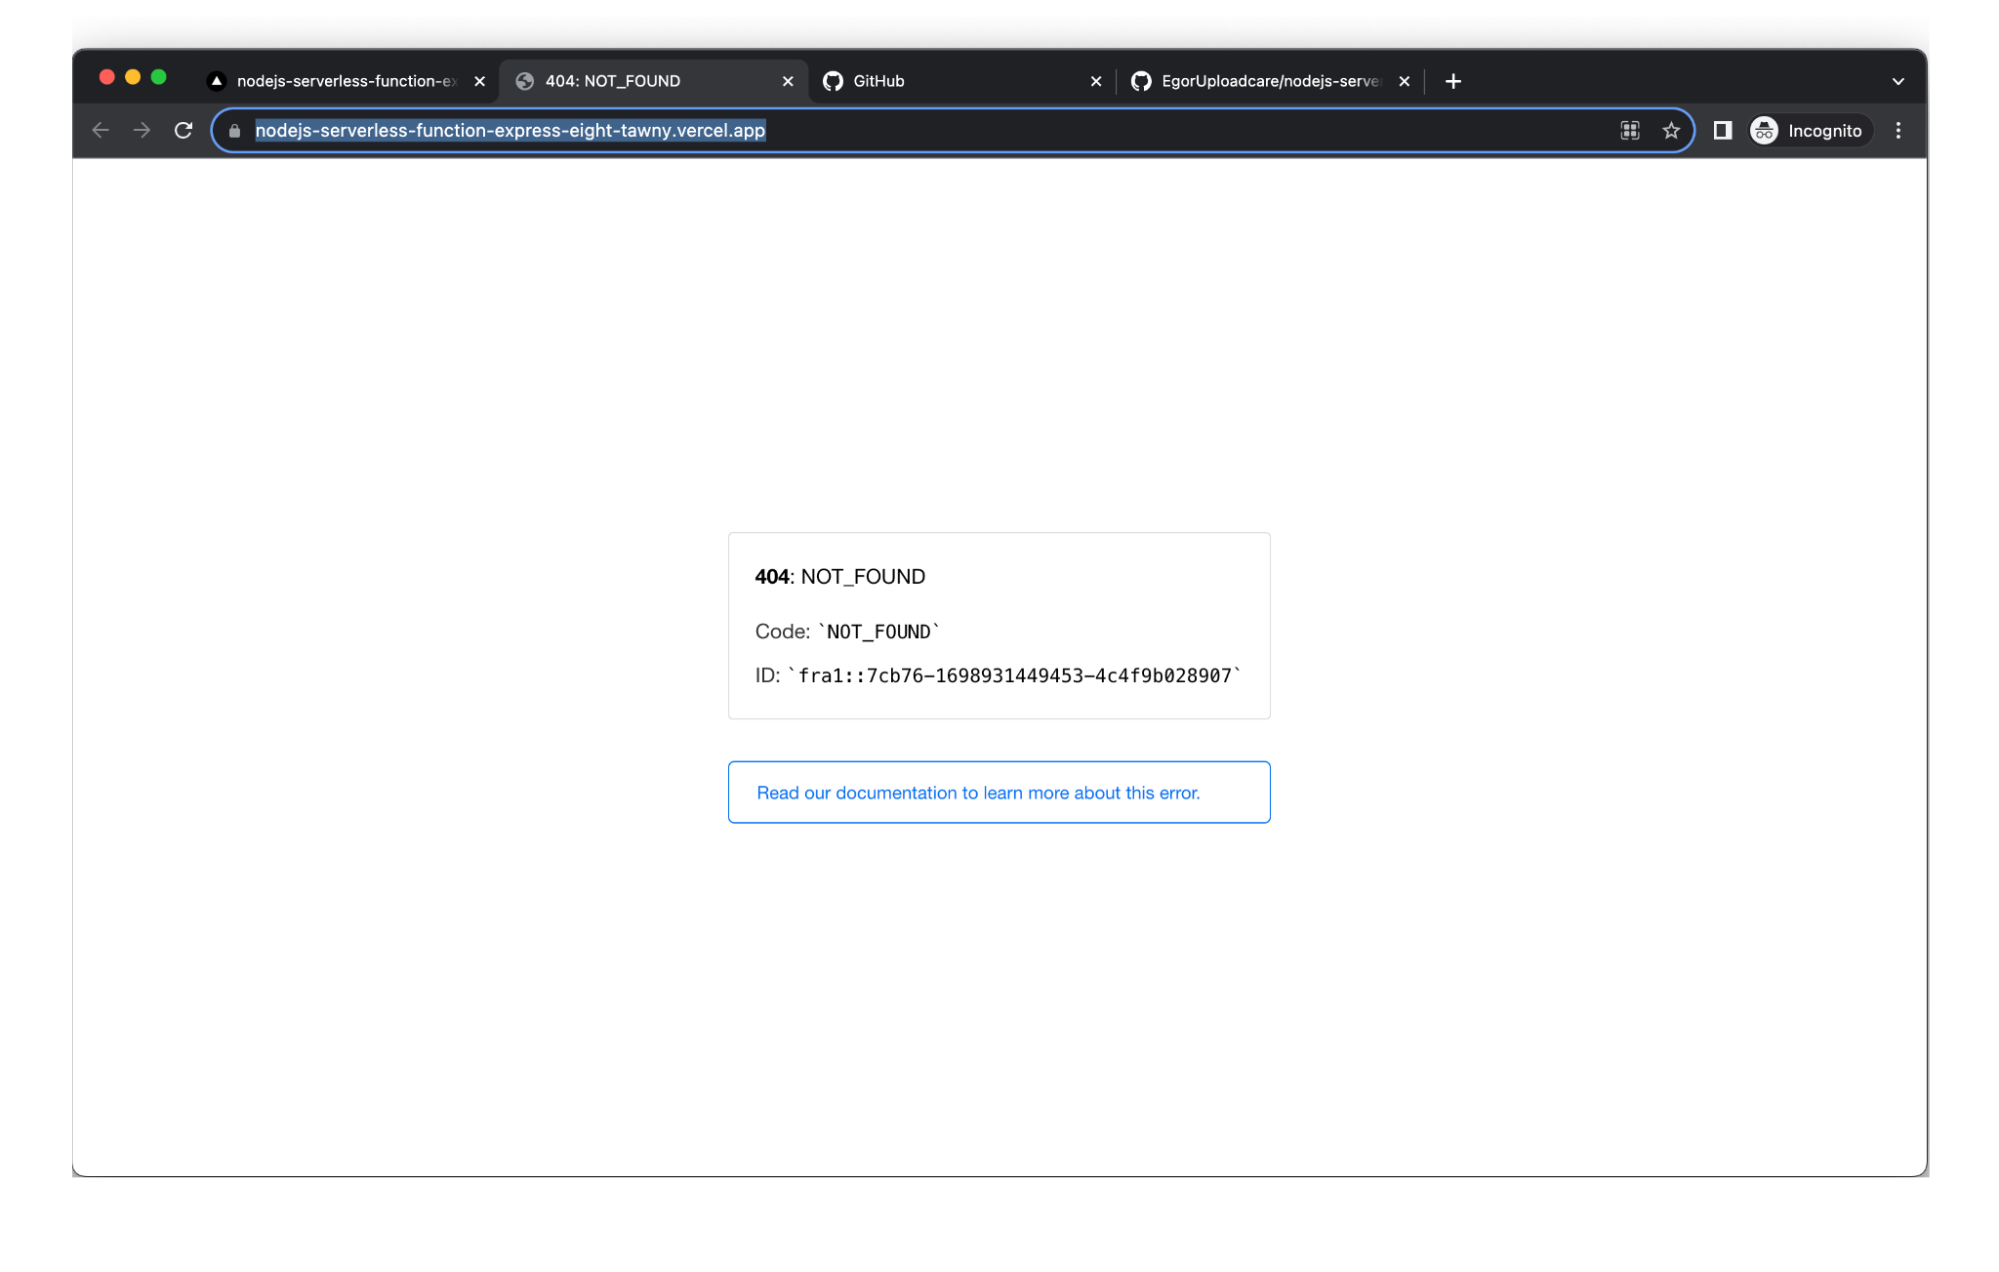
Now, it is time to check if our serverless signature generation works as expected. To check that, visit the endpoint or simply the URL leading to the signature generation function in your project. It should look like this:
https://nodejs-serverless-function-express-eight-tawny.vercel.app/api/generateSignature
The URL consists of two parts:
- your Vercel project address;
- the path to your serverless function (endpoint).
Accessing this URL will result in seeing something similar in your browser:

It means that everything is looking good so far and works as needed.
Setting up an Uploadcare project
Since our serverless function works, now is the right time to think about how to upload our files.
For that, let’s integrate Uploadcare into the project. Uploadcare is a hassle-free service that provides the ability to accept files and secure them. Uploadcare offers powerful features such as smart storage, efficient content delivery, and on-the-fly image optimization, all while ensuring that uploads are fast, reliable, and, most importantly, secure. The integration process itself is a cinch, often requiring minimal code to get started.
Sign up for an Uploadcare account, follow the sign-up process, and verify your email to get started. After completing the registration process, you will find yourself inside your Uploadcare project.
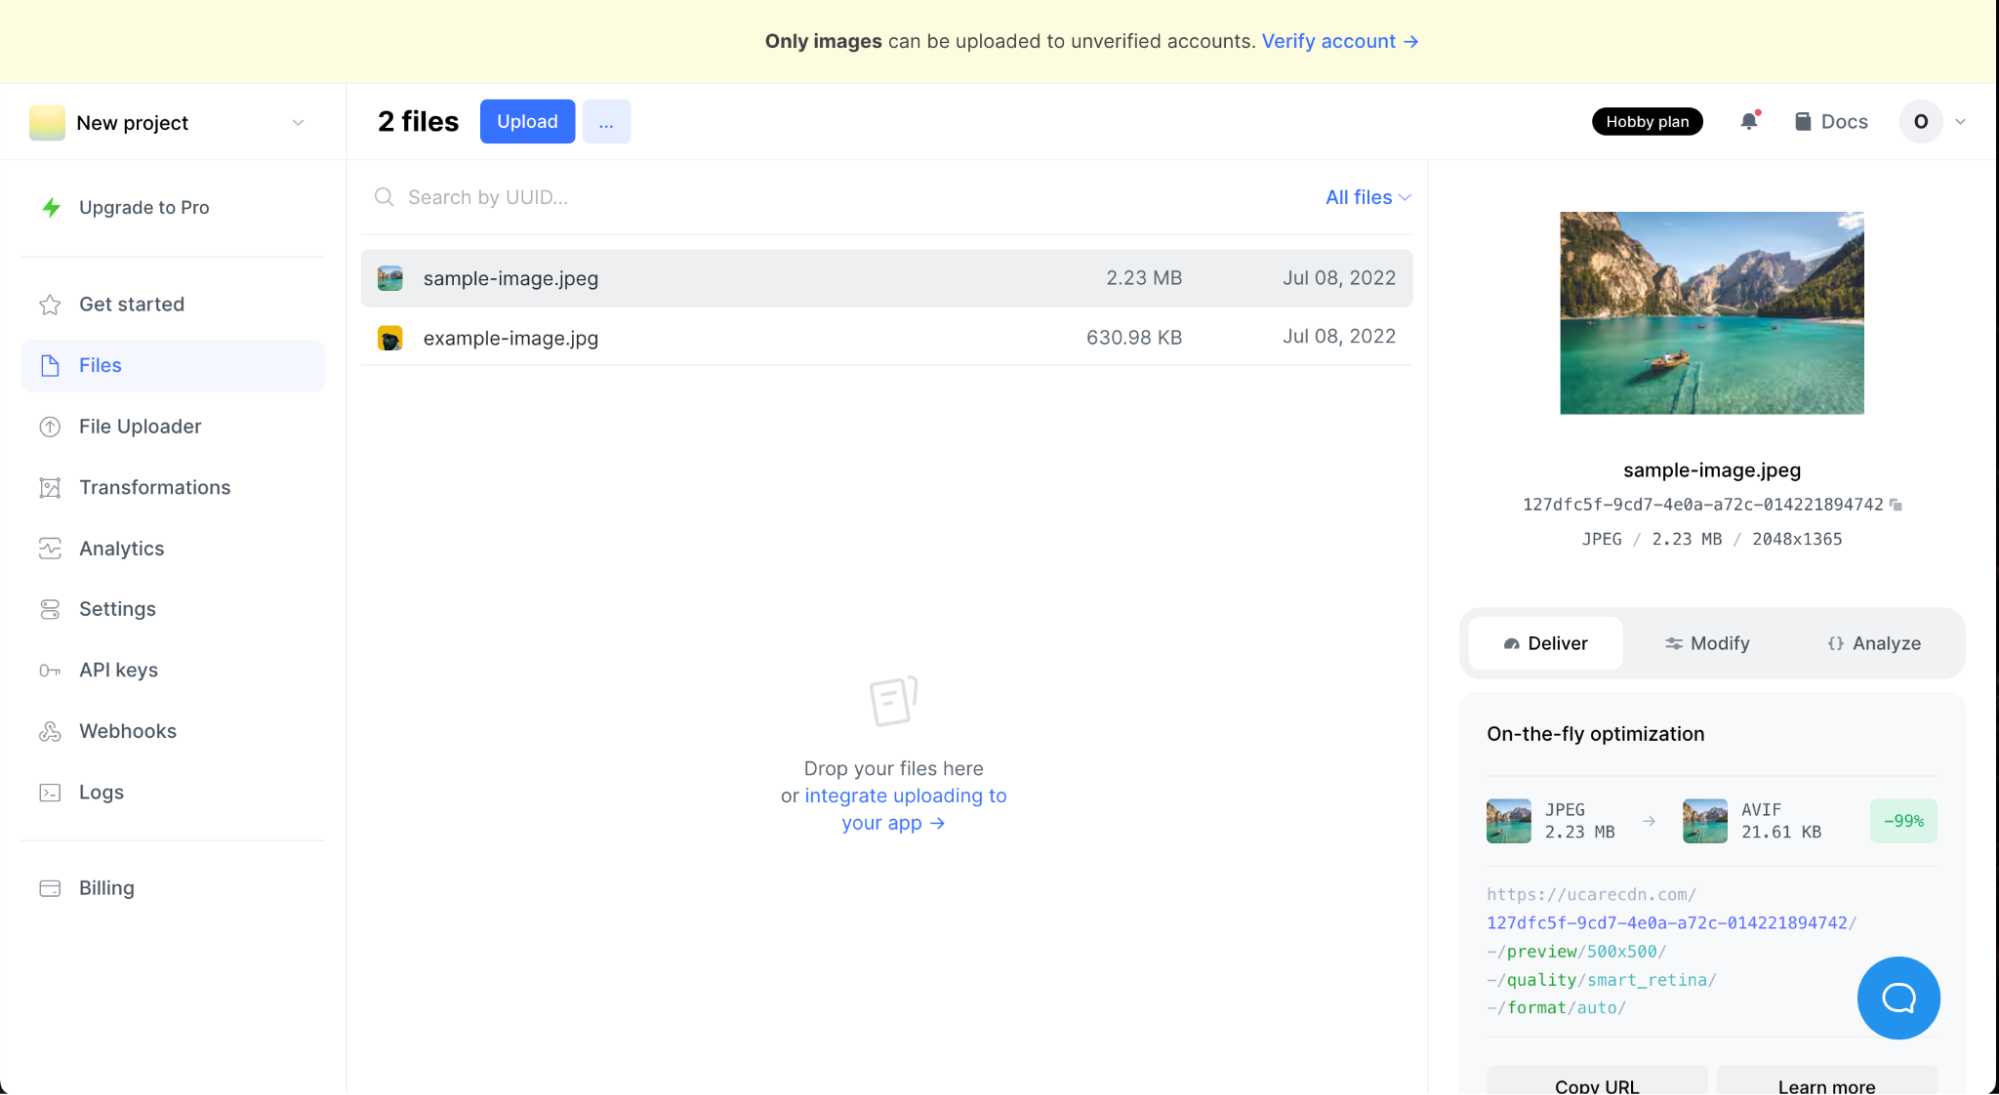
To securely accept images and different file formats (e.g., videos, documents, etc.), verify your account by clicking on the yellow banner above the dashboard. It takes you to the billing section of your profile. Your card is needed only to verify the account. Stripe charges and instantly refunds $1 to verify your card. There won’t be additional charges until you upgrade to a paid plan.
Once you have verified the account, return to the project inside your workspace. Click the Settings tab on the left menu, and inside the uploading section, scroll down to the Signed uploads toggle. Turning on signed uploads means that users without an Uploadcare signature couldn’t upload files to this project. To dive deeper into how signed uploads work, check out the docs.
Generating an Uploadcare secure key
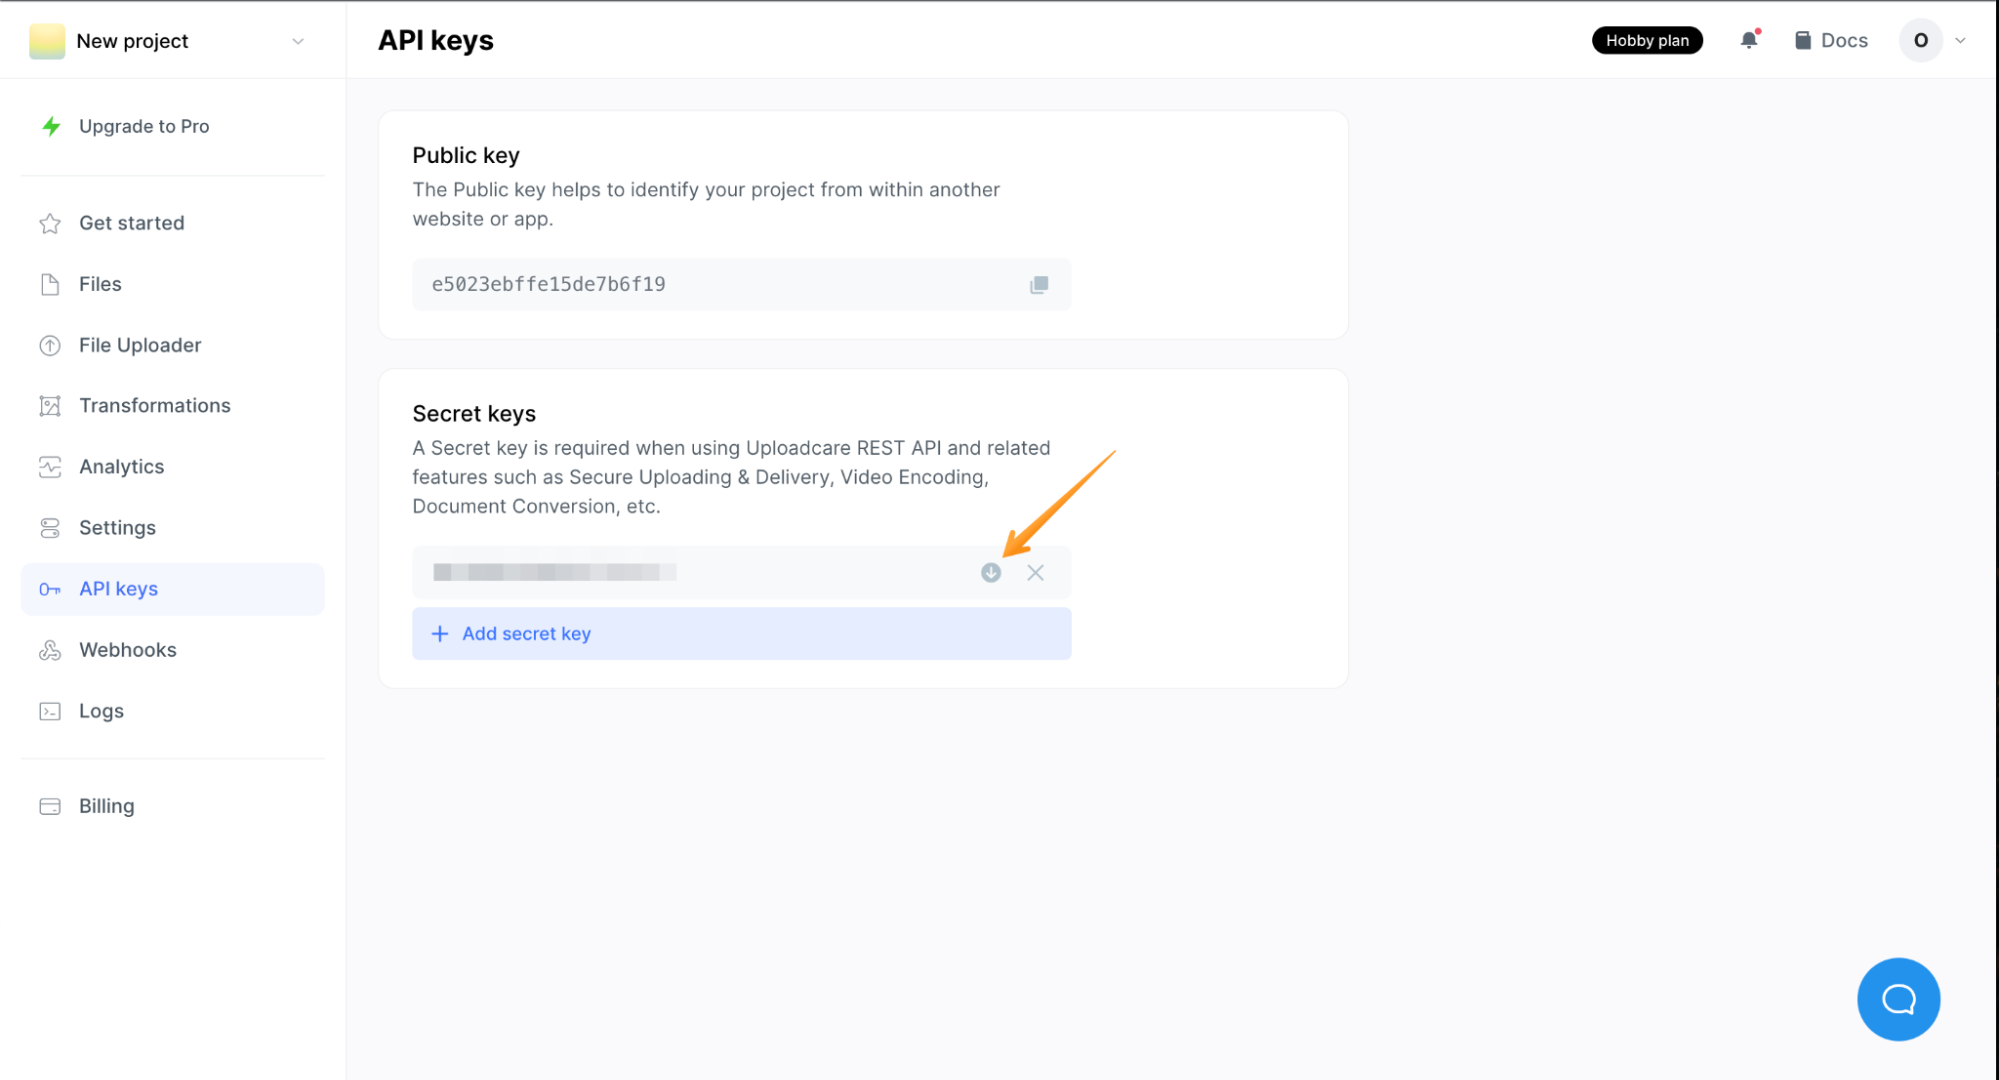
Now let’s get a secure API key that will be used as a handshake to allow our serverless function to generate a signature and enable the upload process.
Navigate to the API keys section of the dashboard and press Add a secret key button. Download or copy your secret key to another document because you will need it in the next step.
Adding the Uploadcare secret key to Vercel
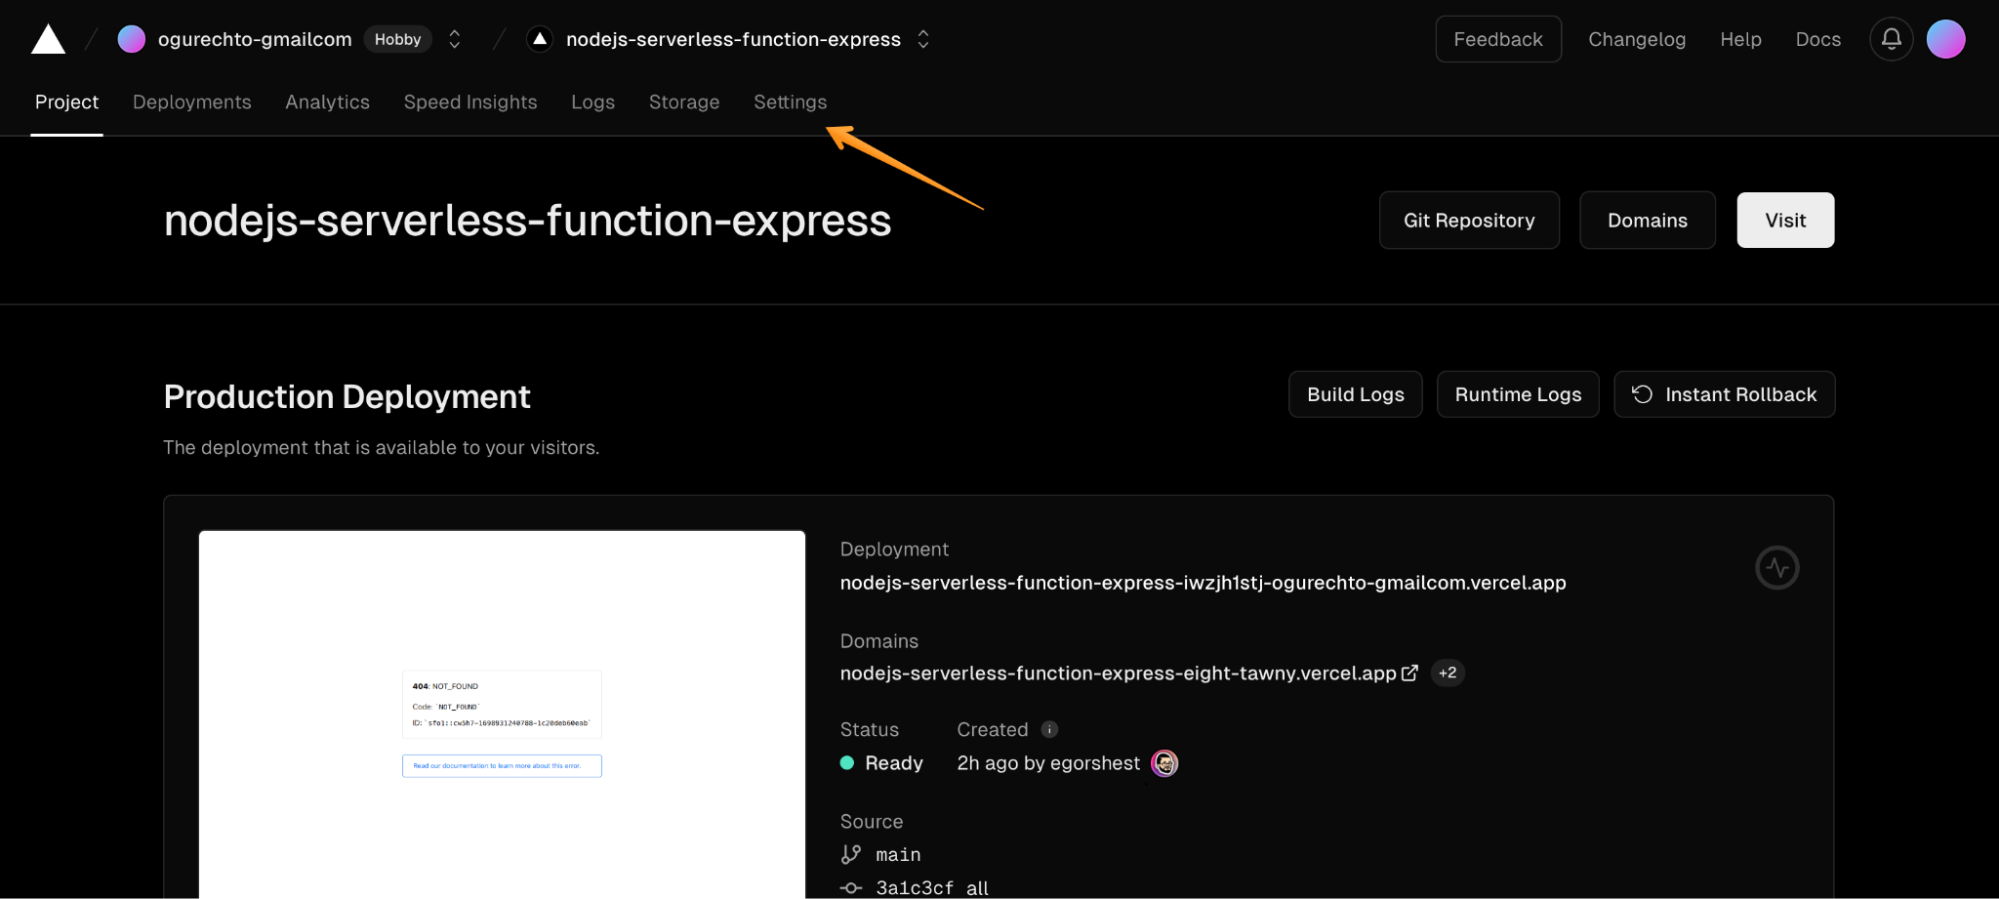
Navigate to your Vercel project and click on the Settings tab.
Inside your project settings, click on the Environment Variables tab in the left menu.
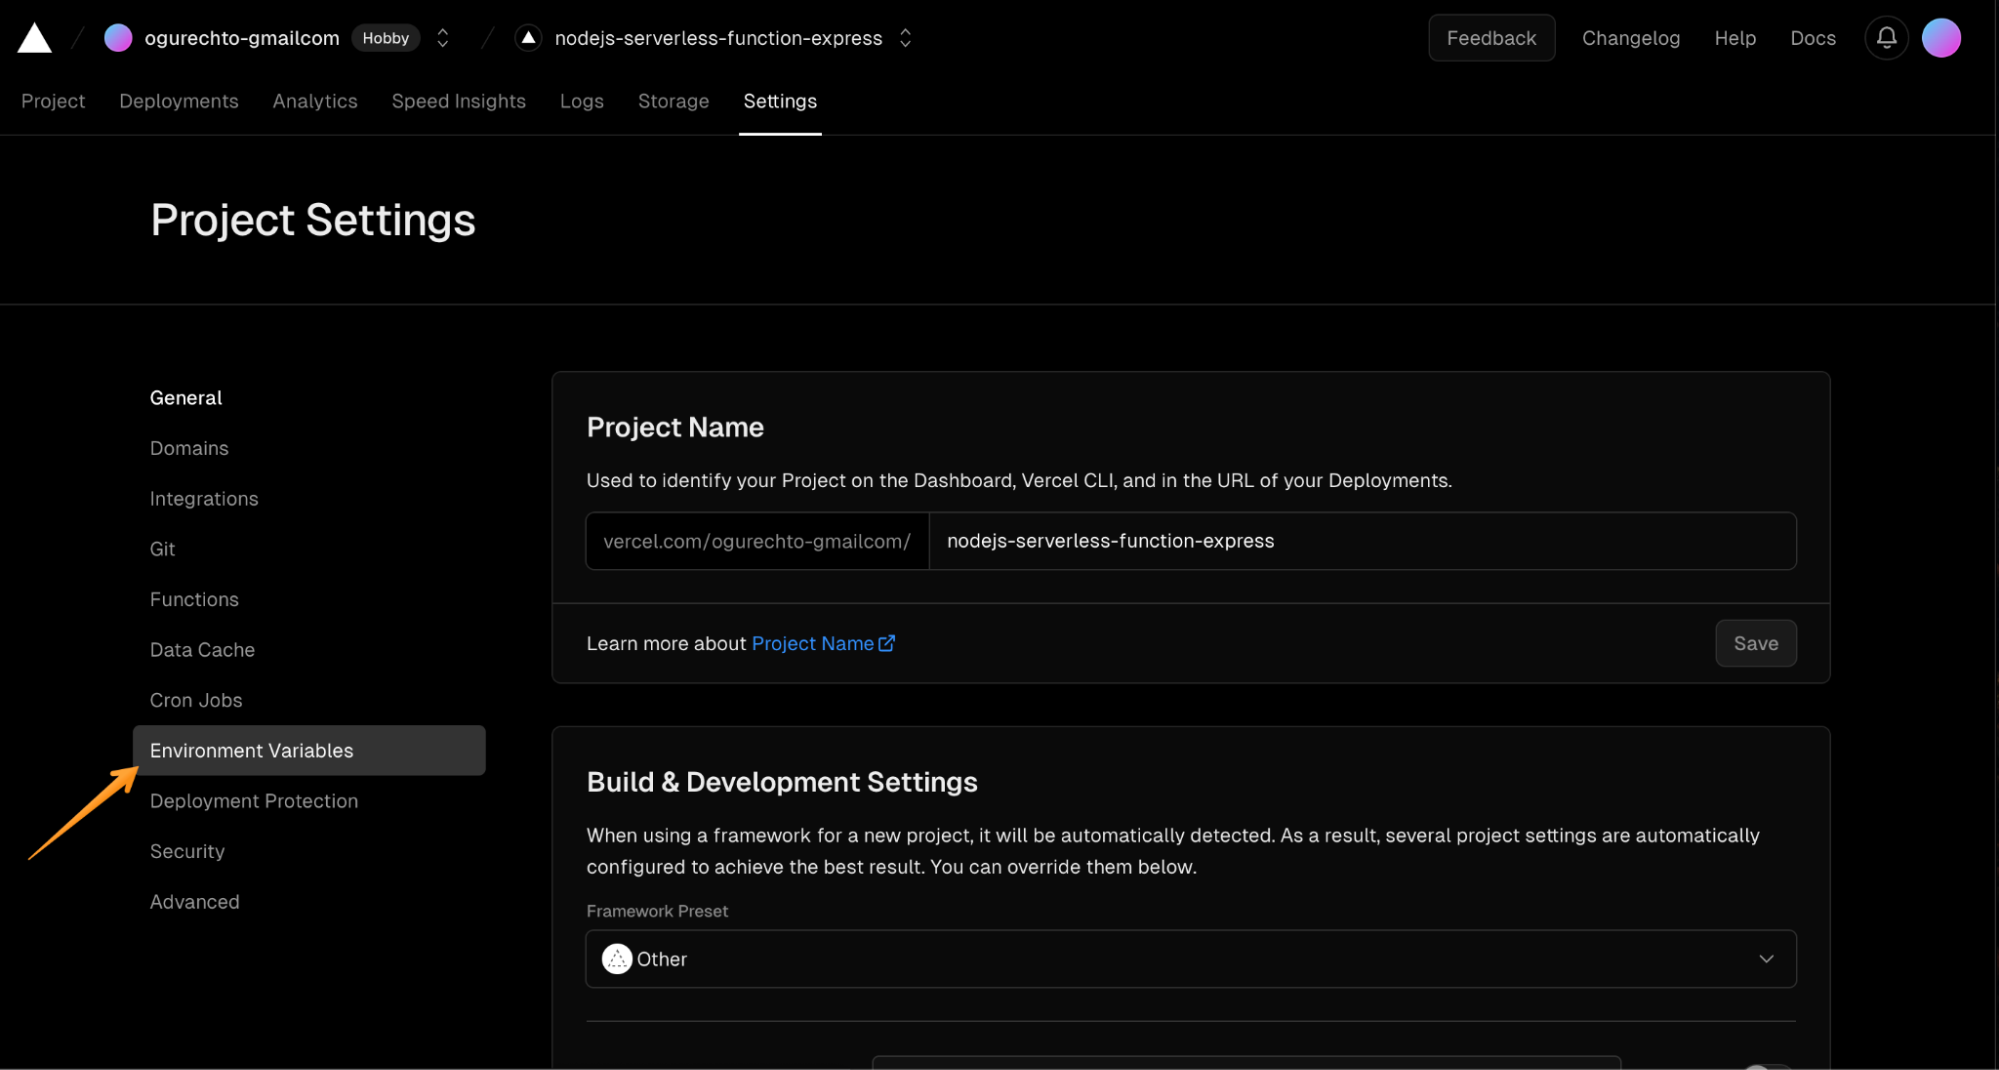
An interface allows you to add Uploadcare secret key as an environment variable.
- In the left column, write the name of the variable that should be
UPLOADCARE_SECRET_KEY. - In the right column, paste the Uploadcare secret key you generated and saved in the previous step.

After saving the environment variable, you can see it added on the bottom of the page.

After setting up our Uploadcare environment variable, we need to redeploy the Vercel project to make the environment variable assign the correct value to our serverless generateSignature function.
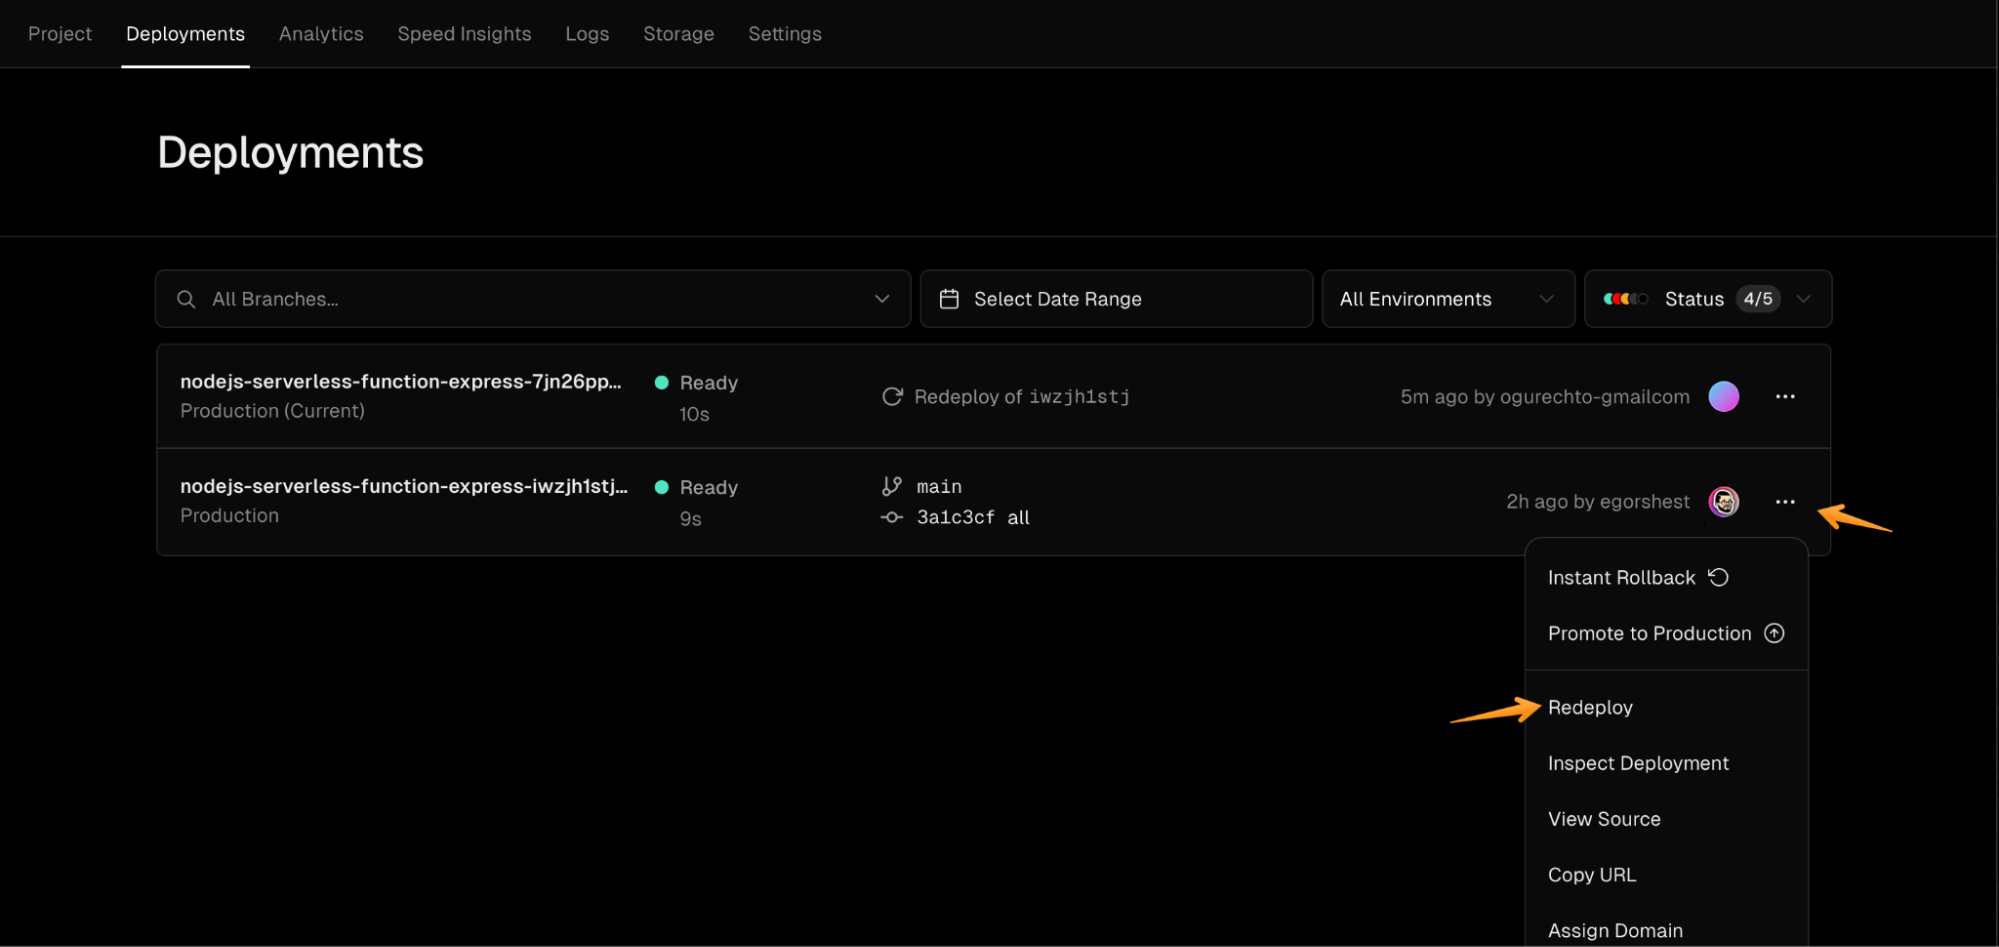
For that, click the Deployments tab of your Vercel project.
Now, you can see the list of your project deployments. On your last deployment, click the options button. It opens a dropdown with actions you can do with this deployment. Press the Redeploy button and wait a couple of seconds.
Let’s check if the function reads the environment variable and works as intended. To check that, visit once again your function endpoint.
It will show that your serverless function generates two new values that we will use to pass with every upload: signature and expire.

Now, let’s move forward to the most exciting part: integrating the file uploader with signed uploads.
Integrating signed uploads with a file uploader
With our serverless function in place, implementing a client-side solution for handling secure, signed uploads is the next step. Uploadcare offers a seamless experience here, with support for direct API uploads and user-friendly uploader widgets. No matter what technology stack you’re using, Uploadcare provides easy integration. It supports all the popular frontend frameworks, ensuring you can incorporate an upload client that fits perfectly with your setup. Check out the full range of supported technologies and integration guides.
In our example, we will use React to handle signed uploads. Similarly to our serverless function, we will run the uploader on Vercel.
To start, fork our pre-build React app template.
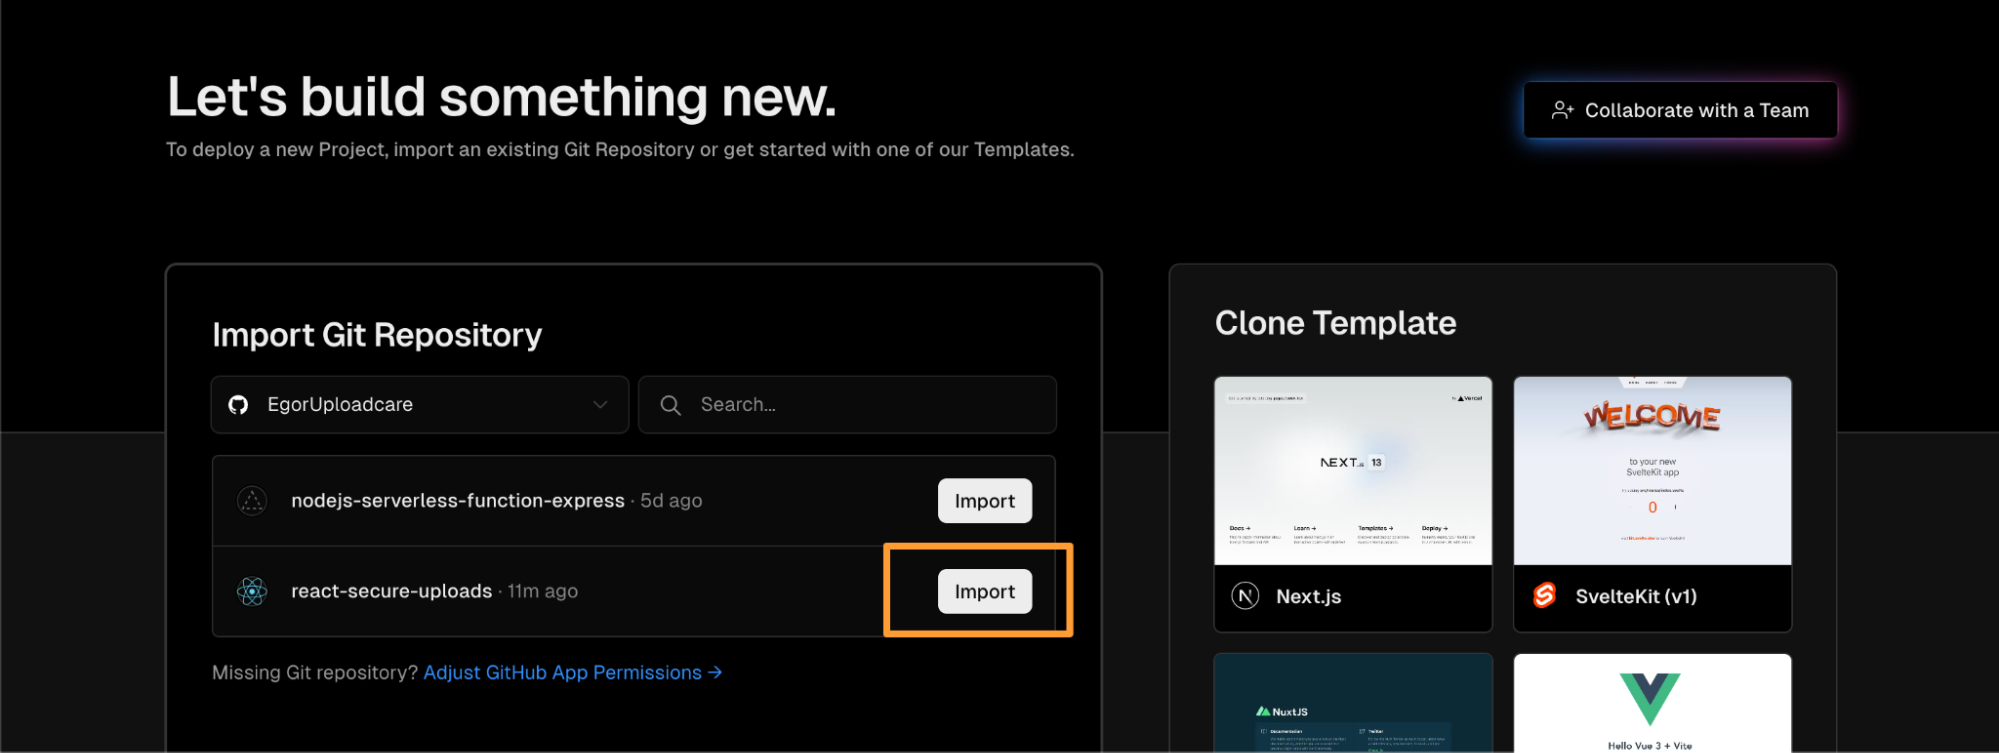
Then return to the Vercel dashboard and add a new project to deploy.
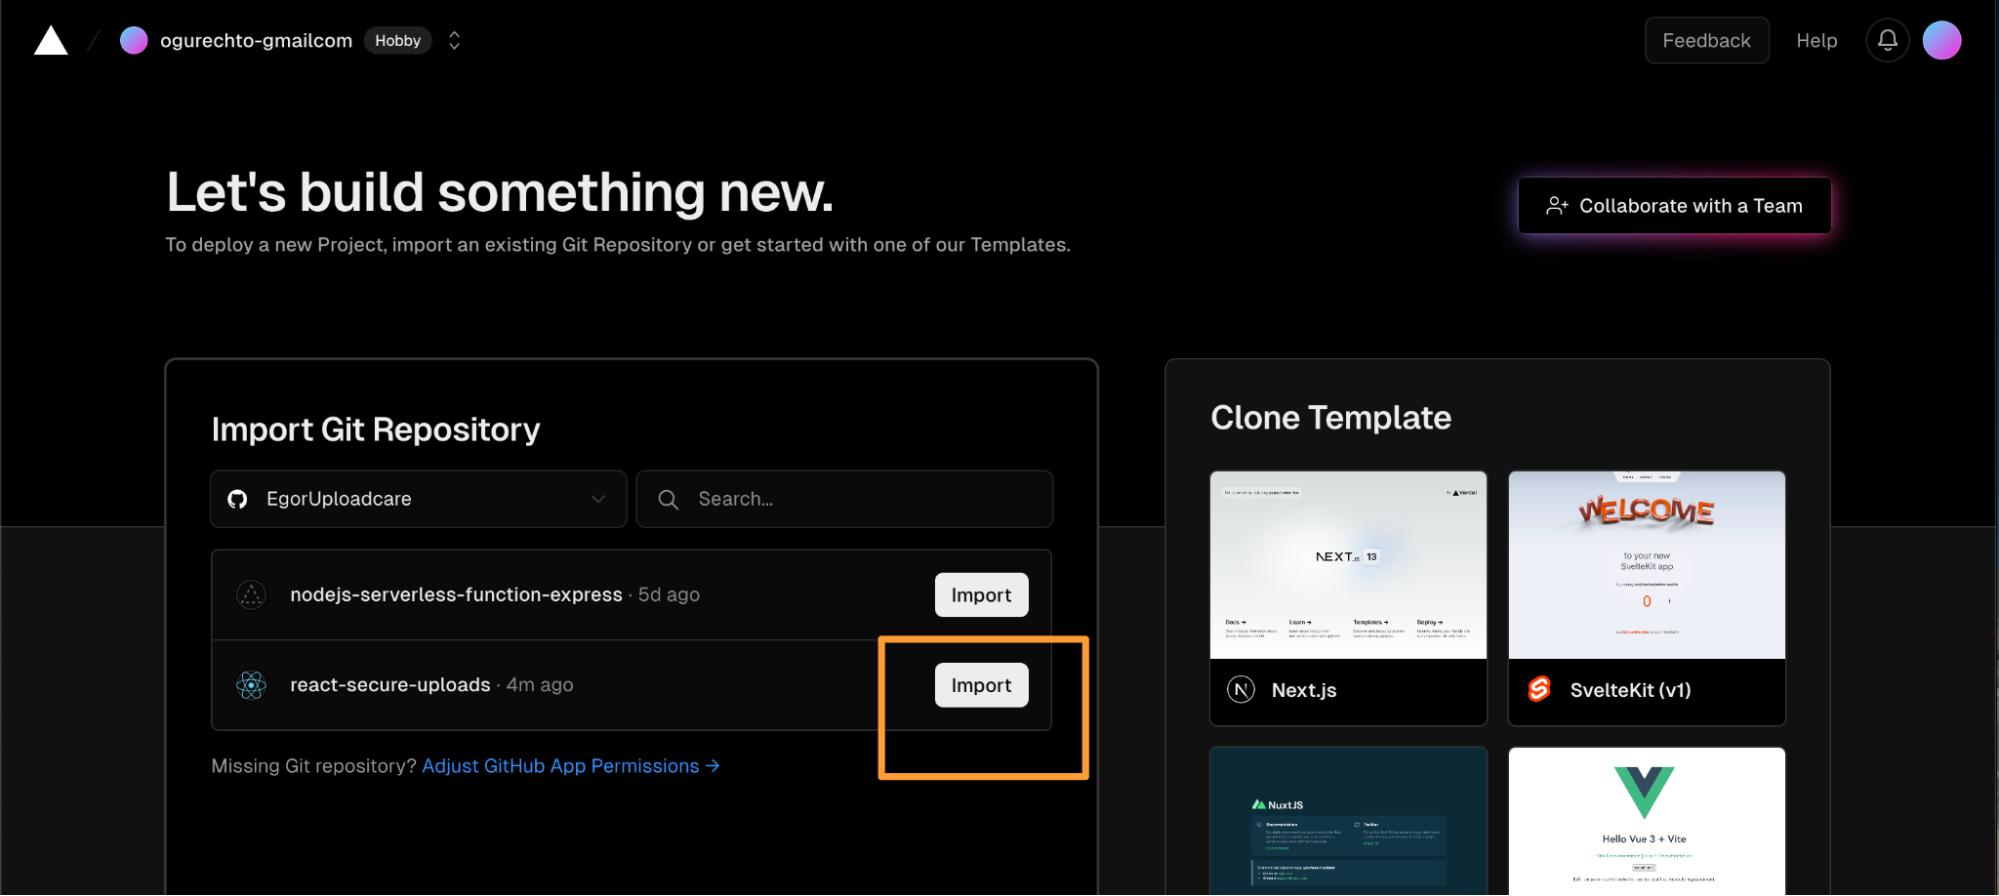
If you are missing react-secure-uploads in your Import Git Repository list, click Adjust GitHub App Permissions link.
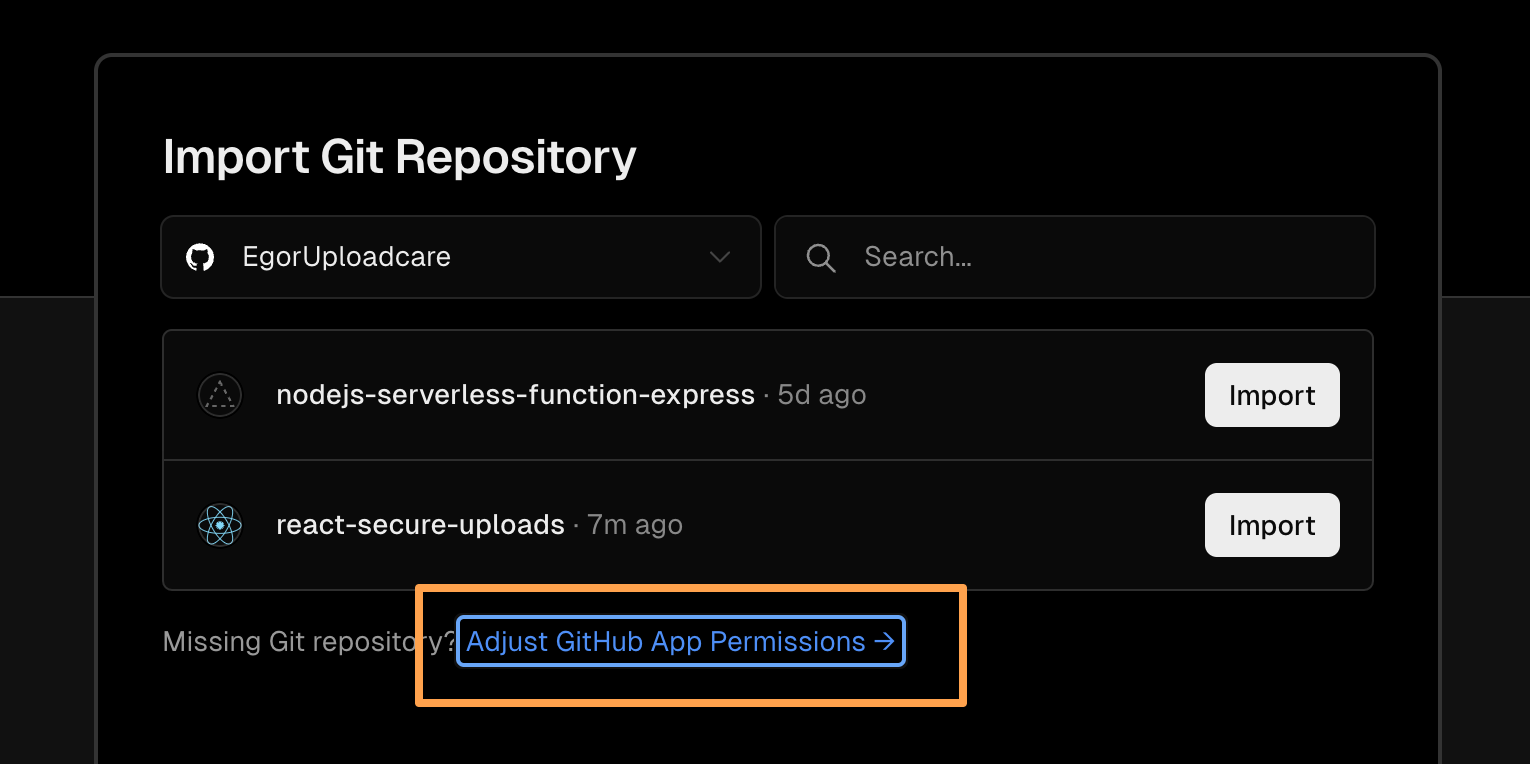
In the modal window, scroll down to the list of repositories that Vercel has access to and select the repository you’ve just forked. If everything is okay, you will see your repository list updated.
Now, let’s import the uploader repository to Vercel.
Without changing any settings, press the Deploy button.
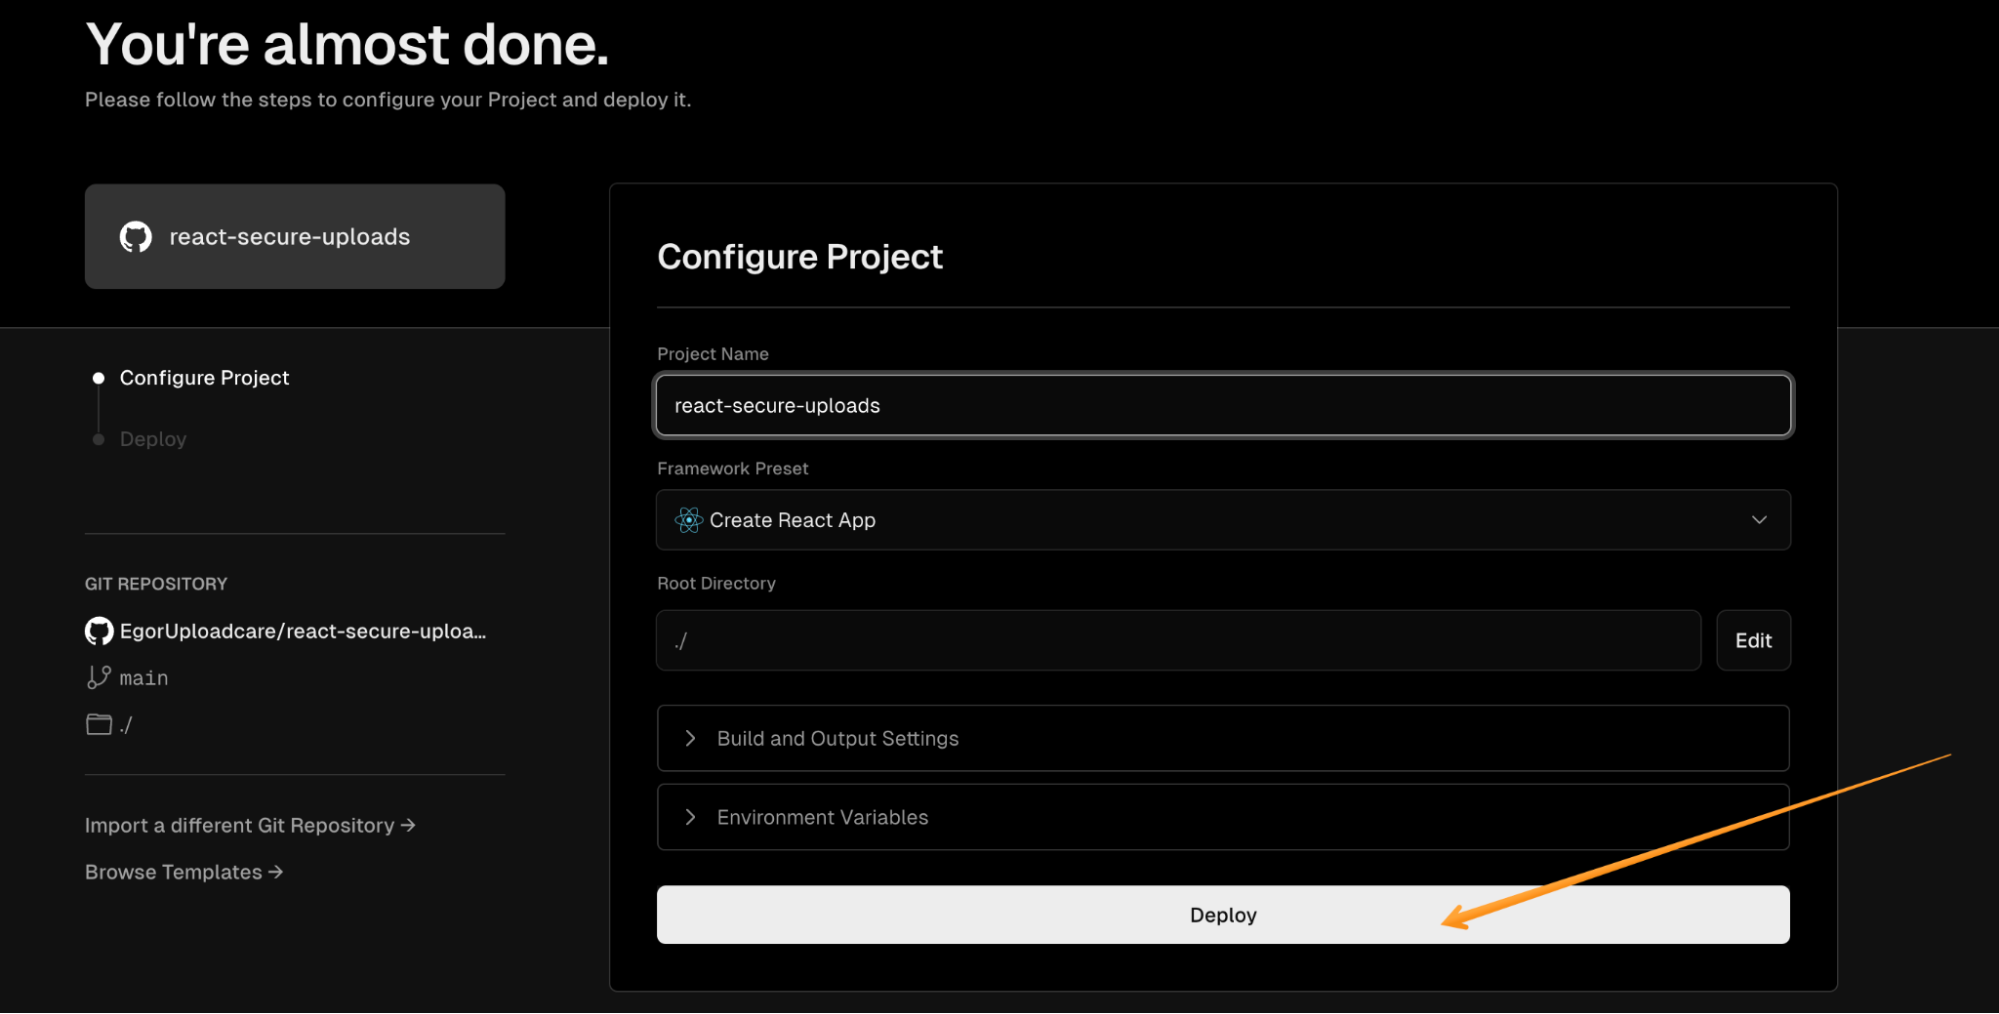
Great! Now, we have a newly deployed Vercel project.
Setting up Uploadcare uploader widget
Only the final step remains when our React project is deployed: connecting Uploadcare widget to our signature generation function and the Uploadcare project.
To do that, navigate to your project settings on the left menu and copy the Uploadcare Public Key.

Insert this key into the React app. Open your GitHub repository and navigate to the src folder.
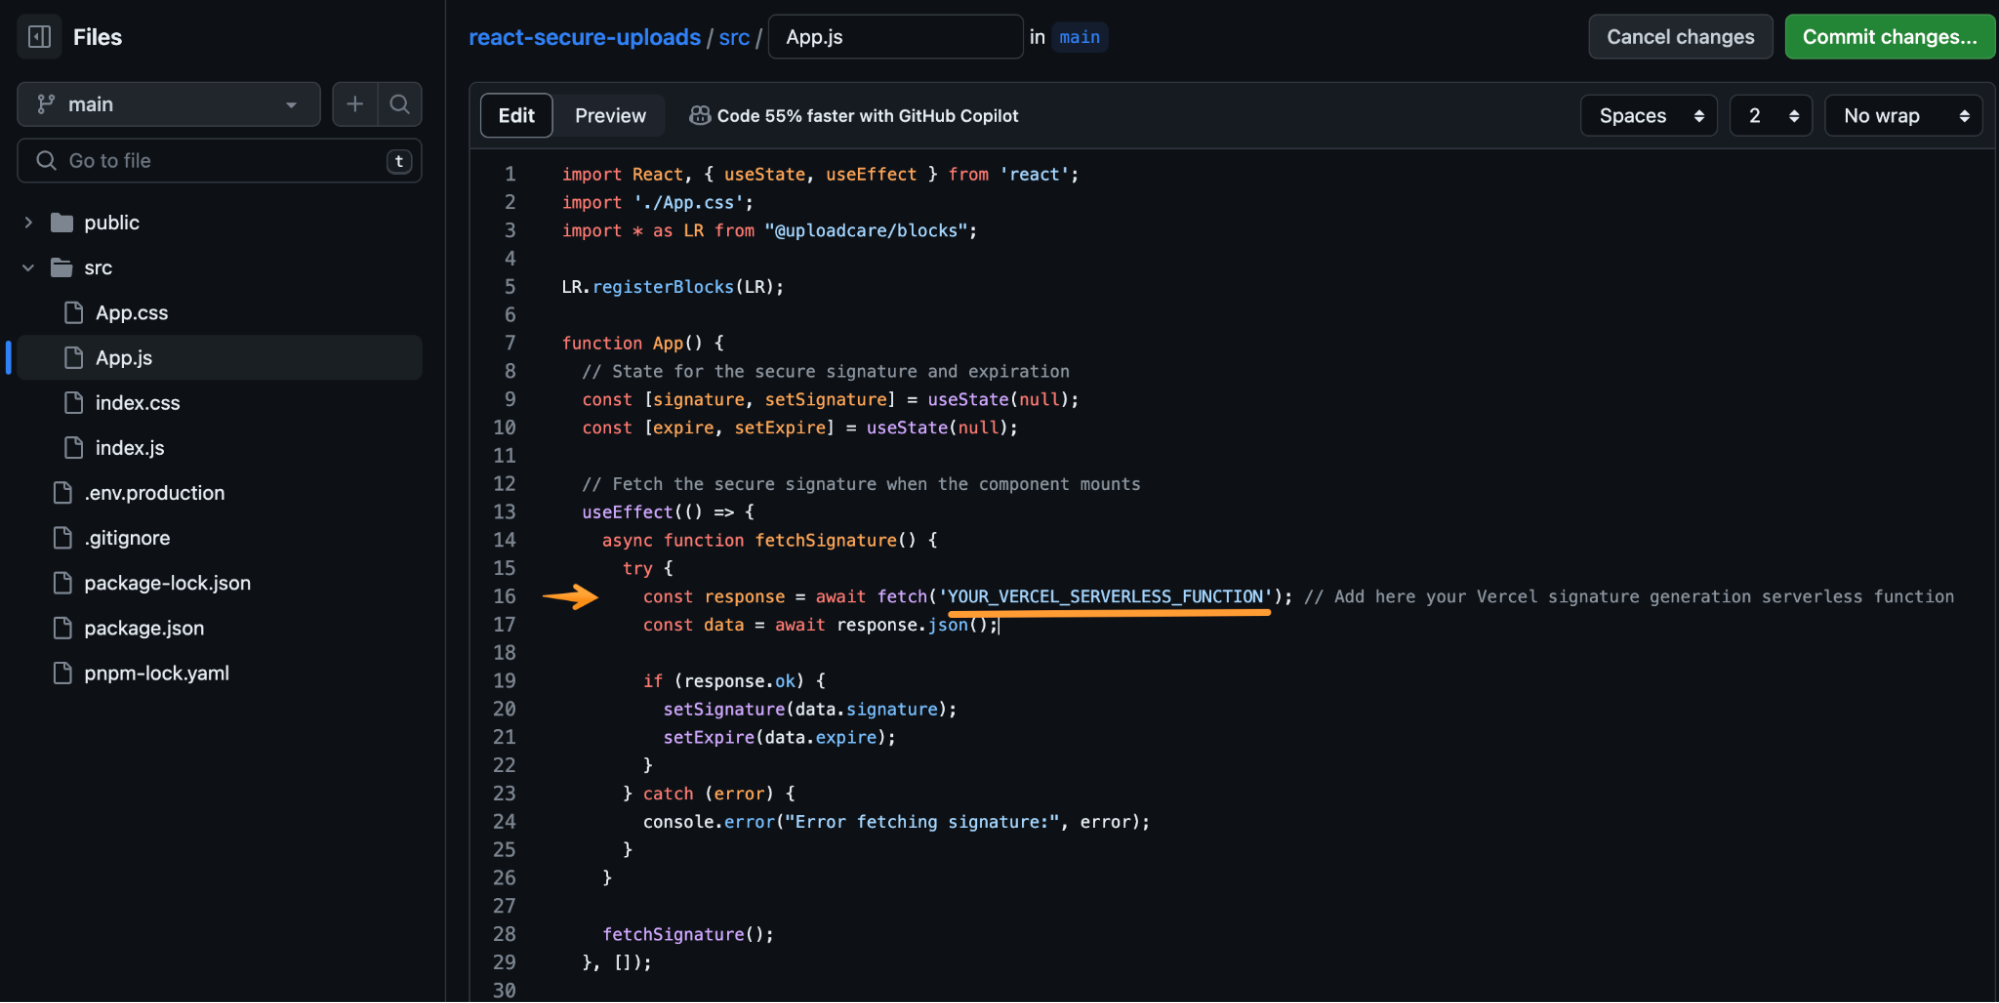
Open an App.js file and find YOUR_VERCEL_SERVERLESS_FUNCTION (on the 16th line of code).
There, you should insert your GenerateSignature serverless function full URL.
It allows the Uploader to get the signature and expire variables to sign the upload.
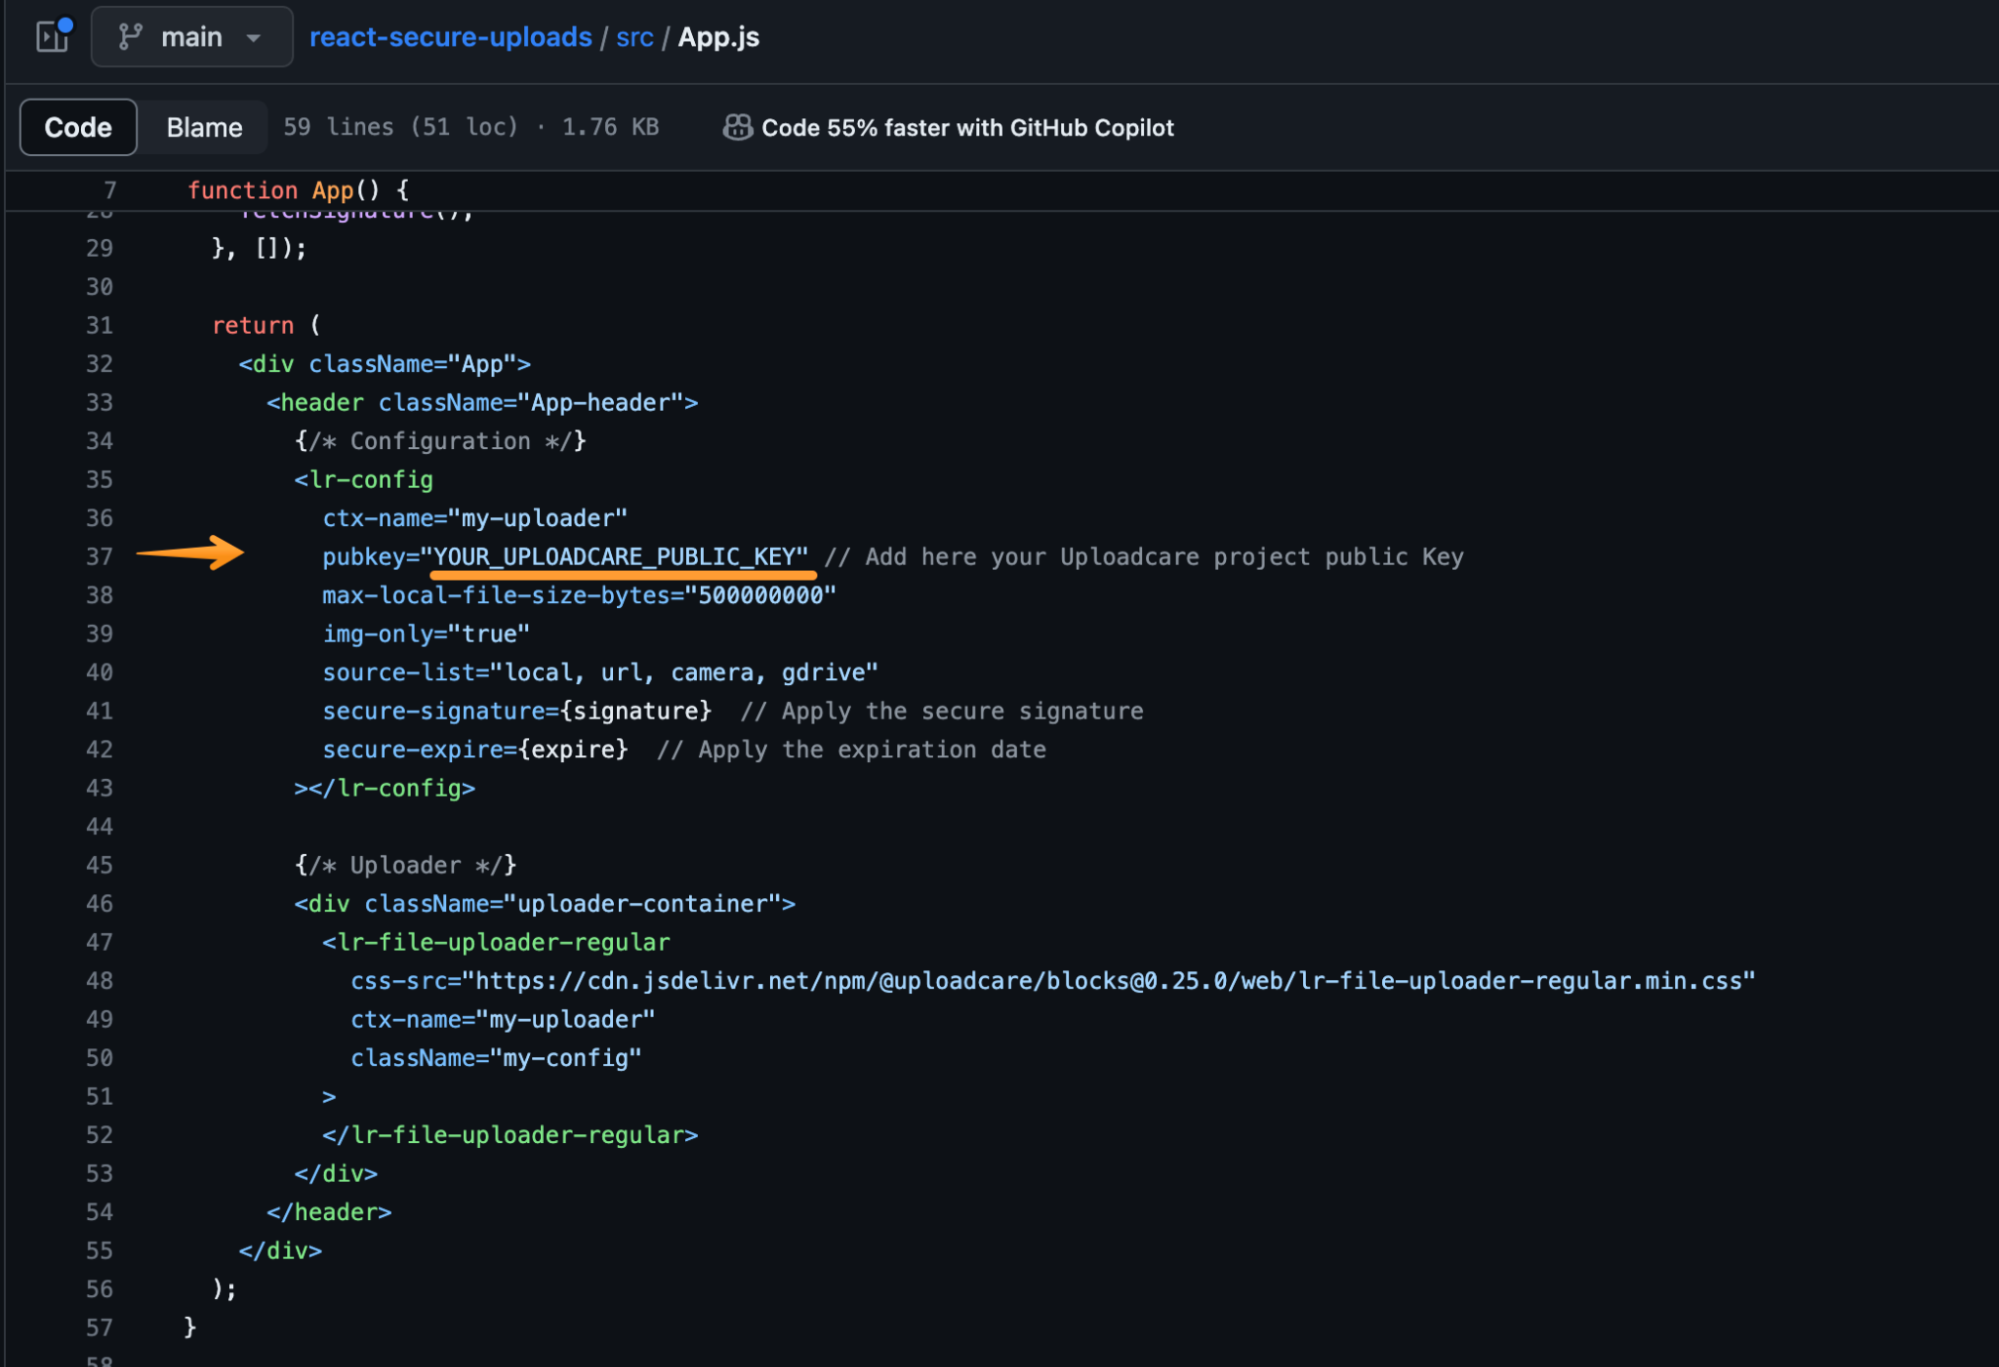
Now, let’s add our Uploadcare Public Key to the same file.
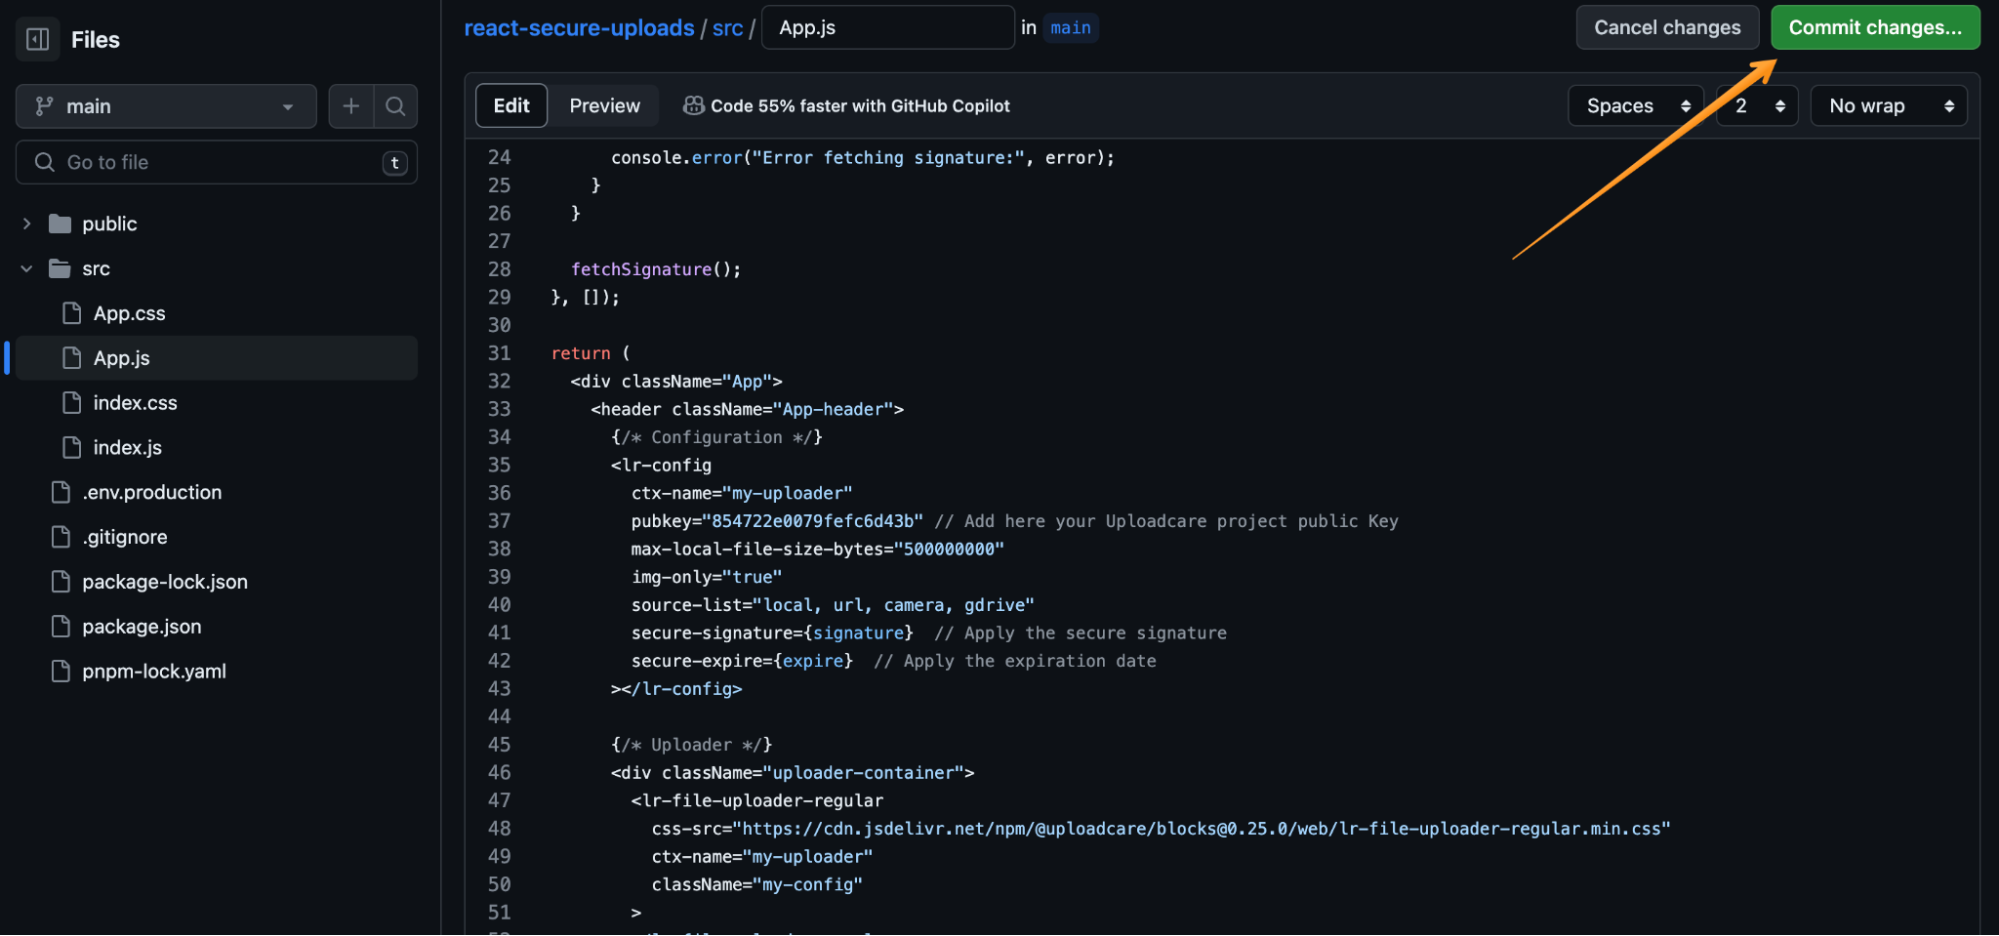
Scroll down to the 37th line and replace the YOUR_UPLOADCARE_PUBLIC_KEY placeholder with the real one.
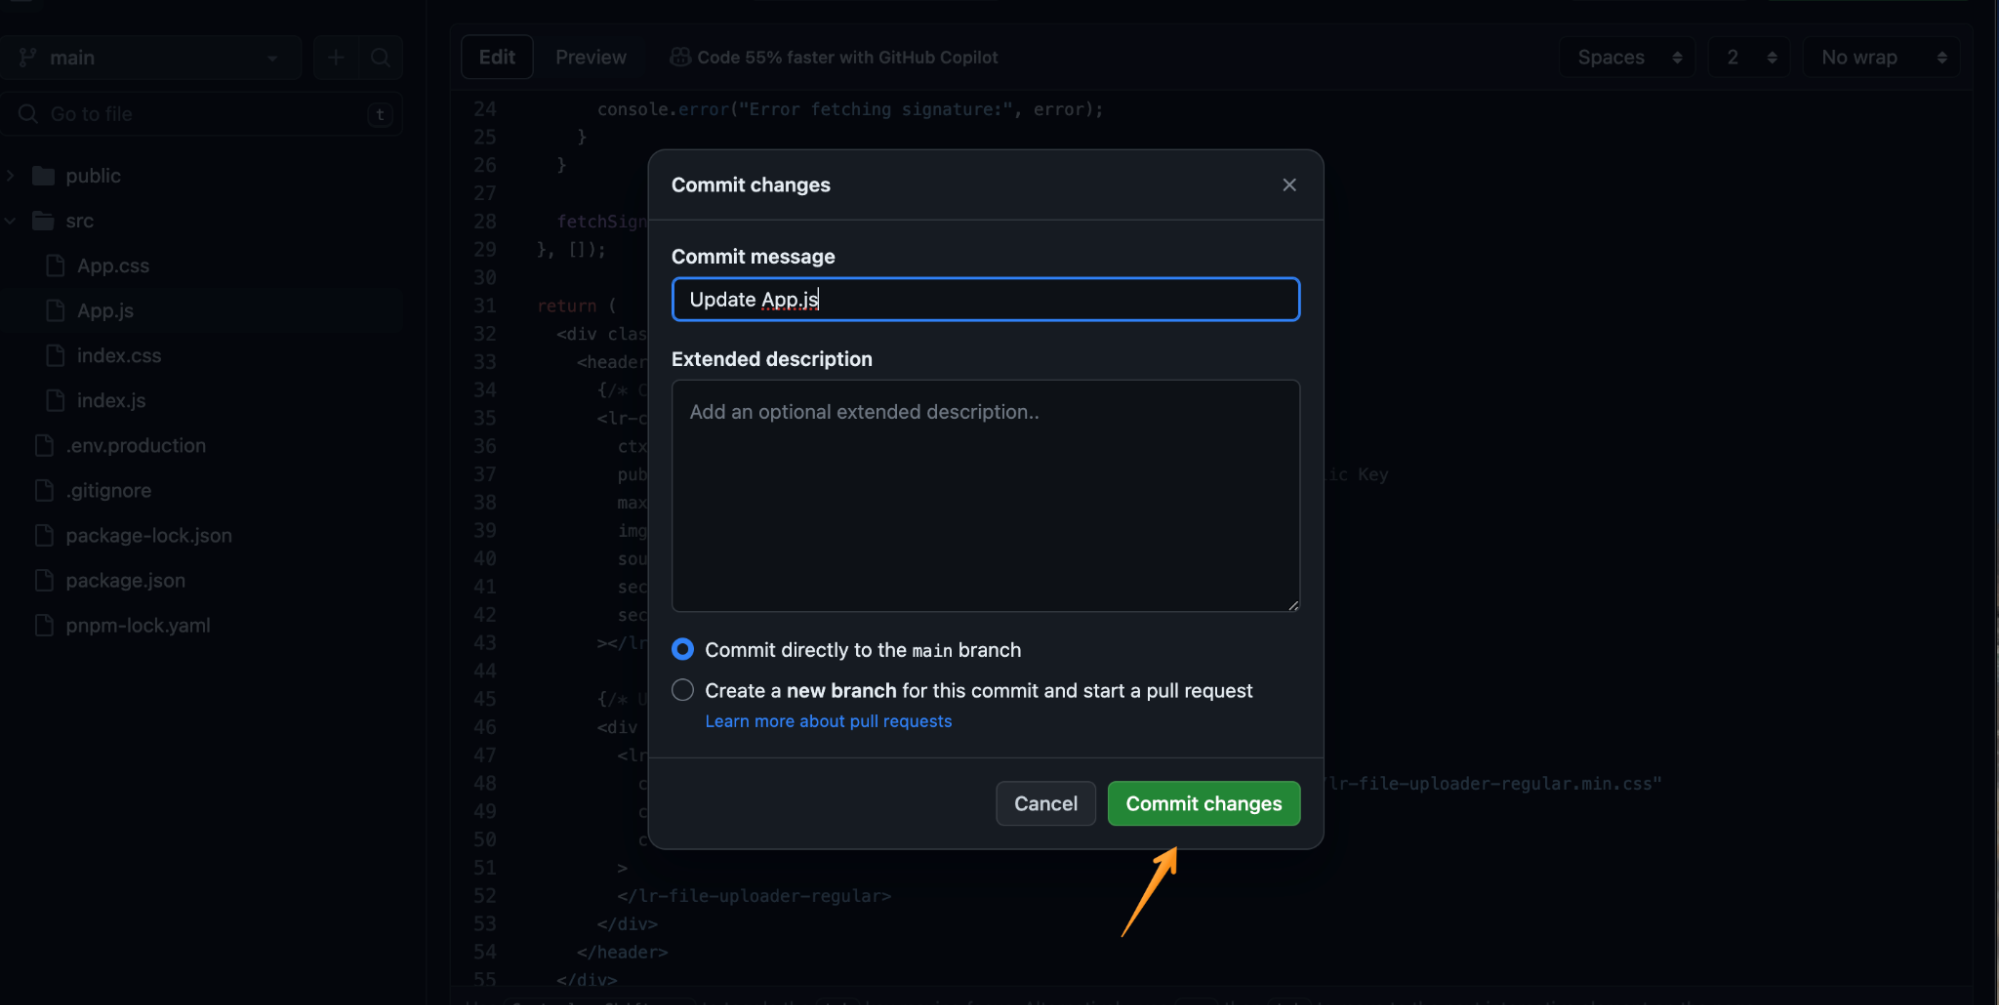
Now, press the Commit changes button to save the changes in your GitHub repository and provide the updated version to Vercel.
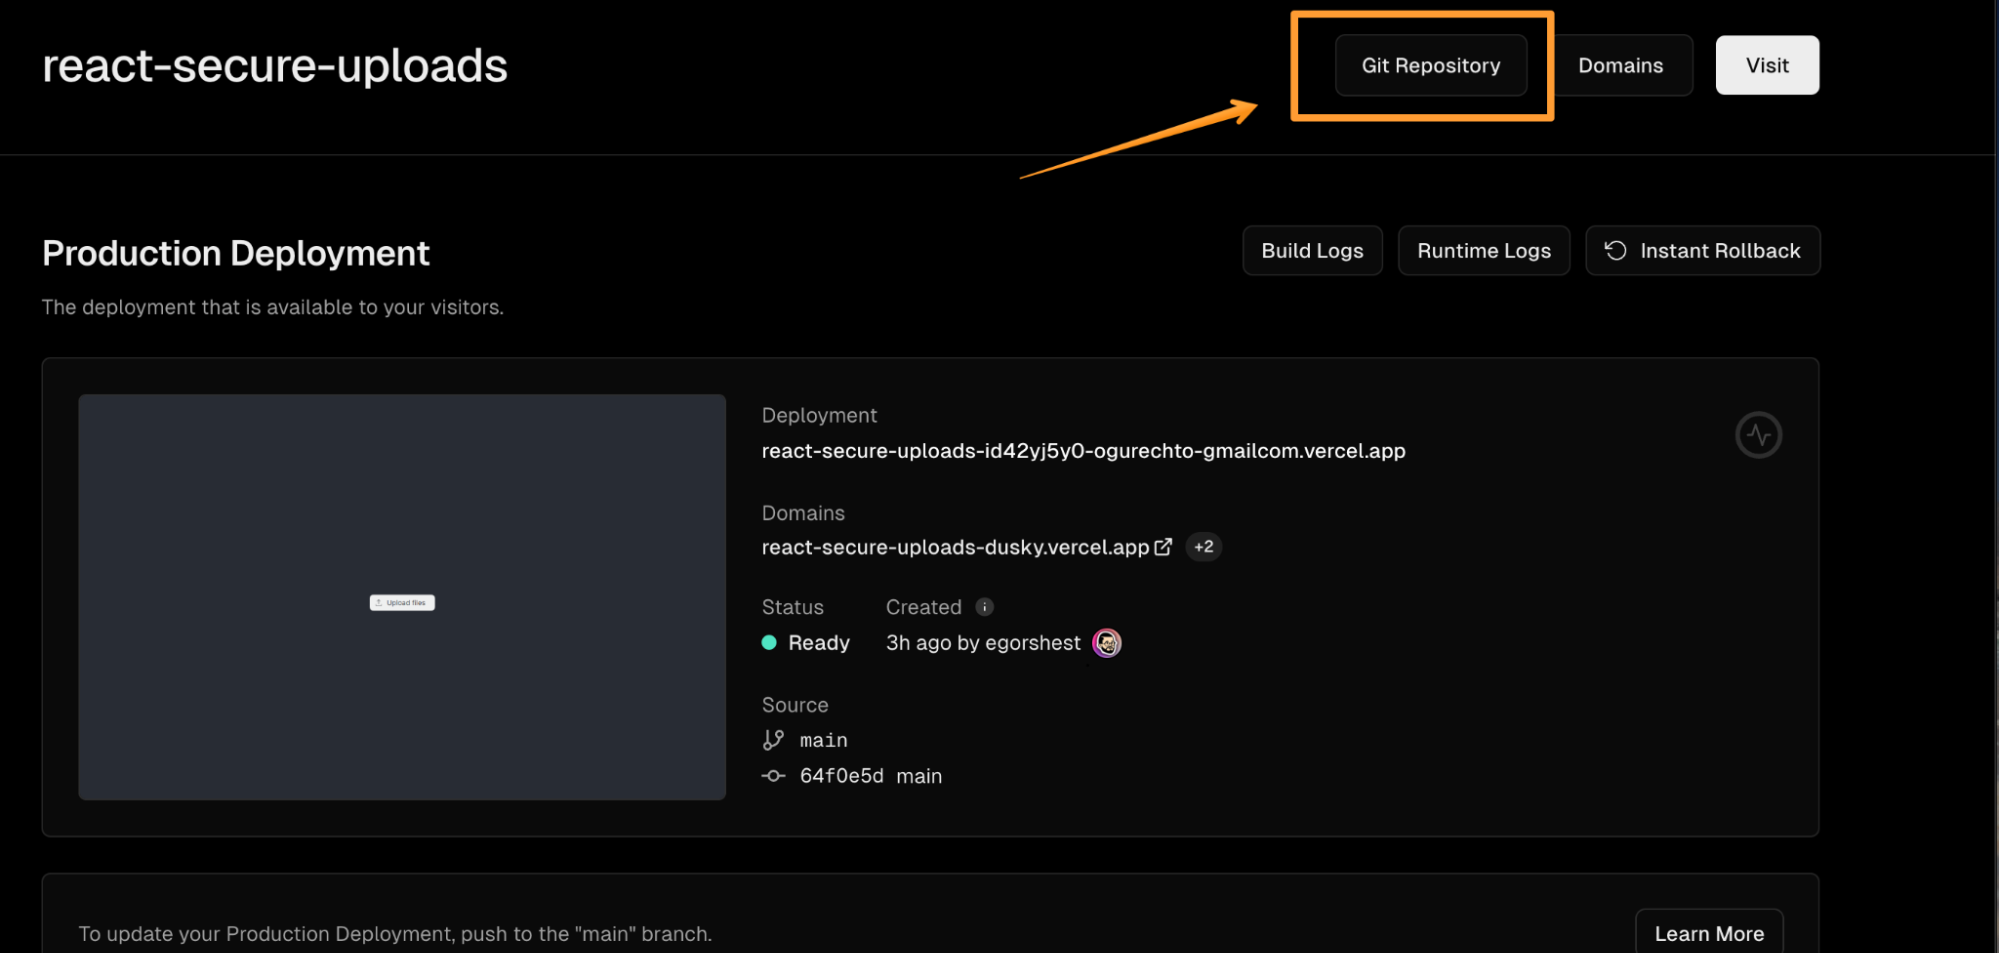
Navigate to the Vercel react-secure-uploads project to ensure your changes are prepared to go public.
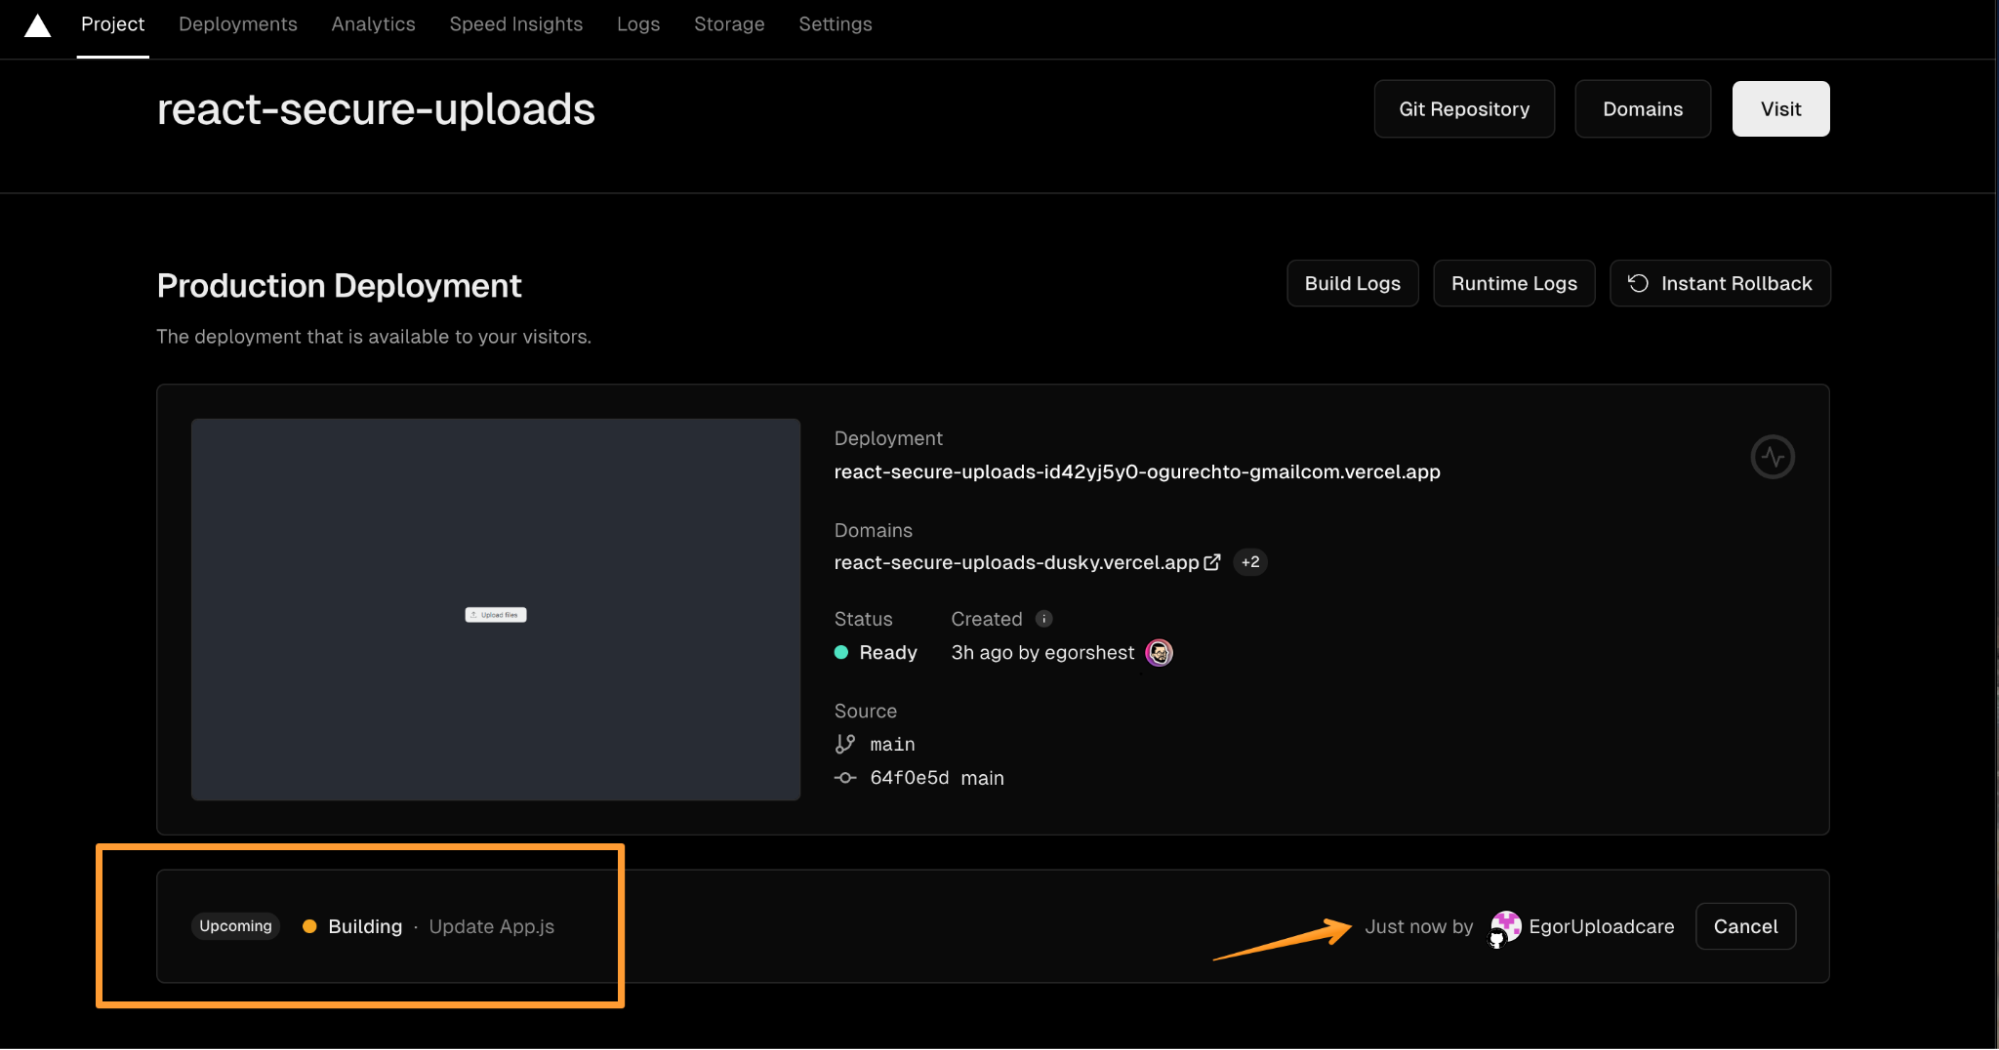
Wait a minute until the status of your project is ready.
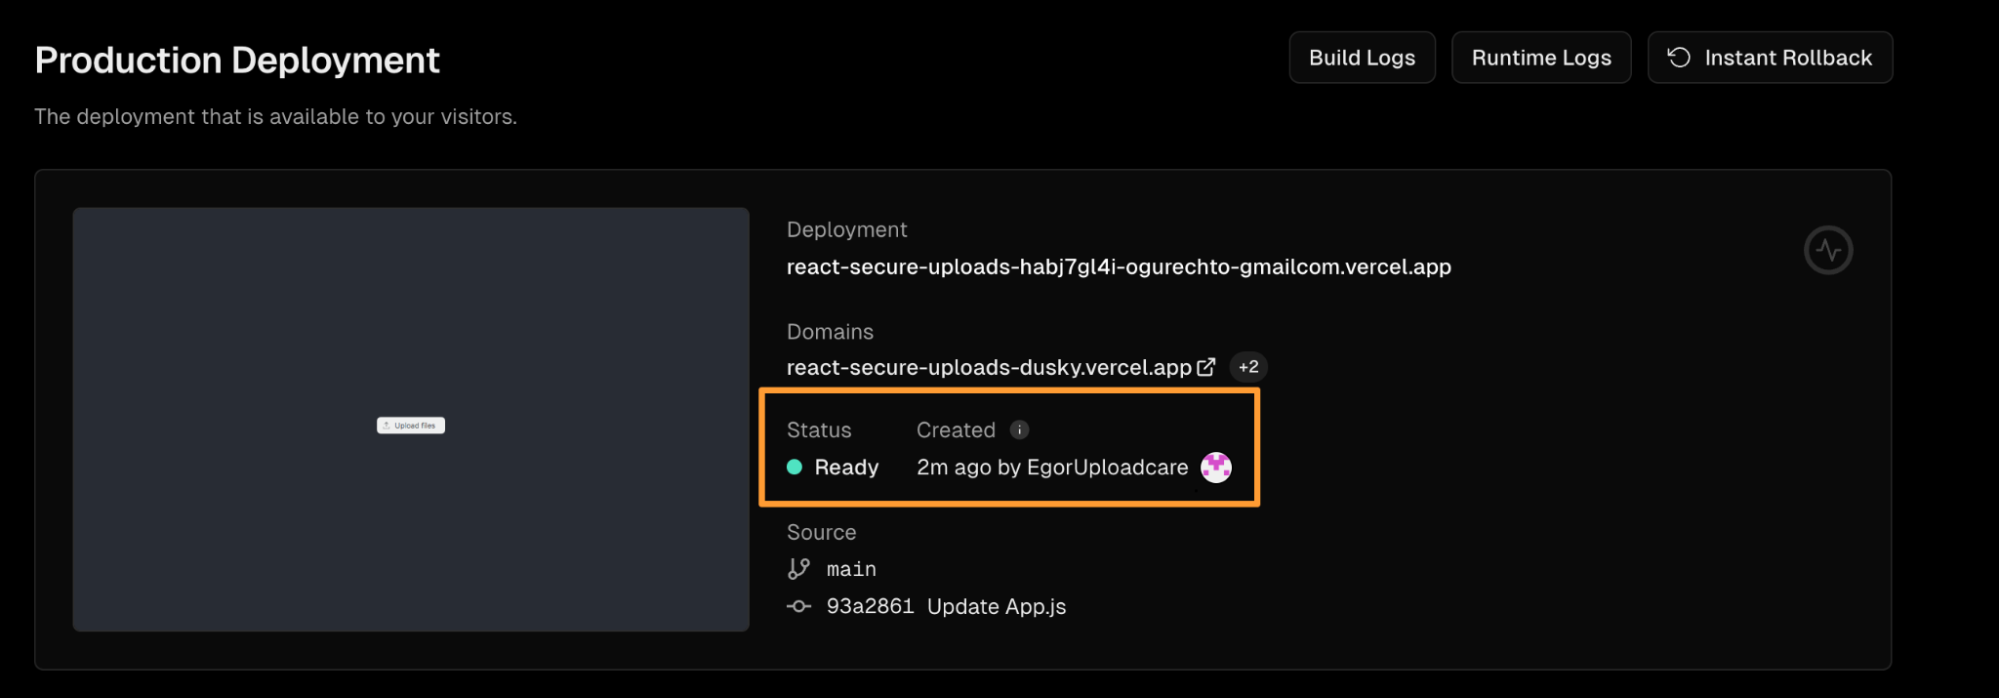
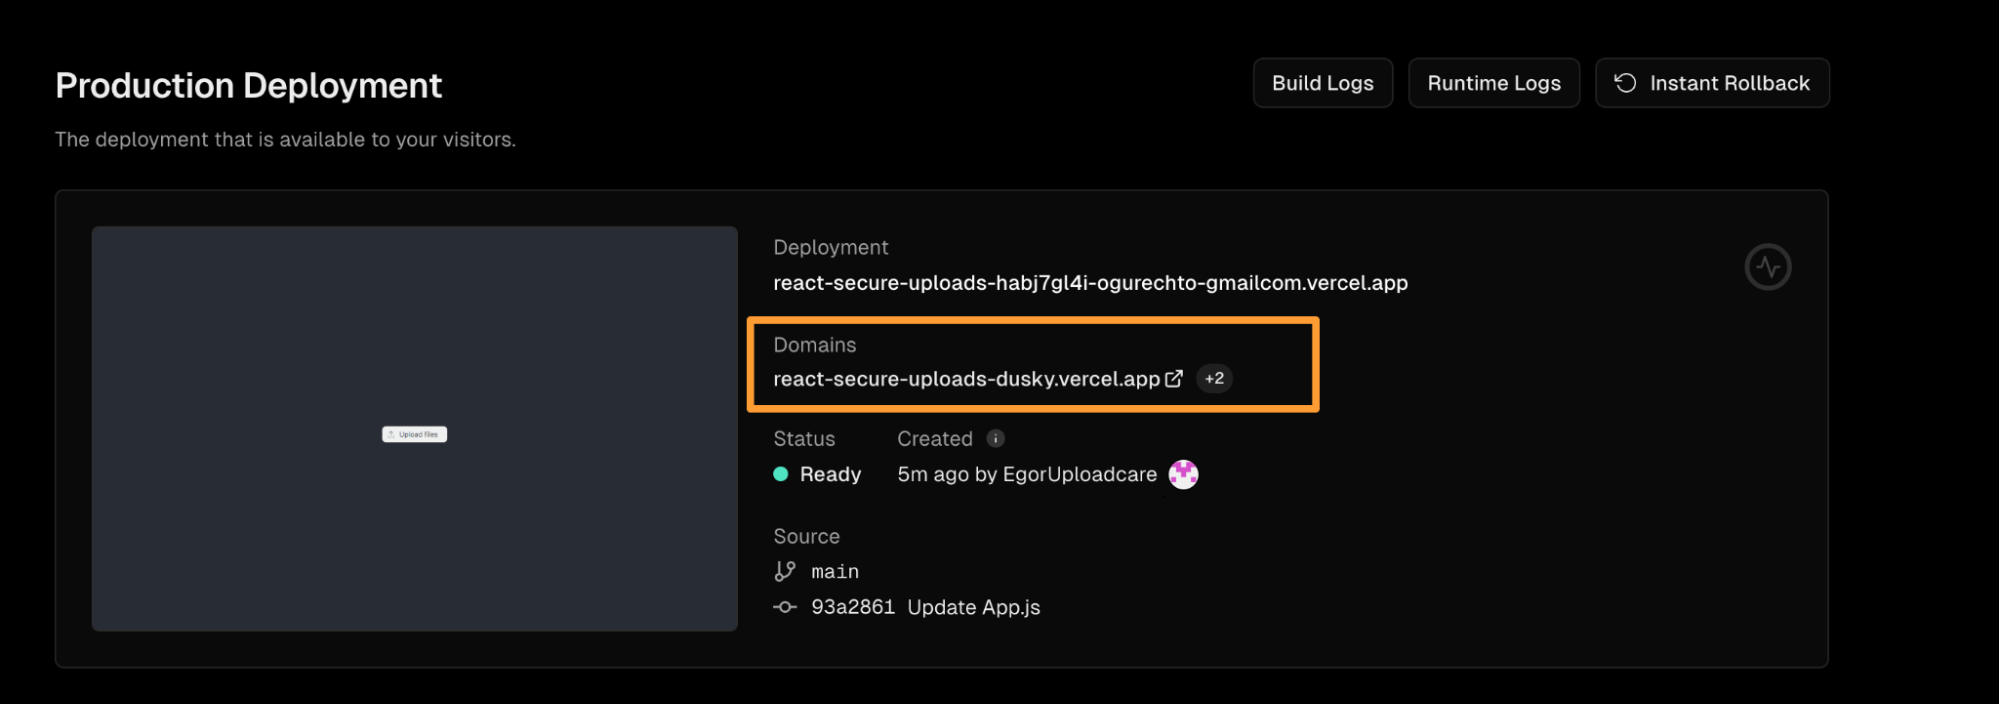
Congratulations, our projects are alive!
Testing the Signed Upload
Now, you’re backed by the File Uploader, an open-source, flexible Uploadcare widget crafted for seamless, secure file transfers, with built-in editing tools, multiple source support, and effortless integration across all devices and frameworks.
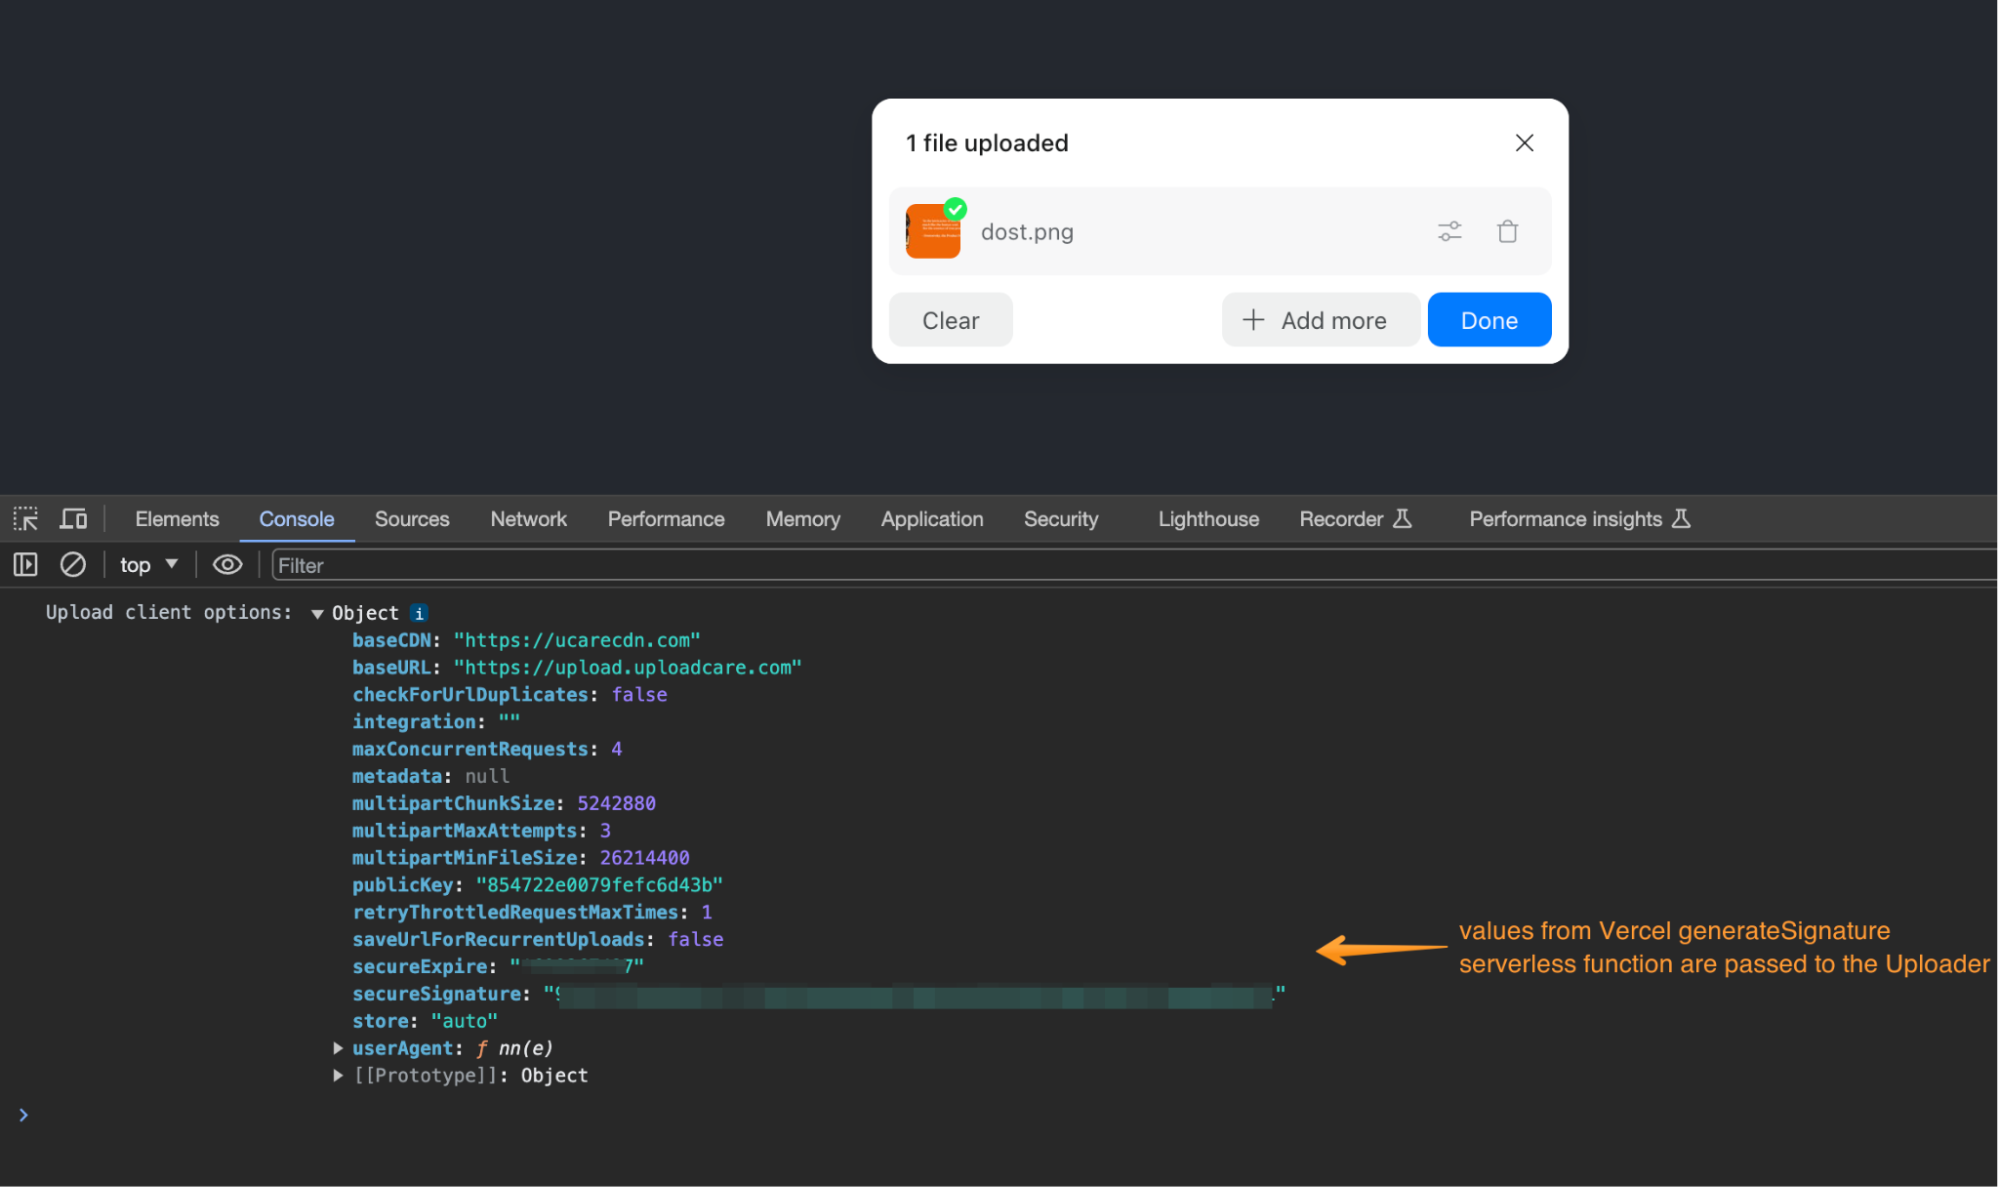
Open the demo and start uploading a file.
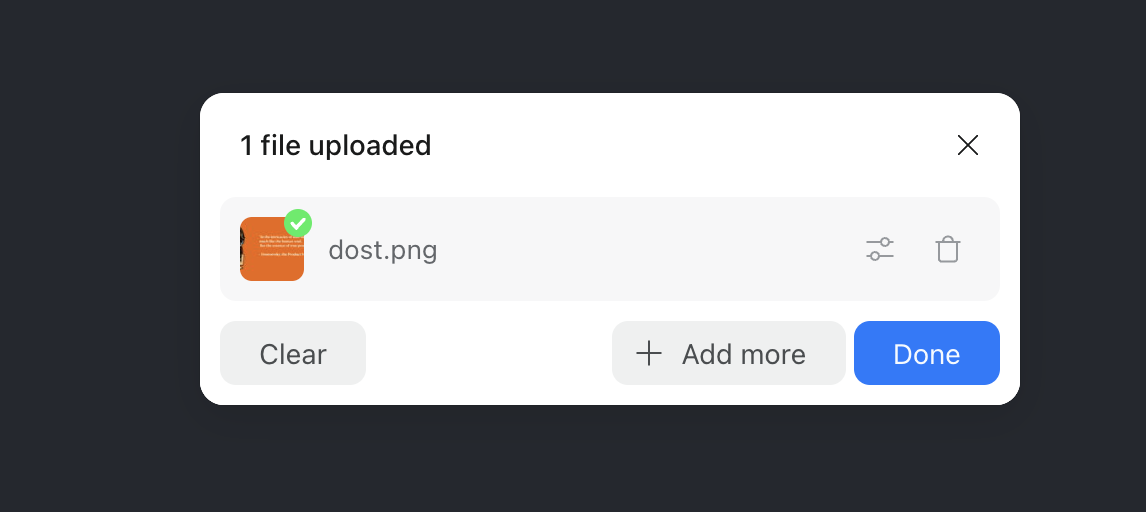
After uploading the file, you can check that the signature was passed to the uploader.
Conclusion and further resources
In conclusion, the journey through setting up serverless signed uploads with Vercel has provided a fun example of ways to secure media uploading — a critical aspect of any web application. We’ve explored the importance of signed uploads as a security measure, ensuring that only authorized content is uploaded to your Uploadcare project.
Through this process, we’ve demonstrated that even without a traditional server backend, getting a signature for uploading media is possible. The serverless architecture simplifies the developer’s workload and optimizes costs and resource consumption by activating only when needed.
As we wrap up, it’s essential to remember that this setup doesn’t form the foundation of a secure uploading process. The example provided serves educational purposes and must be complemented with robust user authentication to form a fully secure system. In the following article, we will dive deeper into serverless authentication to further bolster the security framework around media uploads.
The implications of this approach are vast, providing developers with the tools to create more secure, efficient, and scalable applications. The serverless paradigm, especially when combined with services like Vercel and Uploadcare, paves the way for the future of web development — a future where developers can focus more on creating great user experiences rather than managing infrastructure.