How to upload files in Jotform: Four easy steps
Last edited:
Jotform is an easy-to-use online form builder used by businesses, educators, and entrepreneurs worldwide. It allows you to construct and customize forms to collect various applications and submissions and store and upload media, as well as other files. Jotform can be easily integrated with Uploadcare File Uploader.
With Uploadcare added to your Jotform forms, you’ll get the features of our File Uploader in addition to the benefits of Jotform: namely, serverless file uploads and in-browser image editing. Moreover, every file uploaded via Uploadcare gets instantly cached on our CDN and can be swiftly and reliably delivered across 130+ countries. Uploadcare File Uploader is highly customizable and adapts to your flows and layouts.
This article will guide you through the integration process by using an example of a form created to collect speakers’ data for an industry conference. We will combine Jotform with two file uploaders: one for speakers’ photos, and another for collecting the presentations.
If you’re familiar with Jotform, it should take you about 10 minutes to build a form like this using our File Uploader integration. Here’s what we’re going to get in the end:
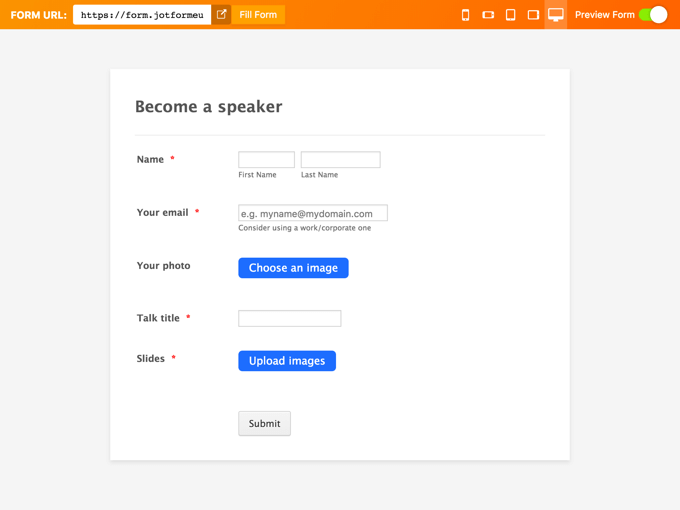 Jotform with Uploadcare File Uploaders Preview
Step 1. Creating an account and setting the Public Key
Since you’re here, you probably already have a Jotform account. If not, go to jotform.com and either sign up with your email or use your Google or Facebook profile.
To start working with Uploadcare, simply create an account by signing up on the website. Once you’re done, navigate to your dashboard: here, you can create a new project or have a look at the Public and Secret API Keys for an existing one.
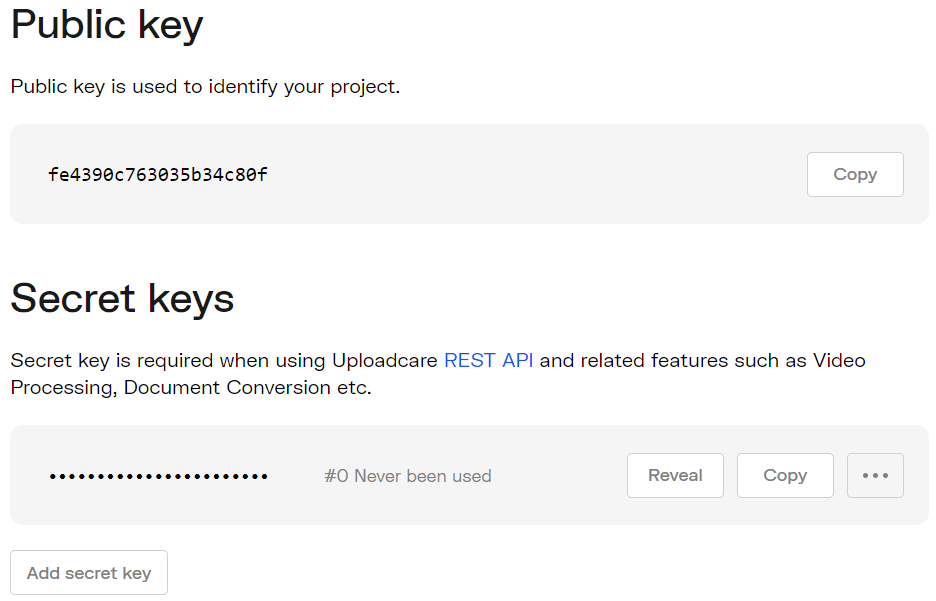 Uploadcare API Keys Screen
Step 2. Create a form and add the uploader
Creating a form
Once you’re on Jotform, navigate to the My Forms tab. Here, you can find all the forms you’ve ever created with Jotform. You can manage the forms by creating folders and sorting different forms by categories (e.g., Submissions, Reports), archive and delete forms, and designate Favorites for quick access.
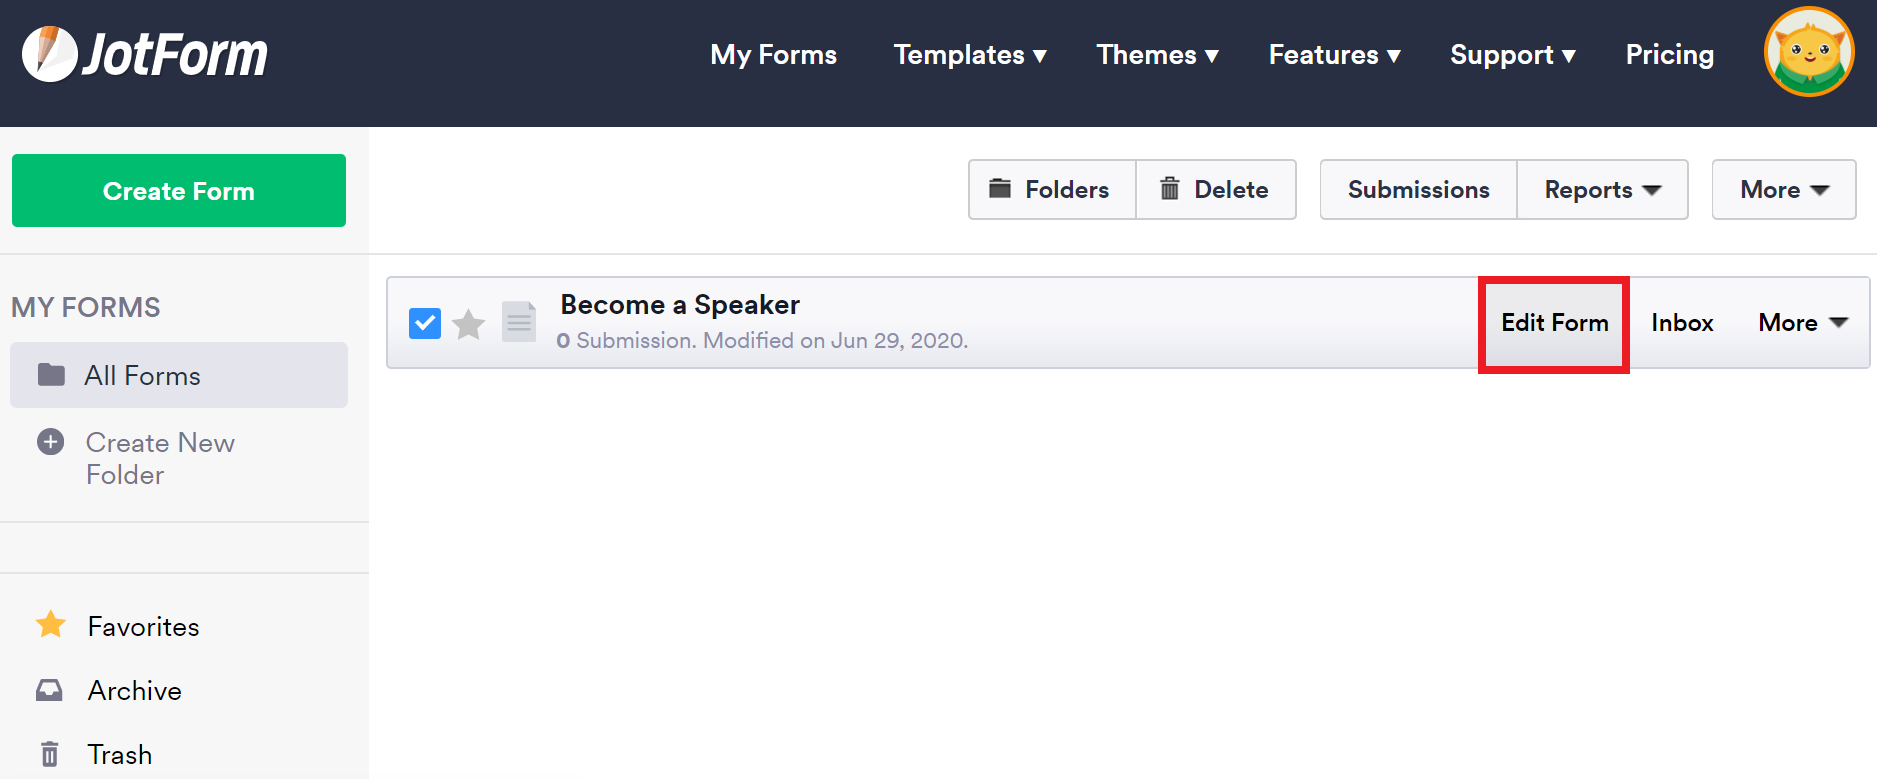 Jotform Forms Tab
Let’s see what’s inside by checking the box to the left of the form title. Hit Edit Form, and you’re in. As you can see, there are two buttons for uploading files: one is called Choose an image, and the other, Upload images. Here’s how you add those:
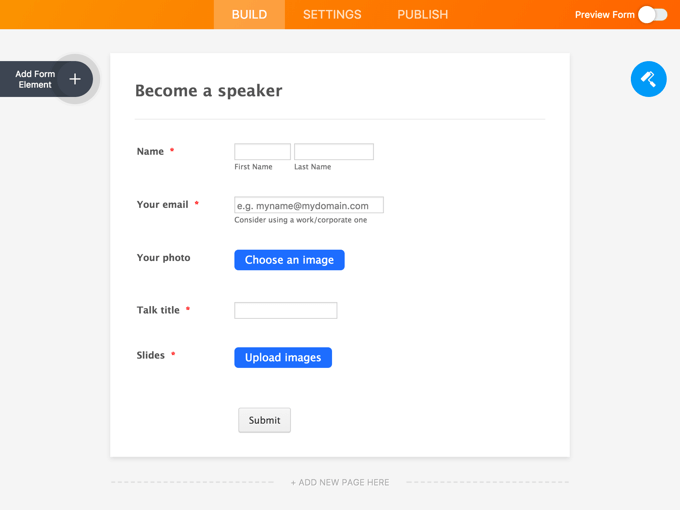 Jotform Edit Forms Tab
Adding the uploader
Click Add form element. Navigate to Widgets and type in “File Uploader” to run a quick search for our integration. You’ll see Uploadcare’s yellowish logo; click on it to add our File Uploader to your form. It’ll be added with default settings, but you can configure it to better fit your preferences. To do that, click on the Widget settings button to the left of the Upload File element of the form.
 Adding Uploadcare File Uploader to Jotform
Step 3. Configure the uploader
First of all, let’s set the label for your new file uploader. To do that, click on the Properties button represented by the gear icon to the right of the form:
This will open the Properties menu on the right side of the screen. Navigate to the Advanced properties tab. You can change the label by modifying the text shown in the Question Text field. For instance, instead of the default “Choose images” you can change it to “Your photo”:
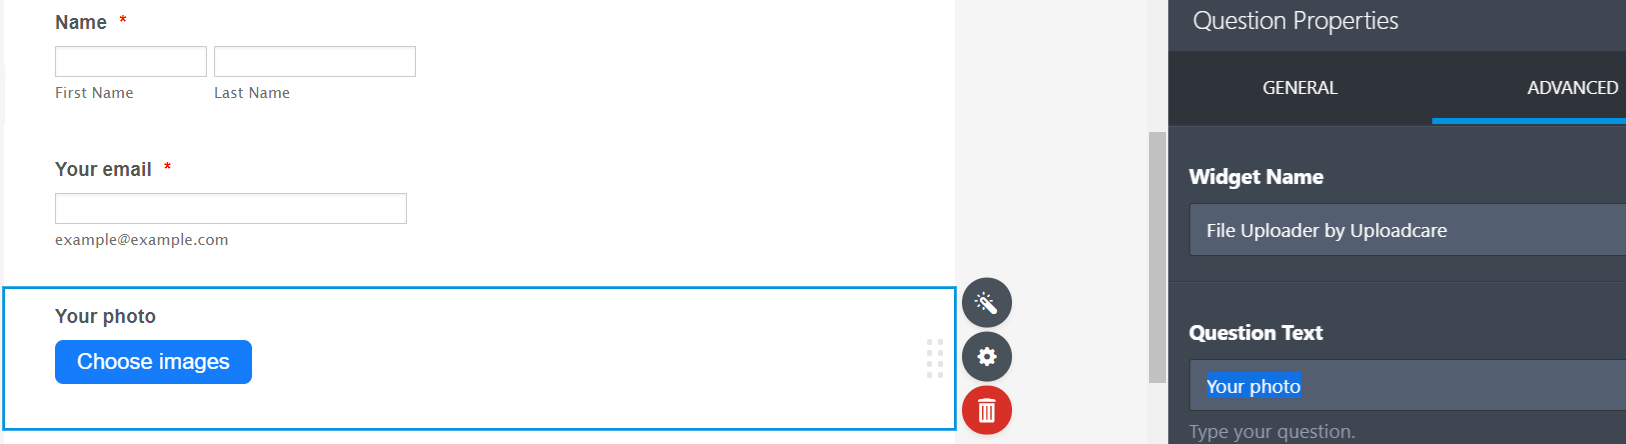 Changing Question Text in Jotform Properties
Once the label has been modified, we can get more advanced. Go back to the Upload File element of the form and click on the Widget Settings button represented by the magic wand icon to the right of the form:
Here you can change the settings of your file uploader. To start with, paste your Public API Key into the relevant field. In the picture above, we’re using YOUR_PUBLIC_KEY as a placeholder. Below the Public Key, you’ll find further configurable settings for the file uploader.
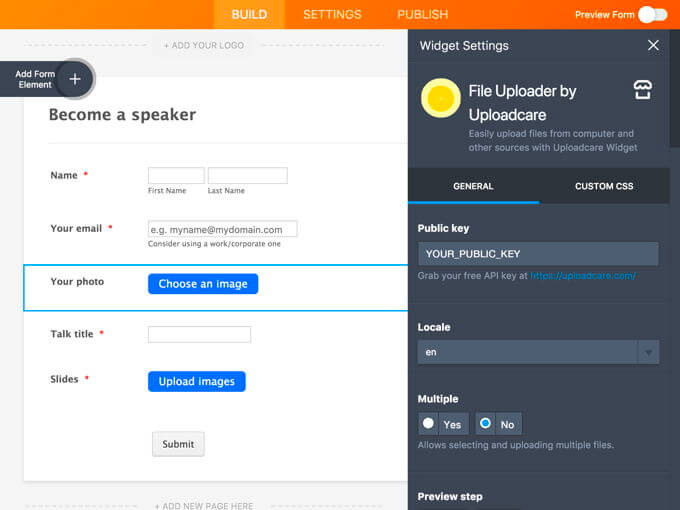 Modifying Uploadcare File Uploader Settings in Jotform
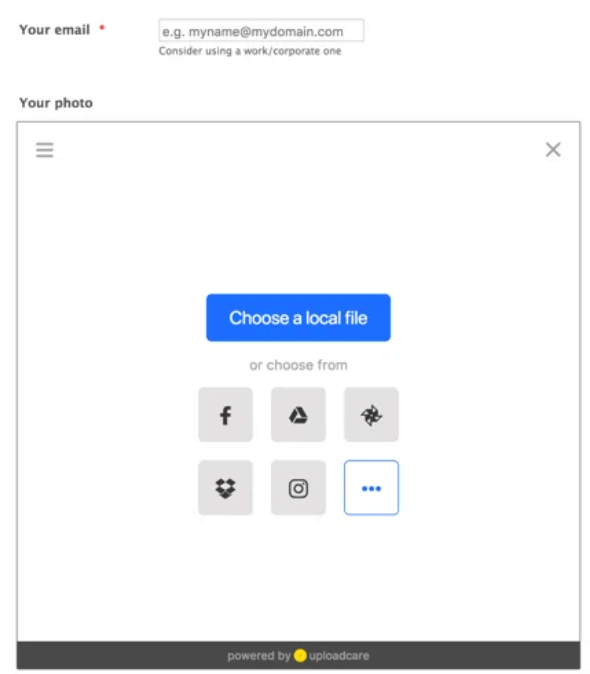
First, let’s configure it to get the conference speakers’ photos. A single photograph will be enough, so let’s set the Multiple setting to No. It would be good to show the speaker a preview of the photograph she uploaded, so let’s set the Preview step to Yes. Finally, to avoid unnecessary clutter and confusion on the users’ side, let’s allow image files only by setting the Images only setting to Yes.
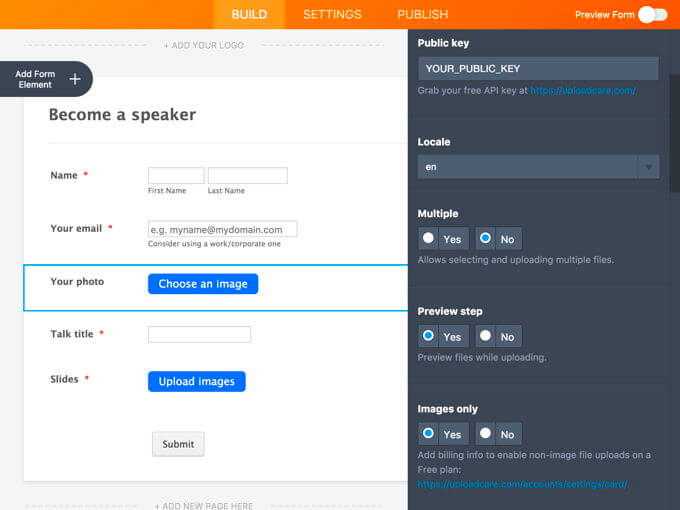 Changing File Uploader Settings in Jotform
Uploadcare File Uploader is famous for its on-the-fly image transformation capabilities, so let’s give the speakers an opportunity to edit their photos while they’re being uploaded. To do that, go to the Effects Tab and tick the Yes box. You will then be able to choose which effects can be applied to uploaded images.
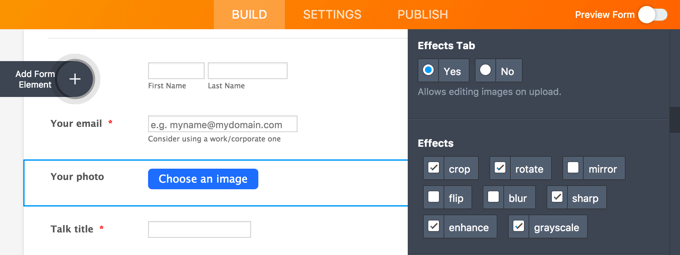 Changing File Uploader Settings in Jotform
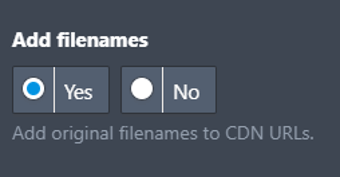
By default, the plugin removes the original trailing filename from the URL. There’s a setting called Add filenames: if you set it to Yes, it will add the original filenames to Upload CDN URLs, thus preserving your own file classification. This could be useful when passing URLs to a third-party system for further processing, for instance.
 Adding Filenames
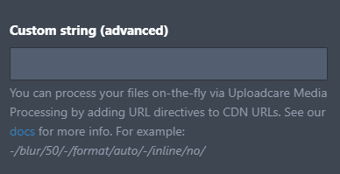
You can also automatically add a set of image transformations to a CDN URL. The Custom string setting allows you to process your files on the fly by adding URL directives to the CDN URLs. The Custom string field will hold a string to append to the CDN URLs in accordance with the transformation requirements. For example, it will add something like /blur/ in your URL to apply a blur effect to the image. You can learn more about this by checking out our documentation.
 Adding URL Transformations
Last but not least, you may also want to change the button caption. To do that, go to Additional global settings and modify the parameters there. Here’s a simple example of what you can do with the global settings: for the full list of File Uploader settings, please refer to the relevant chapters of our documentation.
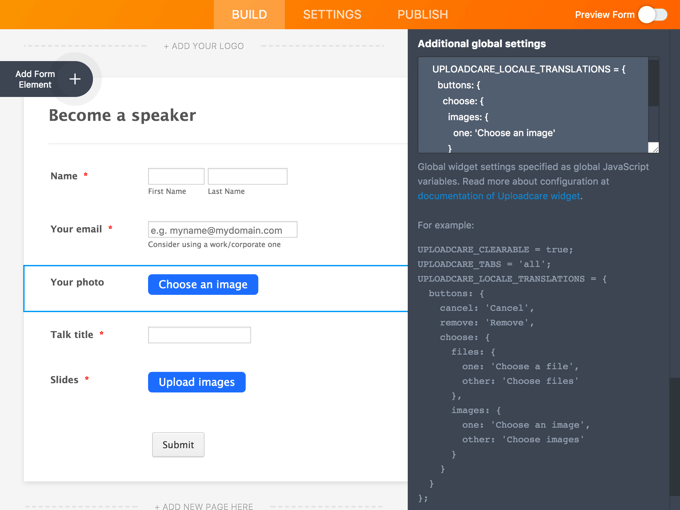 Customizing Jotform with Uploadcare File Uploader
Now you can add further uploaders to your form and configure them, e.g. to accept multiple uploads of images only. Actually, it’s possible to add multiple file upload elements to your form; as many as you need. For example, you may want to collect the speakers’ photographs and presentations, but also CVs, cover letters, and other additional documents.
Creating separate forms for each type of file may not be practical, though; it’s easier to allow multiple uploads through one form. Plus, it’s more useful to separate images from other files by using two separate uploading elements in your form.
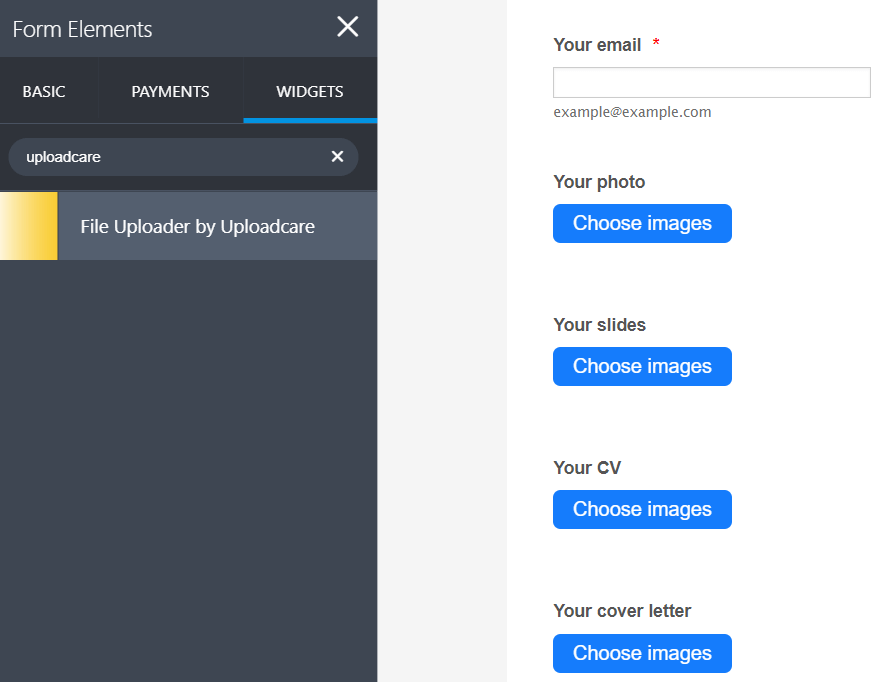 Multiple Uploadcare File Uploaders in Jotform
You can tinker with the settings by allowing multiple file uploads, and changing the label and button caption. This second button will allow form users to upload slides for their presentations. In fact, you might want to create a separate Uploadcare project (and specify another Public API Key for the second file uploader) to collect those slides; this helps organize content in your account.
 Allowing Multiple File Uploads in Uploadcare Widget in Jotform
Step 4. Publishing and testing
Now it’s time to publish the form and see how it performs. Before actually publishing it, however, it would be good to preview the form and make sure everything looks as expected. Simply flip the Preview switch in the top right corner of your screen and choose the device:
 Jotform Preview Options
Jotform allows you to see how the form will look depending on whether it’s viewed from a phone, a tablet, or a desktop. On the left side, you’ll also see the direct link to your form. After making sure the form looks good, you can make it public. Publishing a form is as easy as hitting Publish. You’ll also see the automatically generated direct link to your form. You can then send that link to your speakers.
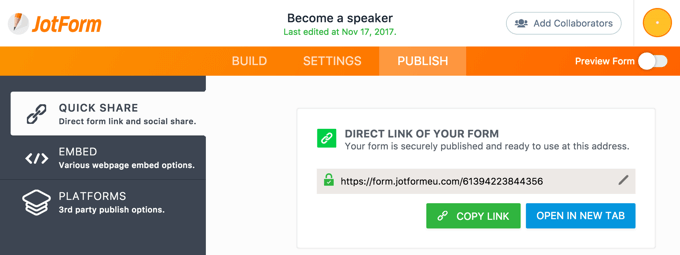 Jotform Publishing Screen
To test the form, click Open in new tab. That shows how your users will see the form. Fill in the fields and upload a photo:
 Upload Files with Uploadcare Integrated to Jotform
Go back to My Forms and click the sheet icon to the left of your form title. This will open a list of your form submissions. You can navigate through those by clicking the arrows in the top right corner.
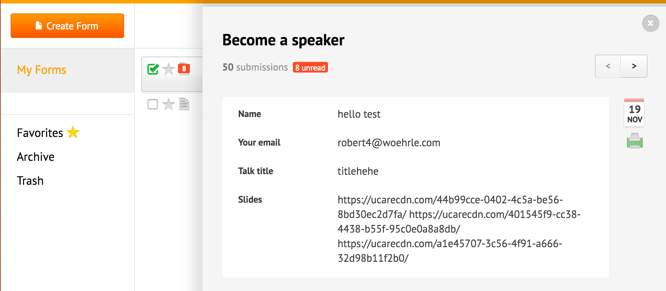 Form Summary Data Jotform
Please note that the files uploaded by form users become either a single URL for an avatar photo or a list of URLs for slides. Those are your file permalinks. You don’t need to have any storage for uploaded files: just put those links in your database. Check out this article to learn more about how those URLs are made and what they mean.
Conclusion
And that’s it! You now have your Jotform form powered up by Uploadcare’s File Uploader, giving you serverless file uploads, a CDN, and image transformations.
If you have any questions, ask them in our Community Area, or leave them as comments to this article. You may also want to consult the guide provided by Jotform.