Long gone are the days when it was acceptable to simply push a 5-megabyte, uncropped photo onto a web page and call it a day.
In today’s competition for user attention, image transformation and compression techniques are more important than ever.
In this blog post, you’ll learn how to transform images from a developer perspective.
Understanding image transformation concepts
Without going too deep into math, image transformation means altering images using a defined set of rules.
It includes not only geometric techniques like scaling and rotation,
but also appearance‑based adjustments such as brightness and sharpness.
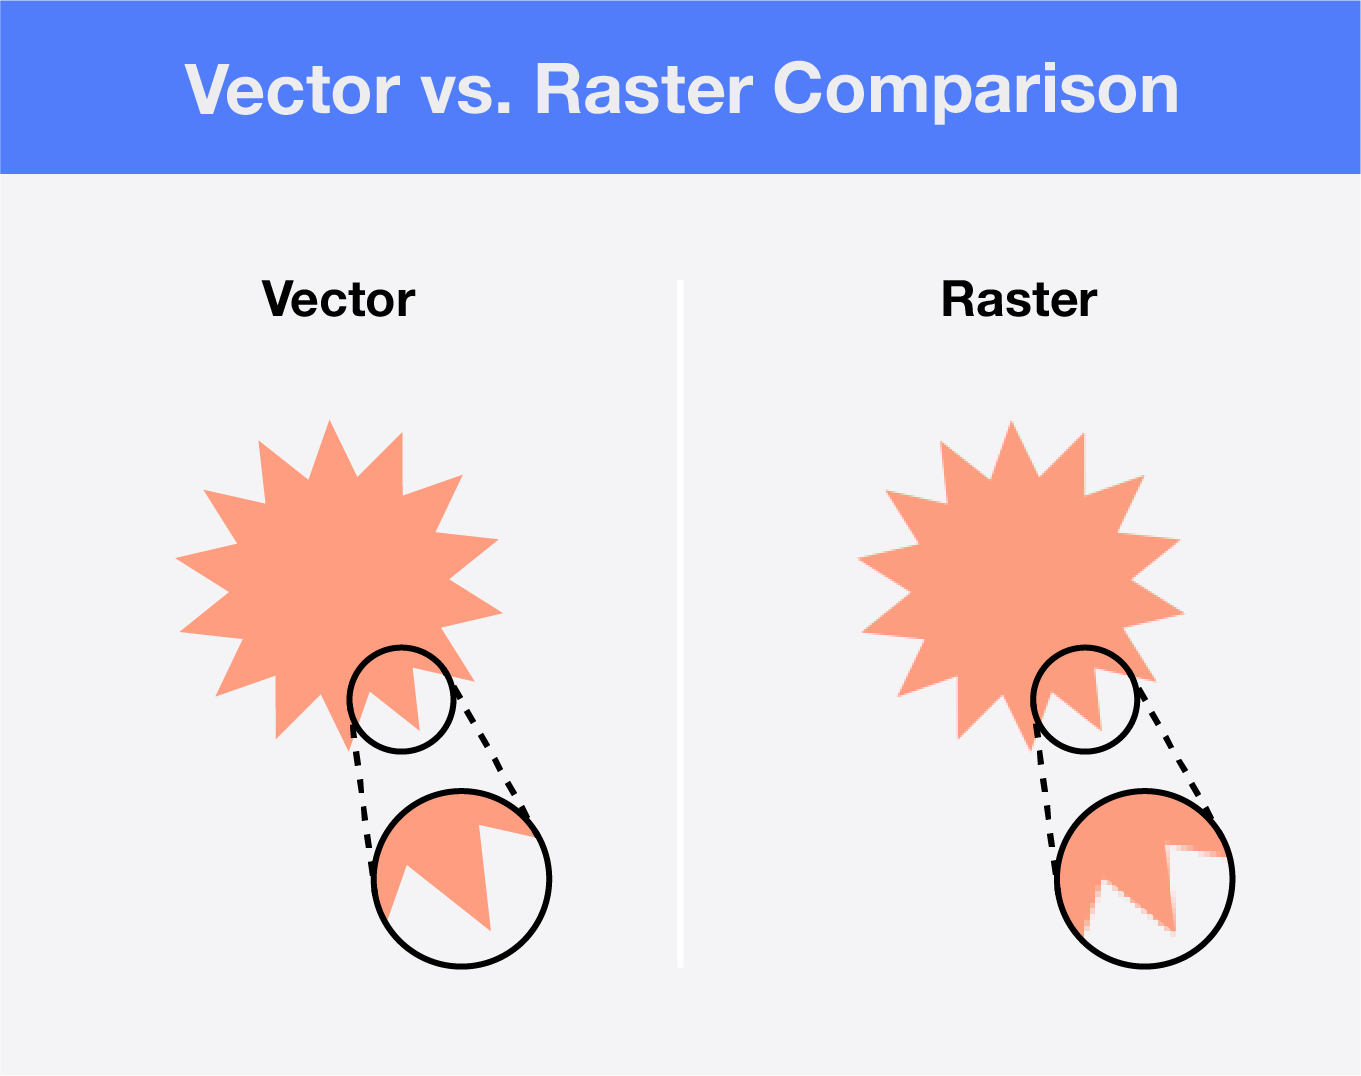
Raster vs. vector transformations
The core difference between raster and vector is their data models.
Raster images are represented with a fixed-size pixel grid,
whereas vector images utilize mathematical primitives (points, lines, curves, and shapes) to draw a picture.
Raster versus vector demo
Therefore, raster image transformation quality is capped by its pixel density, while vector transformations lead to no quality loss.
You often see advice to use vector formats for logos and other geometric graphics — this is why.
Client-side vs. server-side transformations
Client‑side transformations run directly on a user device using tools like Canvas on the Web and native mobile APIs.
This approach shines when your main goal is to provide almost instant feedback and a smooth editing experience.
But there’s a trade-off. Client devices vary in power, so heavy or quality‑critical operations slow down,
and you can’t guarantee consistent performance.
Server‑side processing centralizes the heavy lifting.
You can use many libraries across different stacks to handle large files,
advanced filters, and format conversions with predictable results.
The downside involves cost and latency.
When mismanaged, your image transformation setup may become a bottleneck if the traffic demand is high.
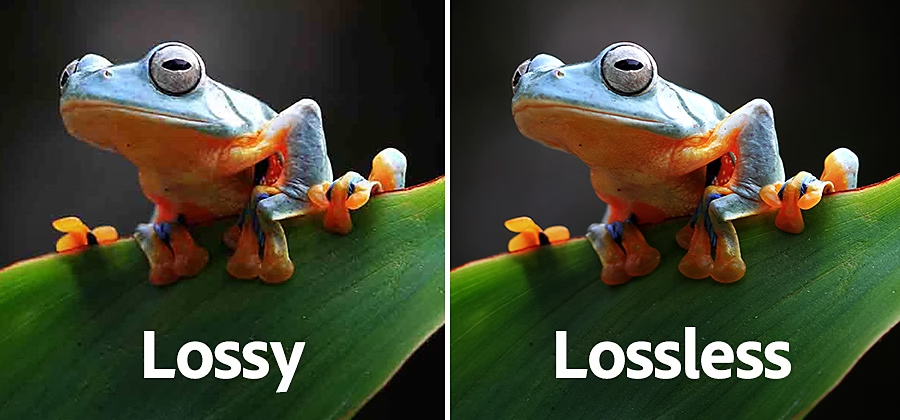
Lossy vs. lossless modifications
Lossy operations permanently remove or change image data to achieve a result,
while lossless operations retain original data so you can fully restore the image.
An artistic demo of lossy vs. lossless image compression
Resizing with interpolation (new pixels are invented when upscaling, old ones are merged when downscaling)
Aggressive sharpening or smoothing (alters pixel values irreversibly)
Noise reduction (removes fine detail)
Color quantization (reducing color depth)
A recent newcomer — AI upscaling (can hallucinate details)
Use lossy transformations for web delivery, thumbnails, previews,
and any situation where small file size matters more than perfect fidelity.
Lossless transformations preserve all original pixel information.
After the transformation, the image can be reconstructed exactly as it was before.
Let’s go over the examples of lossless transformations:
Rotation by 90° increments (no interpolation needed)
Flipping (horizontal/vertical)
Metadata edits (adding/removing EXIF without touching pixels)
Color space reinterpretation (like going from sRGB to YCbCr)
PNG or JPEGXL transcoding (re-encoding without discarding data)
Cropping without resampling (cutting out pixels but not altering them)
If you need extreme precision and pixel‑perfect fidelity for further edits, stick to lossless transformations.
Resizing
Resizing is one of the fundamental operations in image transformation, but it’s tricky.
A lot happens behind the simple idea of “scaling”.
Pixel recalculation and choosing the right interpolation algorithm both shape the result.
Resizing means giving an image a new width and height and recalculating pixels to fit the new grid.
Resizing is always a geometric transformation and always lossy:
Downscaling merges pixels
Upscaling generates new pixels based on an interpolation algorithm
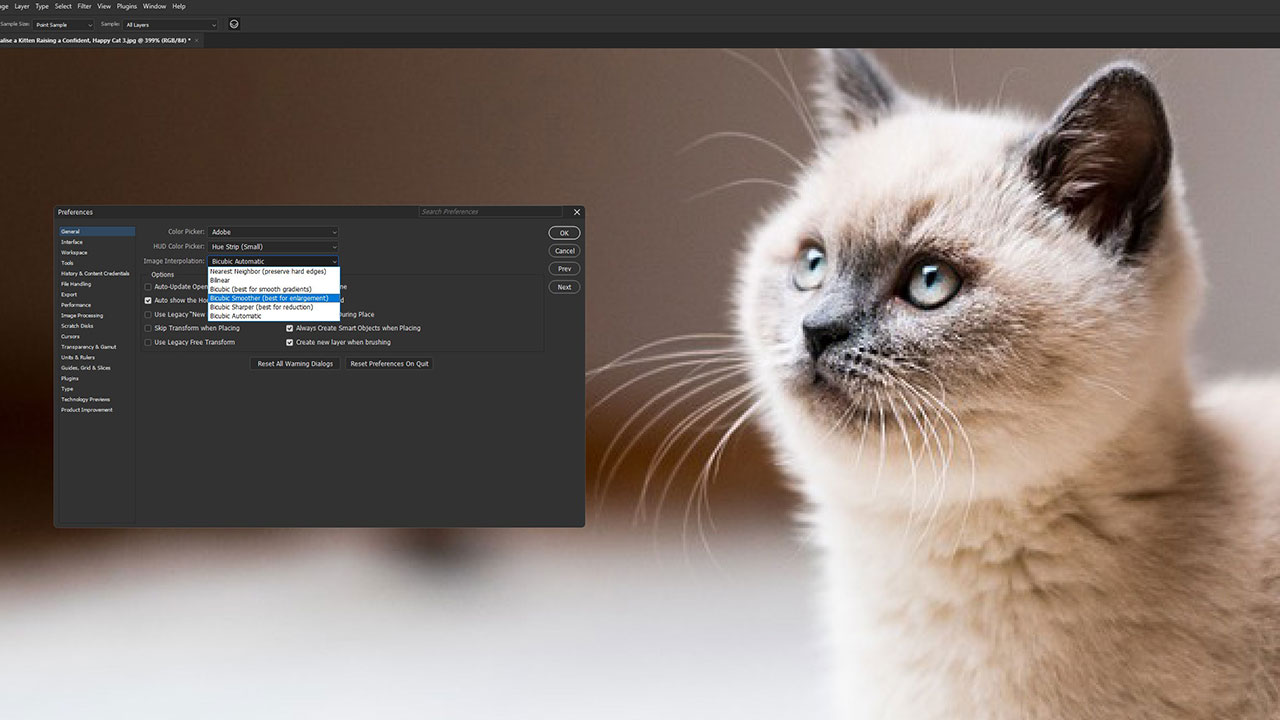
Interpolation methods in Photoshop
New pixels are created by interpolation. Interpolation is, essentially, a guess as to what color a new pixel must have.
The most used methods of interpolation are:
Nearest Neighbor — fast, but produces sharp edges and torn‑text artifacts
Bilinear — averages four neighboring pixels and produces softer results
Bicubic — uses sixteen neighboring pixels and produces smoother gradients and higher quality
Lanczos and similar filters — more complex, minimizes artifacts, and requires more computation
Like most of the transformations described in this post, resizing can be performed in many environments:
graphic editors, command‑line tools, and code libraries across different languages.
In web projects, resizing in a browser is often handled directly on the client side, or via other means server-side.
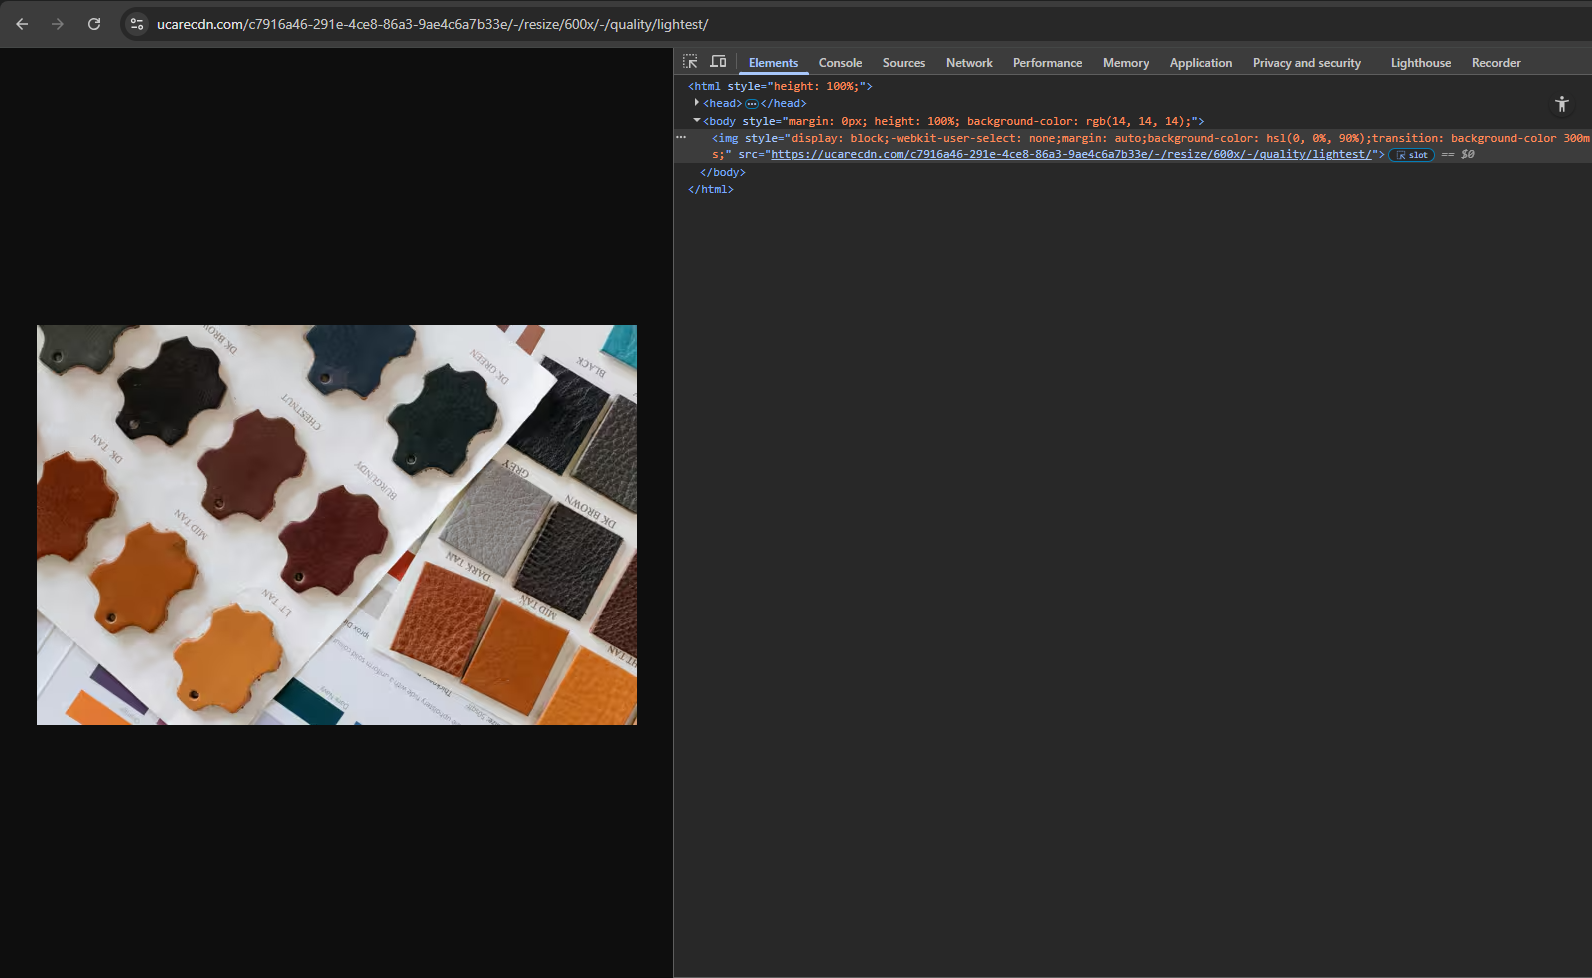
Uploadcare provides another approach: a SaaS image pipeline that handles resizing through a URL‑based transformation API.
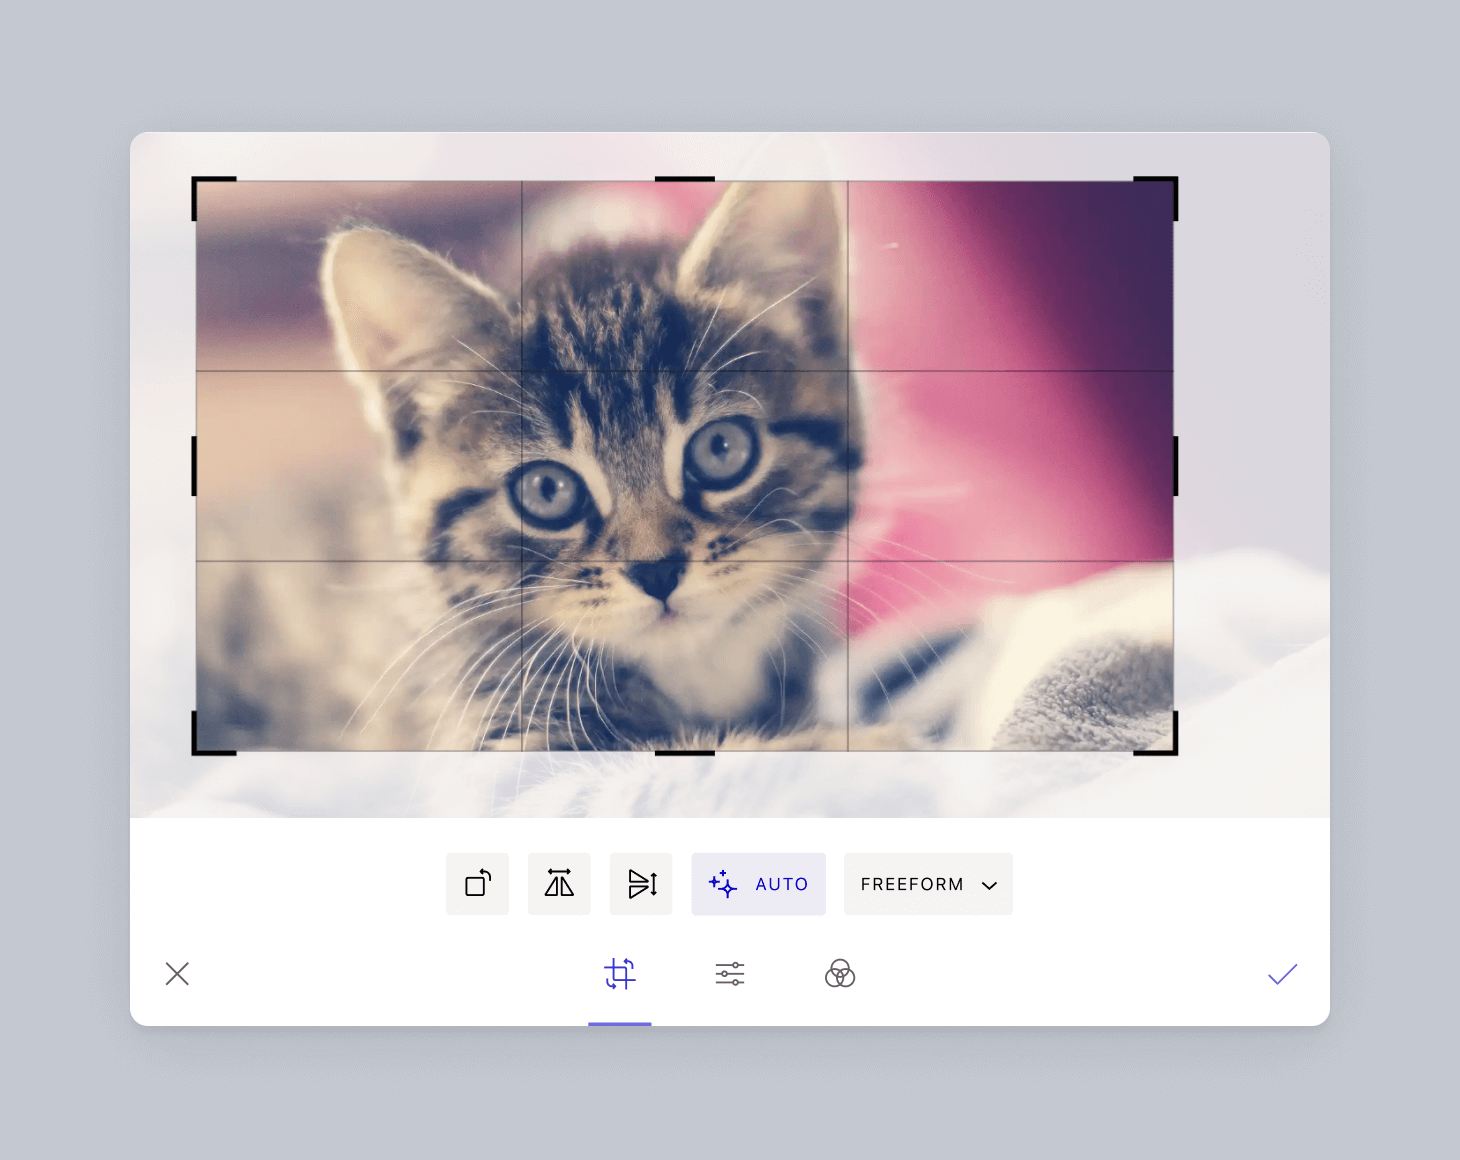
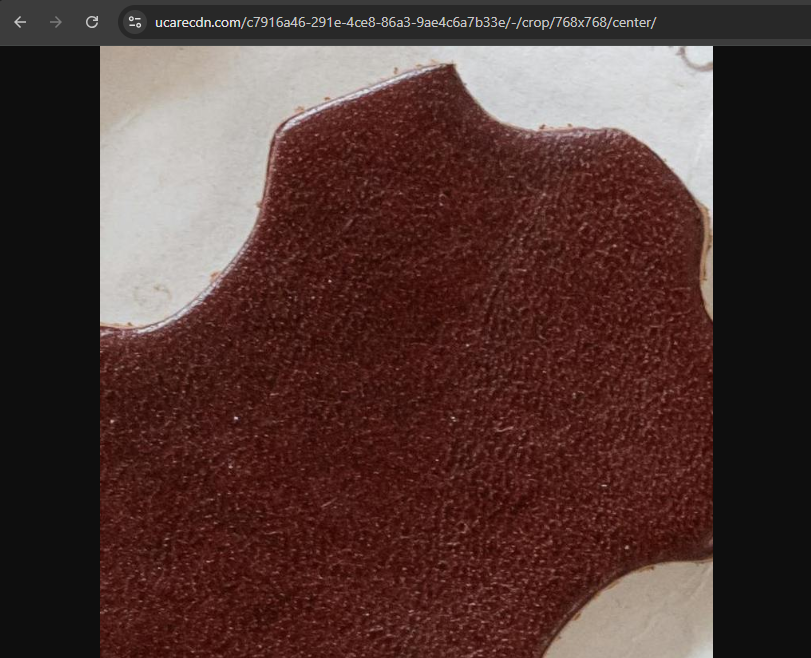
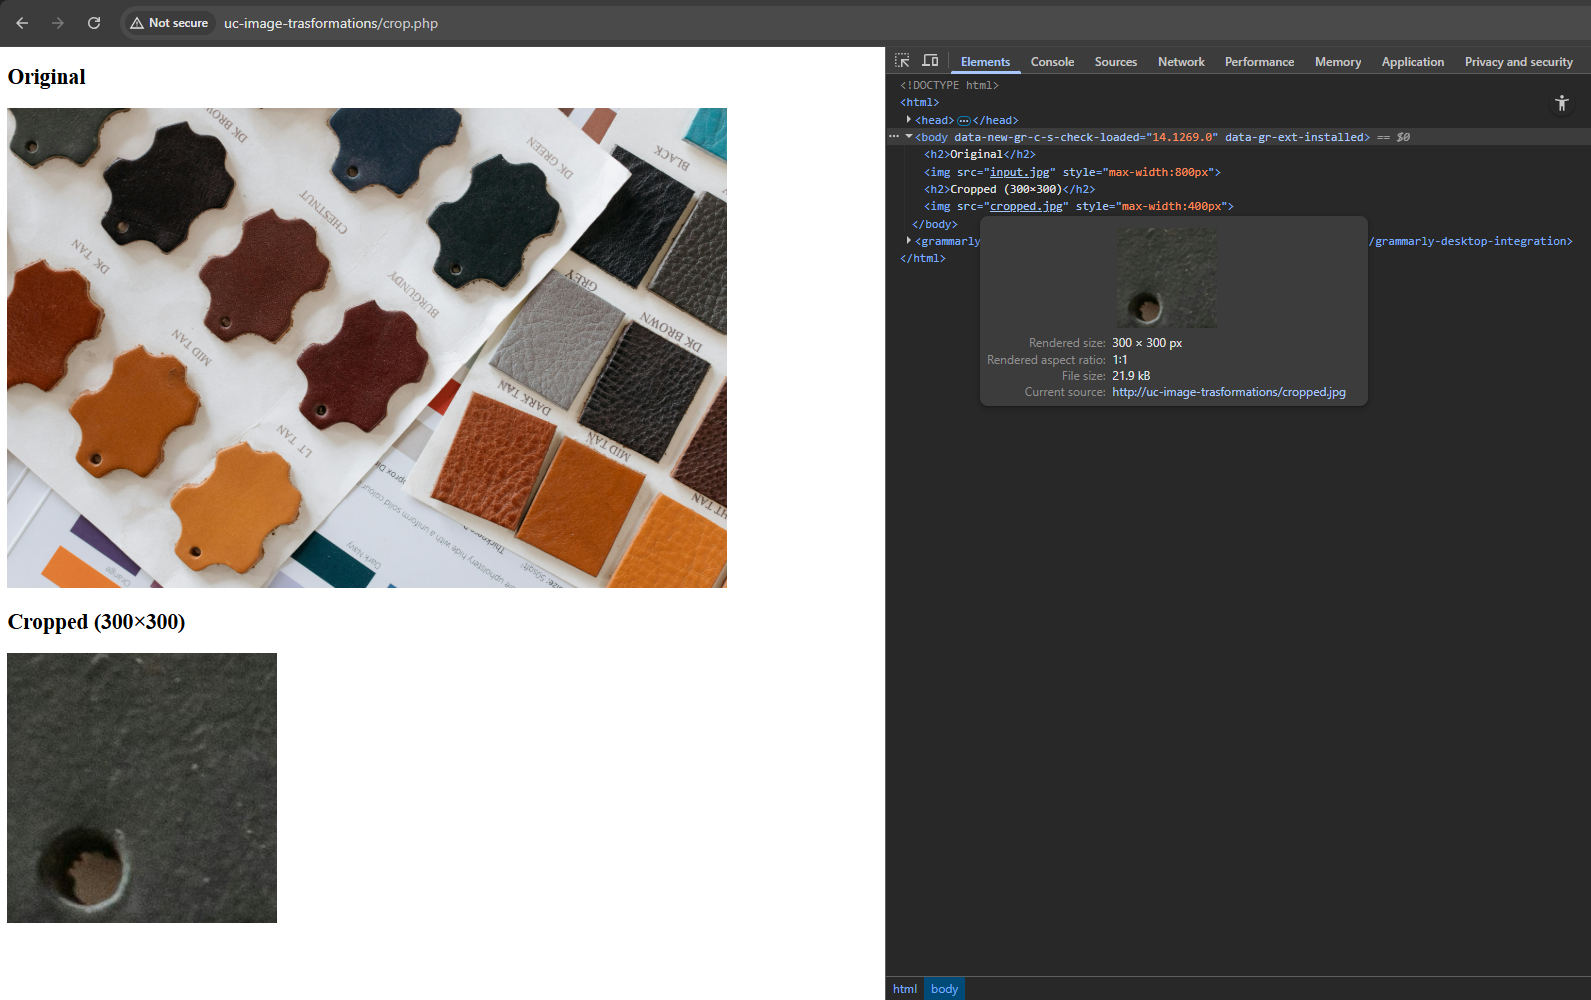
Cropping
Cropping transforms an image by removing everything outside a defined rectangular area.
Unlike resizing, cropping changes only image geometry and doesn’t recalculate pixel values inside the selected area.
Cropping tool in Uploadcare File Uploader Widget
After cropping, an image gets a new height and width and loses pixels outside the selected area.
However, cropping isn’t fully lossy — the remaining pixels stay unaltered.
Rotating
Rotating an image requires moving each pixel to a new location around the transformation center, usually the image center or top‑left corner.
Visually, it resembles rotating real‑world objects, but the process relies on math instead of physics.
Any rotation by an angle not divisible by 90 degrees introduces potential quality loss because transformed pixels don’t always land on integer coordinates.
When pixels fall between coordinates, the algorithm applies interpolation, which makes the transformation lossy.
An interface of JPEG Lossless Rotator software
Rotations by 90, 180, and 270 degrees are different. In this case, you don’t need interpolation — pixels aren’t recalculated;
they’re swapped, with width and height coordinates exchanged. Like cropping, this type of rotation isn’t lossy.
You might need specialized software to perform this operation.
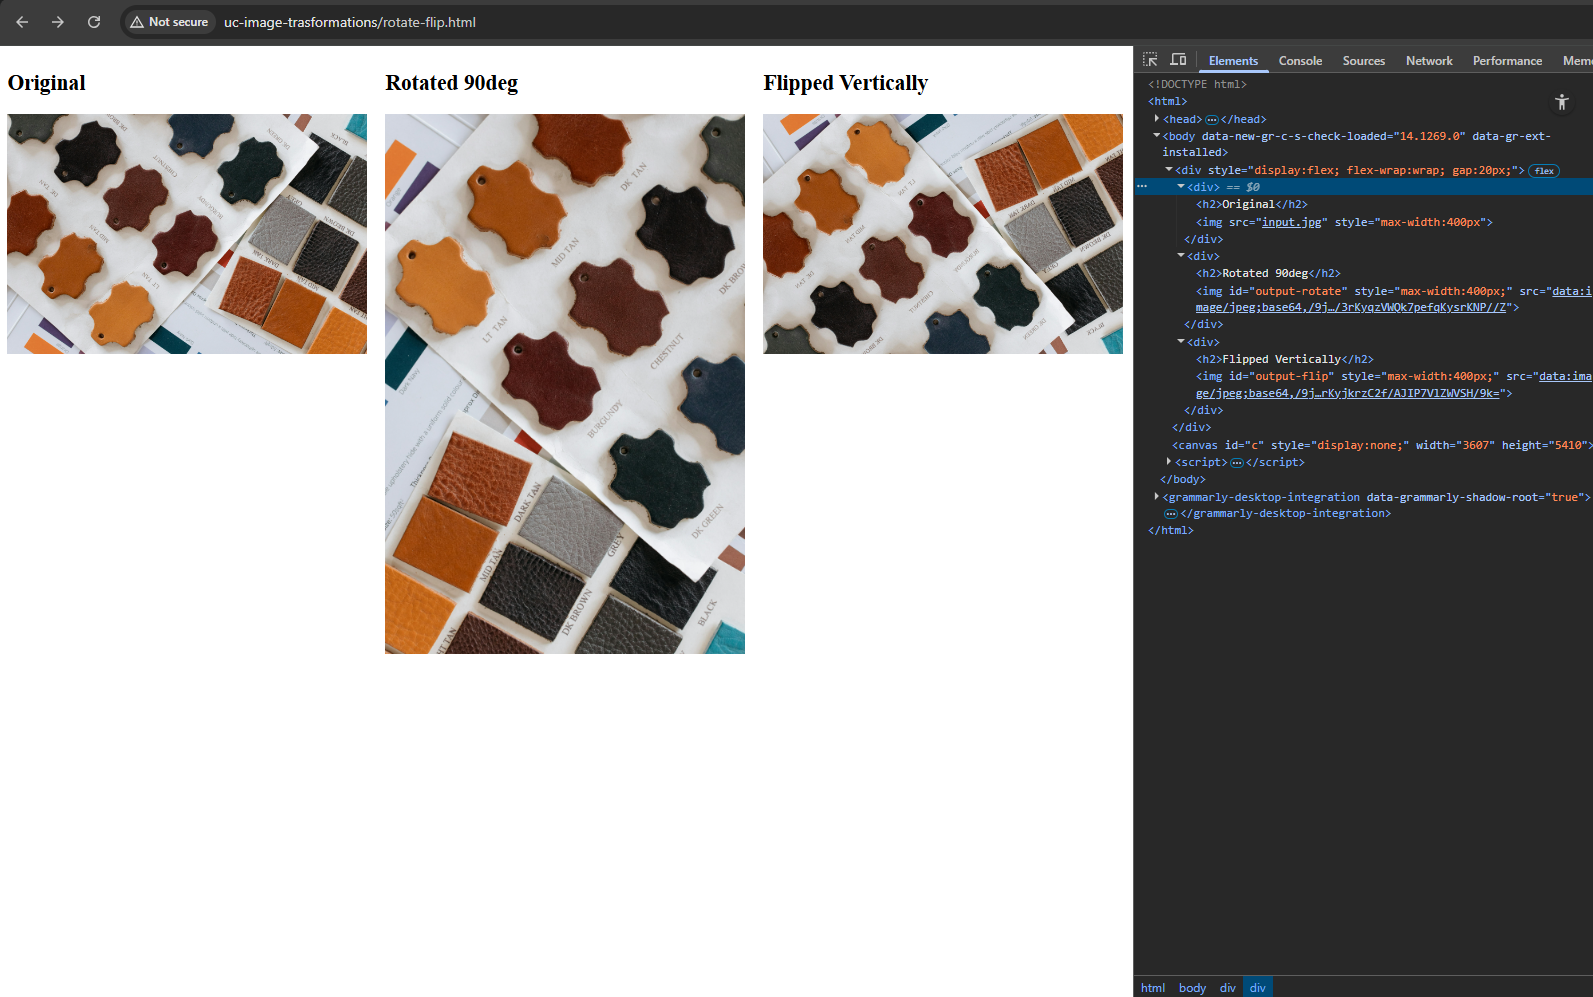
Flipping
Flipping is often described as mirroring an image.
Visually, the process swaps pixels on the left with pixels on the right and vice versa, which results in horizontal mirroring.
Applying the same swap to top‑bottom pixel pairs creates vertical mirroring.
Performing horizontal and vertical mirroring in sequence produces a 180‑degree rotation.
The operation is lossless because it doesn’t add or remove pixels, doesn’t require interpolation, and produces no artifacts.
This makes it one of the cleanest transformations.
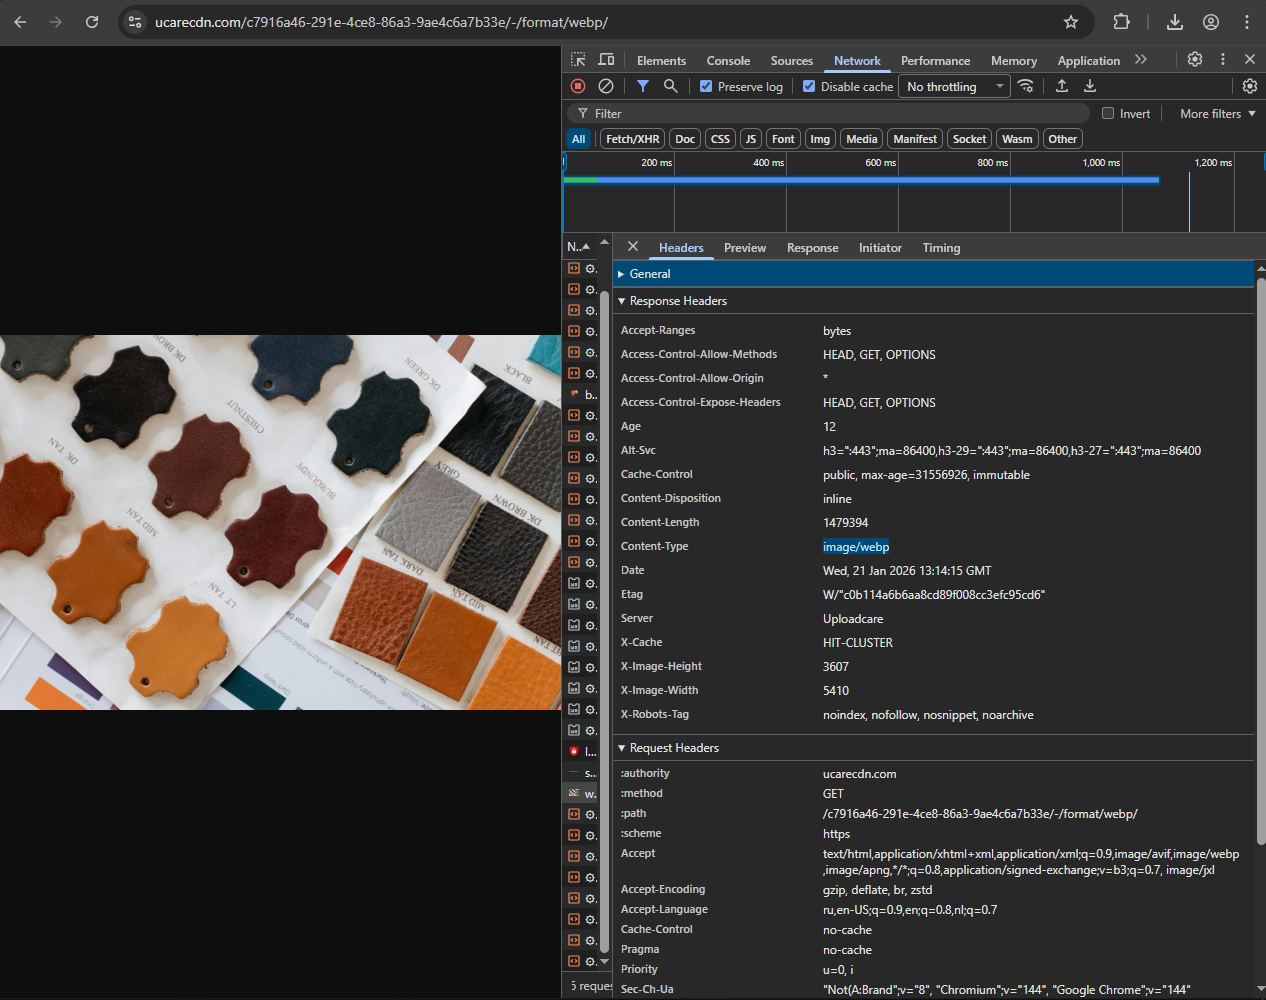
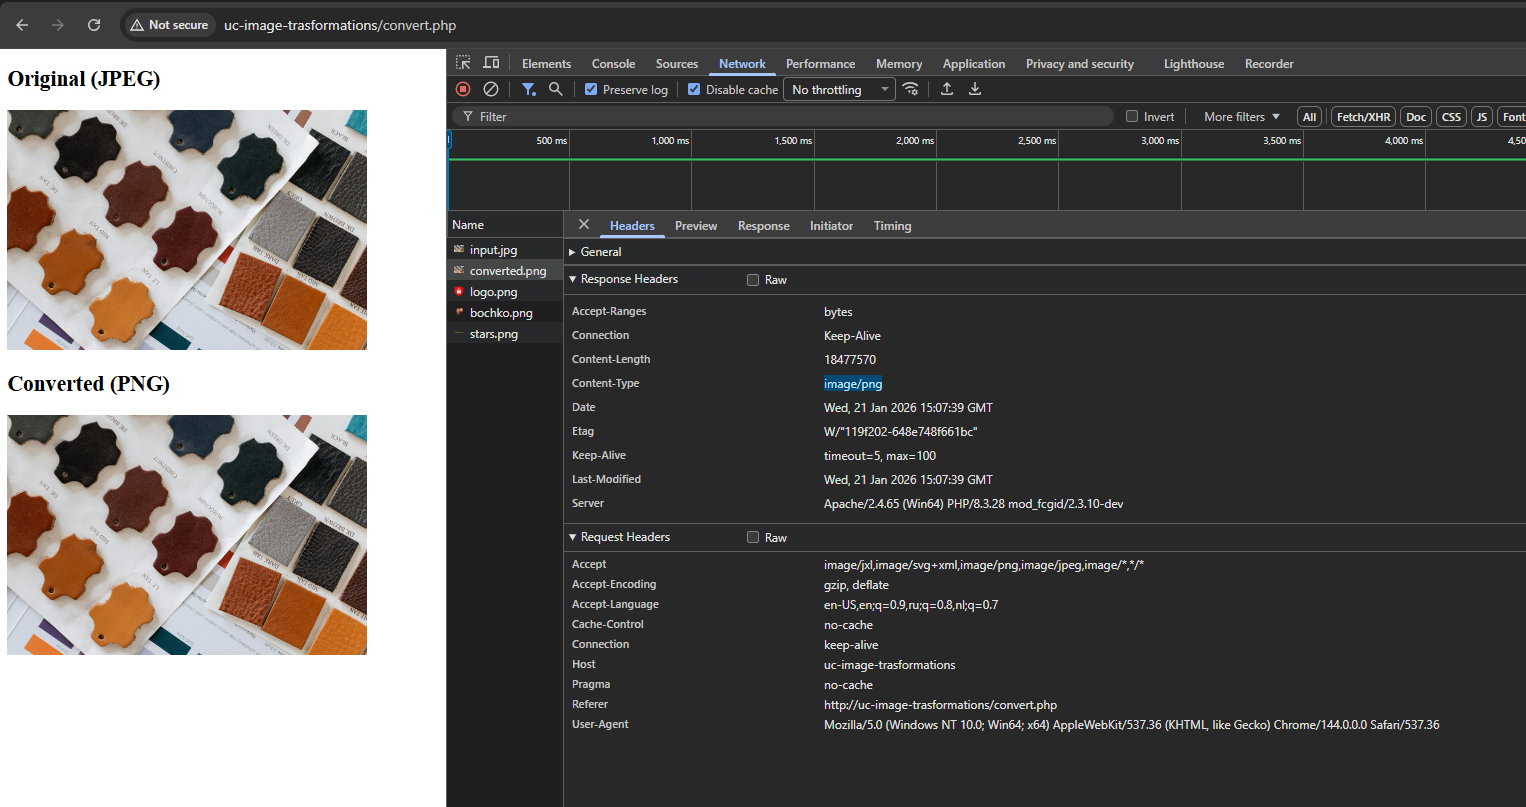
Format conversion
In image transformations, format conversion means changing the image codec or container.
Depending on how different the original and target formats are, several properties can change during conversion:
Method of storing pixel data (for example, switching from spatial to frequency domain as in JPEG)
Color depth
Alpha‑channel support and transparency support
Lossy/lossless compression type
Metadata structure
Format conversion can be lossy or lossless, too. For example, transcoding an image from BMP to PNG (both lossless) is a lossless conversion.
Saving a PNG with an alpha channel as a legacy JPEG is lossy because of domain changes, quantization, and the loss of transparency.
You can treat format conversion as a service operation that happens prior to any geometric transformation.
For example, opening a JPEG image in any graphic editor converts its data into a bitmap for further processing.
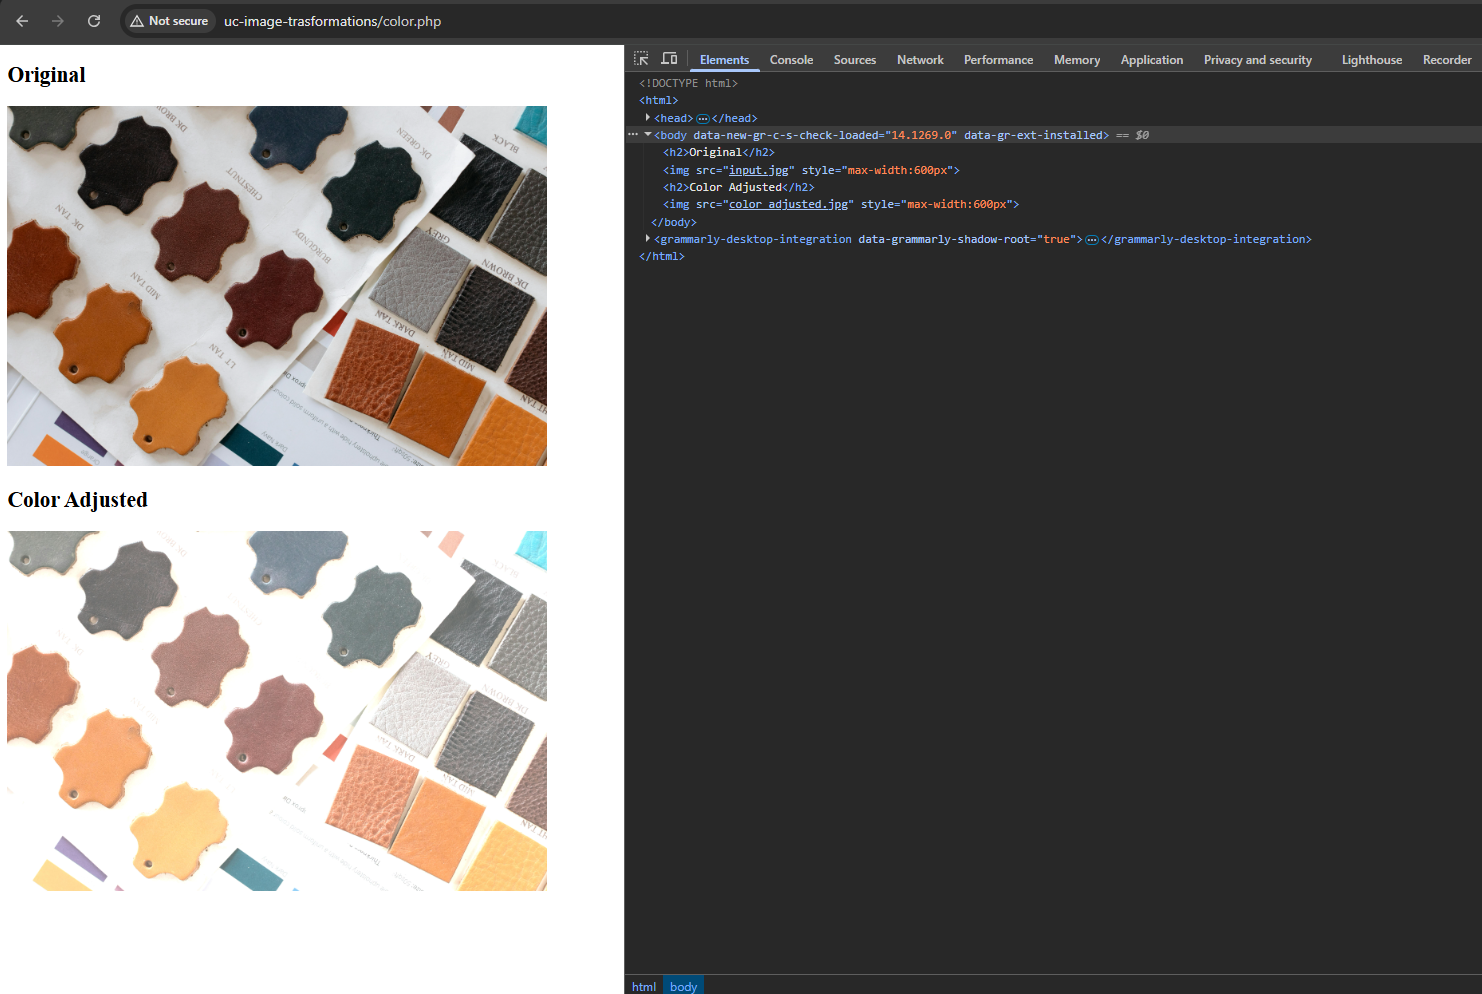
Color adjustments
Color adjustments belong to the photometric group of transformations, meaning they change the image’s appearance but not its geometry.
Based on the transformation algorithms, there are distinct categories of color adjustments:
Point operators/pixel transforms — adjustments applied to each pixel individually without considering neighboring pixels
Filters — also called local operators — use regions around pixels to calculate new values
Global operations — effects applied equally to all pixels
Selective — region‑ or feature‑based adjustments applied to specific brightness ranges, colors, objects, masks, or other segments of an image.
Smart transformations
Smart transformations are AI‑powered operations that use computer vision to analyze an image and perform context‑dependent actions:
Object/face detection
Highlighting regions on an image
Automated cropping
Quality improvements
Style alterations
Smart transformations are relatively new in the area of image transformation.
They can act as standalone effects or support regular transformations by automating context‑dependent steps.
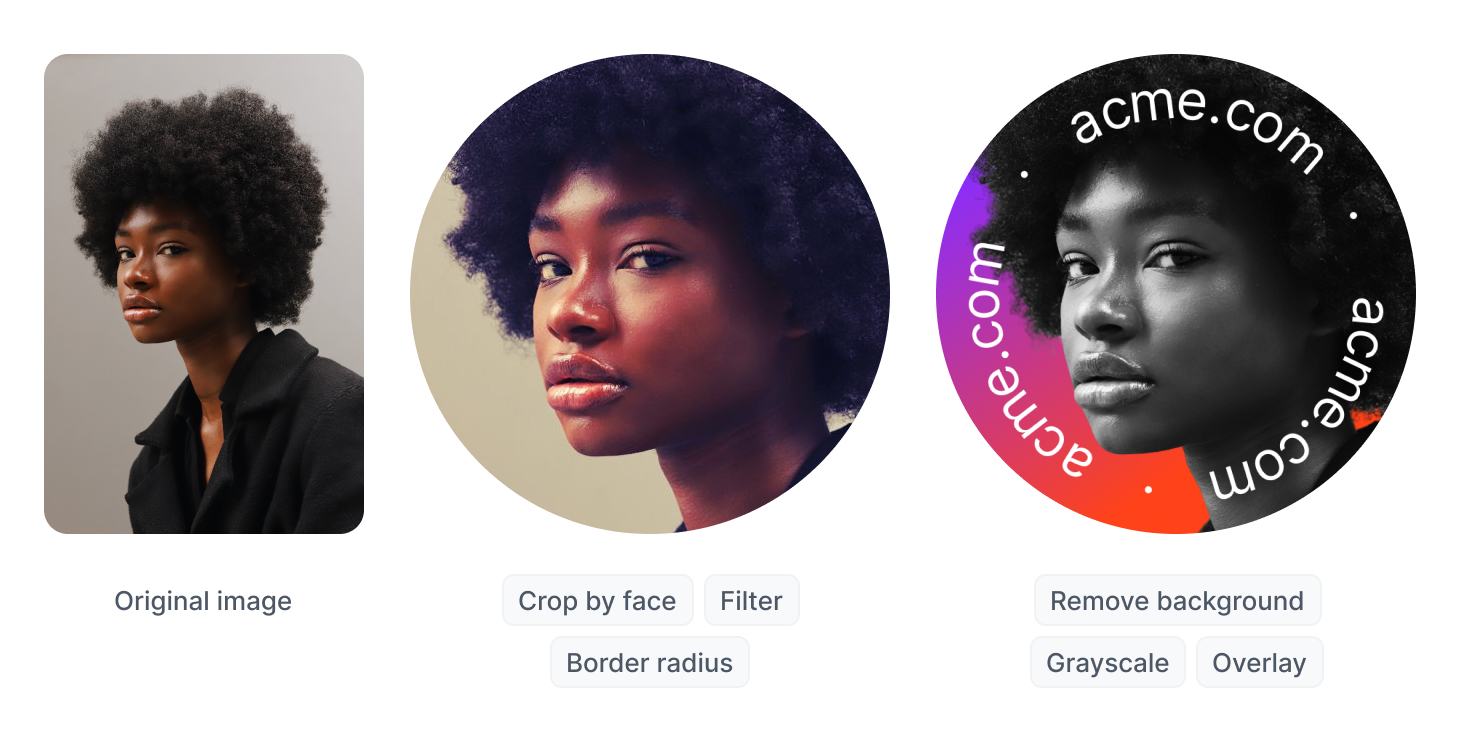
Uploadcare smart transformations
For example, automatic face detection identifies face rectangles, key points (eyes, nose, lips), and head orientation.
This information feeds into a regular cropping transformation.
Uploadcare’s AI-powered Smart Resize preserves the correct proportions of faces, silhouettes,
and objects and resizes only the background and insignificant details.
Quality enhancers like AI upscalers perform resizing, but they generate new pixels
by interpreting image context instead of relying on mathematical interpolation.
Developer workflow: How image transformations work in Uploadcare
Now that we’ve covered different image transformation types, let’s proceed to how these are implemented in real software products.
Here, Uploadcare’s approach is especially illustrative since image processing is built directly into the platform’s architecture
and becomes a natural part of the developer’s workflow.
Uploadcare architecture
Uploadcare uses a modular architecture where each component handles its own stage of the file lifecycle:
Upload Layer — uploading files from a browser, mobile app, or a server, done with File Uploader and Upload API
Delivery — the CDN API delivers transformed results
What are on-the-fly transformations?
With on‑the‑fly operations, you don’t treat transformations and delivery as separate processes.
You request an image with specific parameters or filters through a URL, and the transformed result arrives immediately.
The CDN caches each result, so repeat requests are served instantly.
URL‑based vs. API‑based operations
Uploadcare supports two ways of working with files.
URL-based operations are defined right in the URL and allow for image transformations:
REST API-based operations let you manage storage, convert documents and videos, and perform other file operations.
The REST File API integrates with popular frameworks and languages. Here’s a JavaScript example:
Uploadcare turns image handling into a simple and predictable process.
The CDN caches every unique image variant and delivers it instantly.
The URL‑based approach lets you chain transformations,
all on top of a secure system that normally requires significant time to build yourself.
Getting started: Your first image transformation
Sign up for an Uploadcare account, create a project, and upload your image.
After selecting your image in the dashboard, you see the UUID on the right under the file name —
this identifier lets you reference the original image when applying transformations.
Uploadcare interface with image selected and UUID visible
The rest is simple: you take the UUID and add the required operations to the URL.
The platform supports dozens of transformations, from basic geometric changes to advanced optimizations and color corrections.
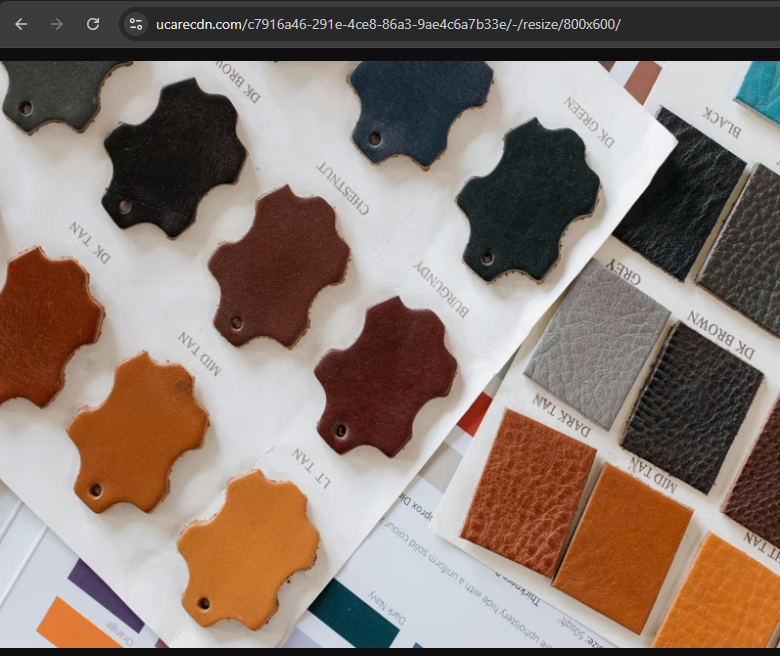
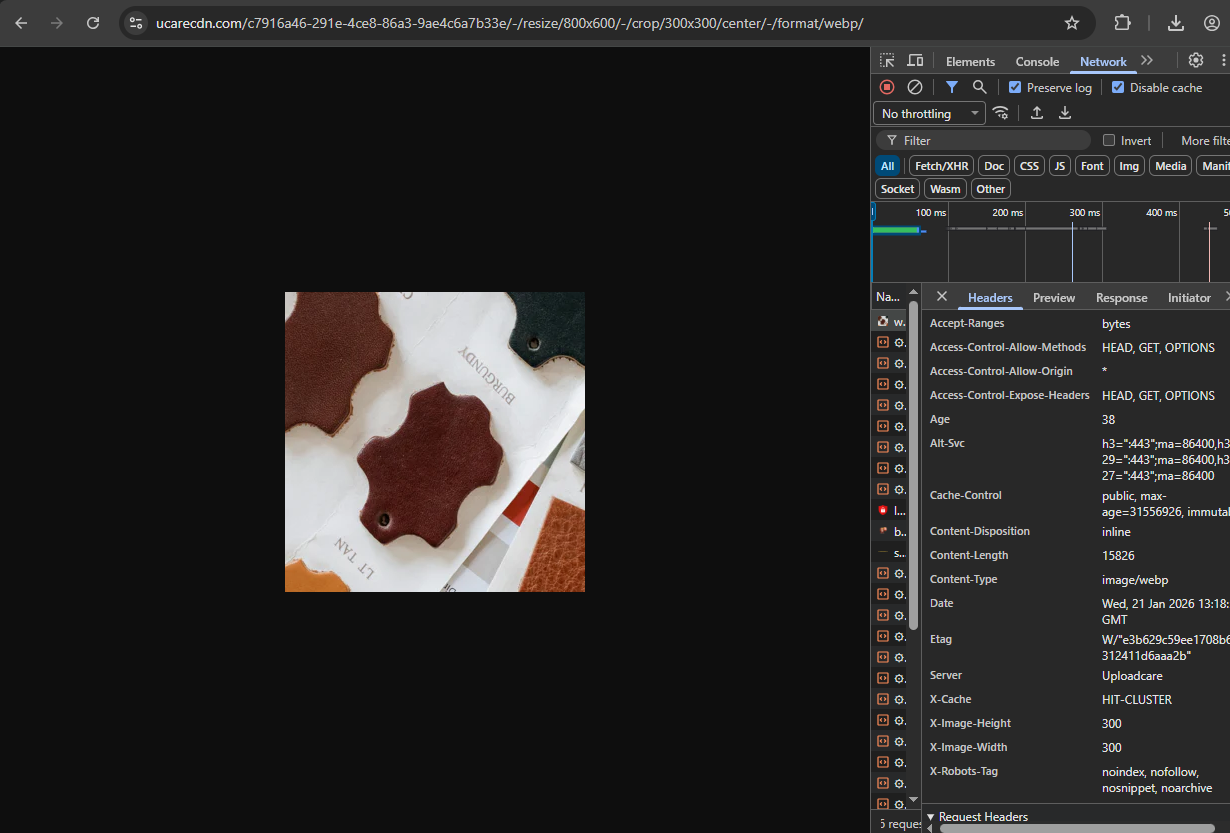
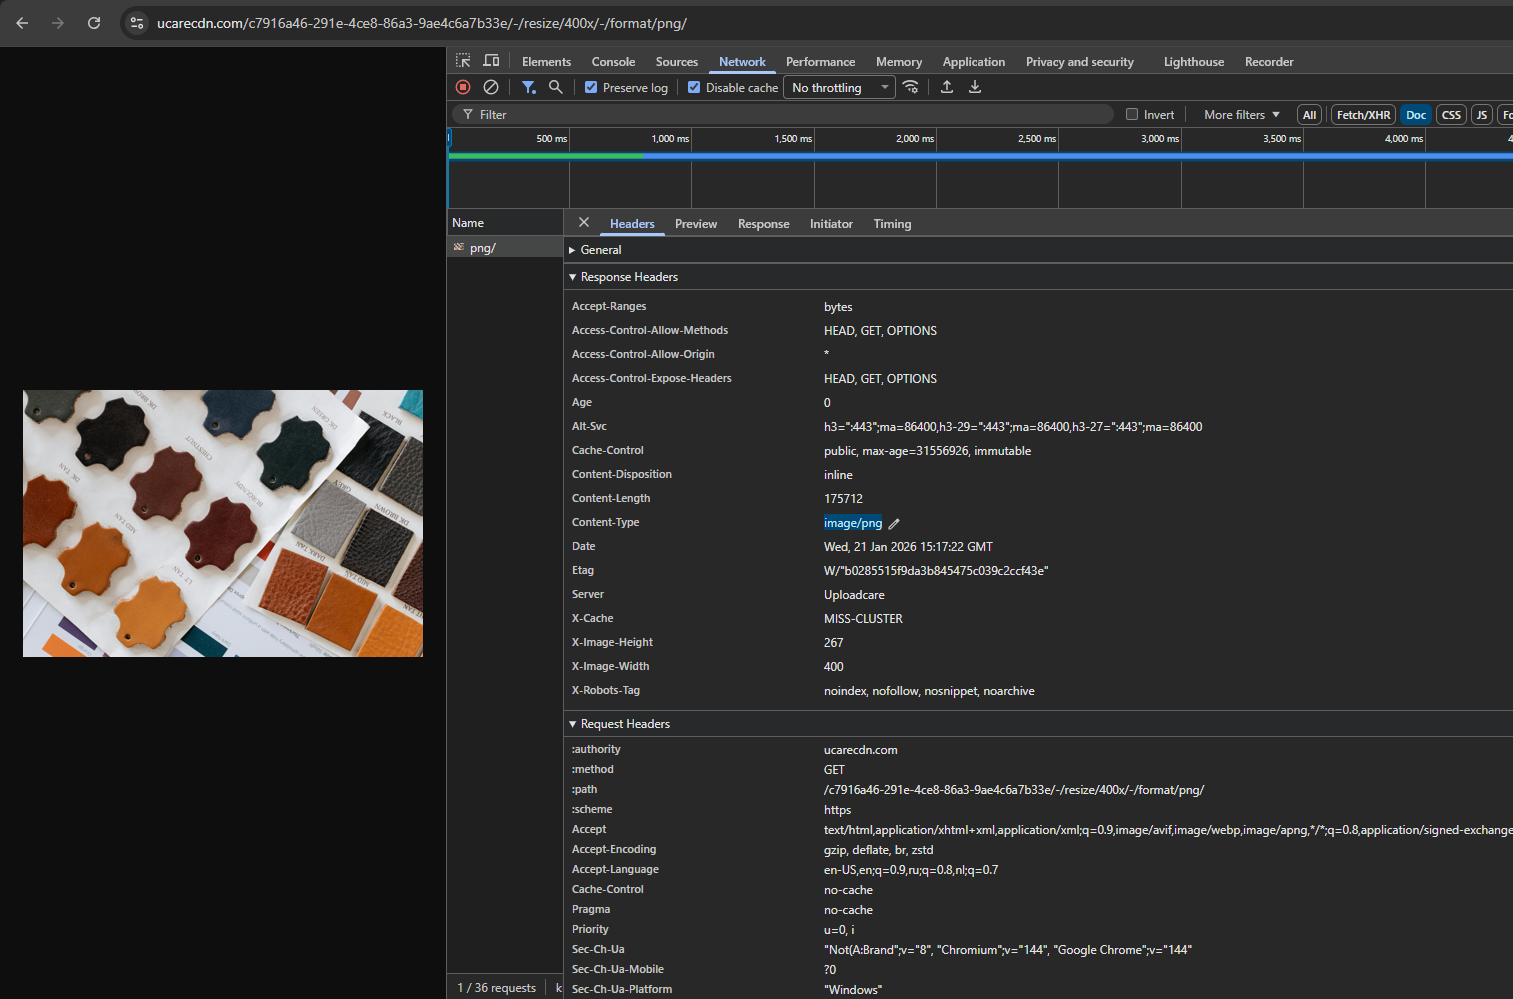
For example, you can resize the image using the following URL structure:
https://ucarecdn.com/<UUID>/-/resize/800x600/
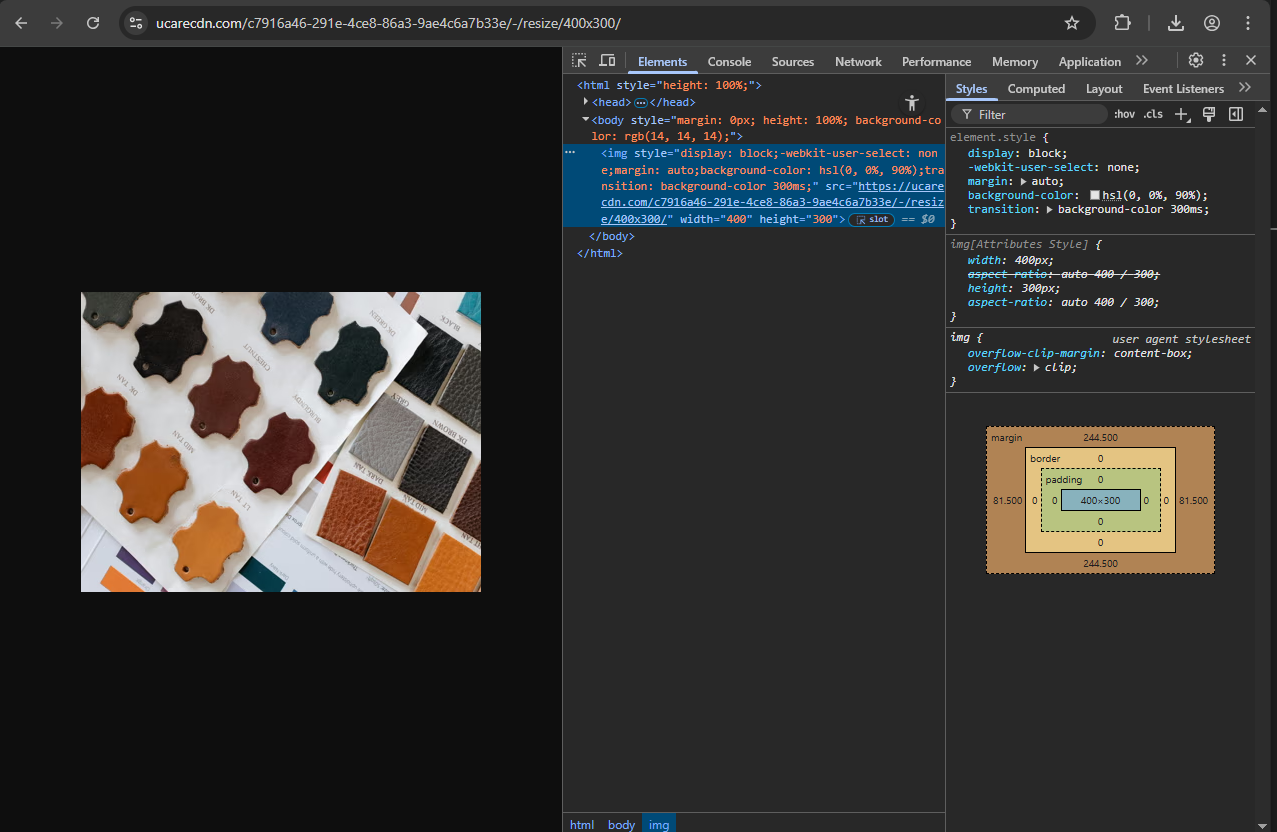
Example of resize transformation using URL in Uploadcare
Uploadcare’s URL-based transformations chained together
Common image transformations
This section includes practical examples of the most commonly used transformations, demonstrated in PHP,
with HTML5 Canvas and JavaScript, and through Uploadcare’s transformation API.
Local code examples require input.jpg in the same folder and the GD image library activated for PHP.
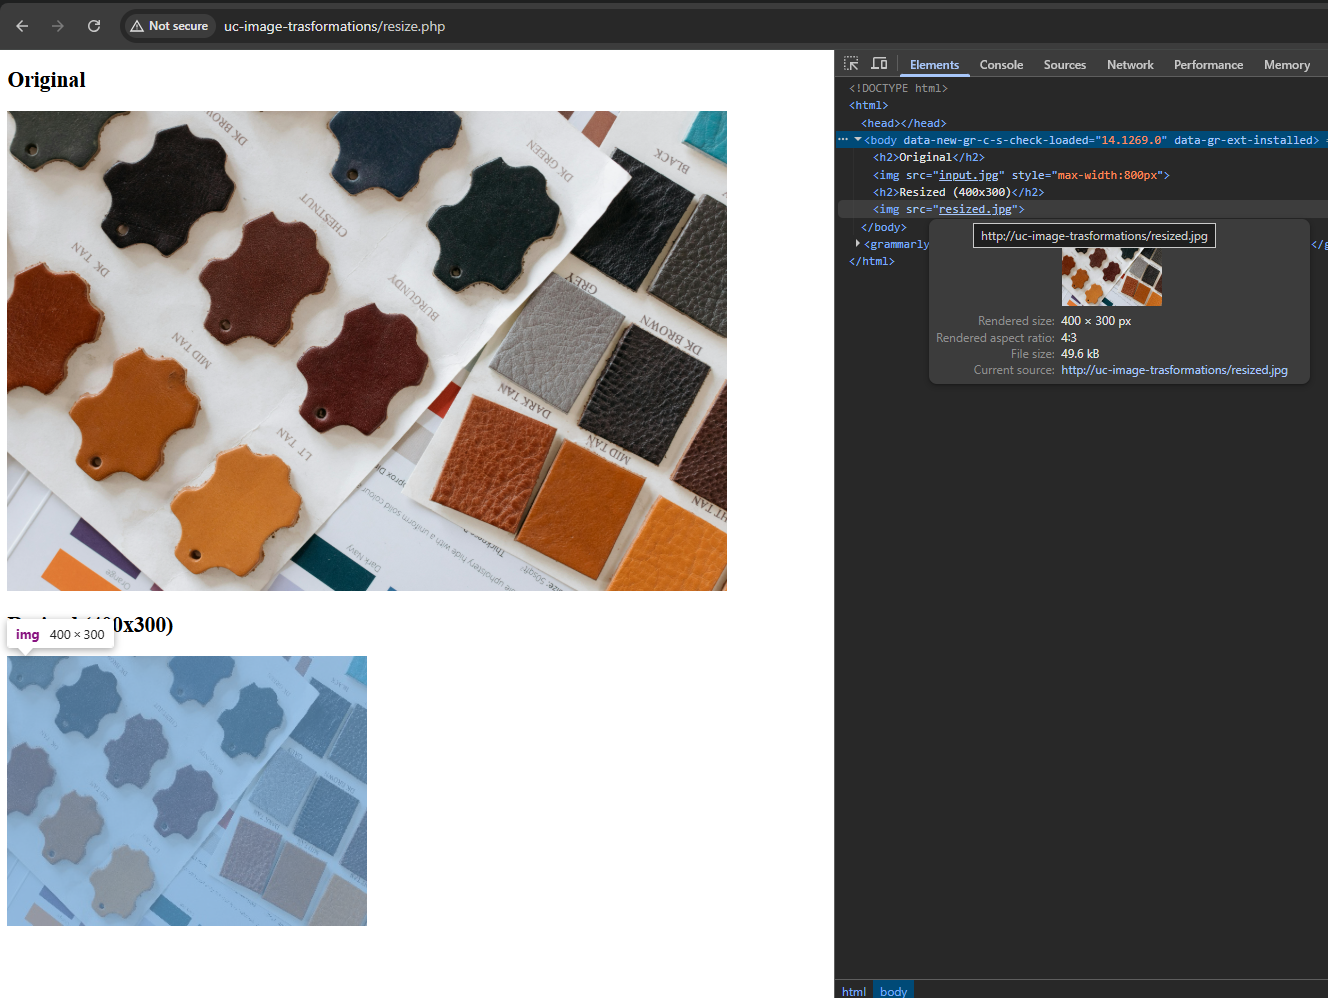
Resizing using PHP
To demonstrate resizing with PHP and GD library, this snippet loads a JPEG file and scales it down to 400×300 pixels.
The script recalculates the image to match the new dimensions and saves the resized version as a separate file.
<?php// Load original image$src=imagecreatefromjpeg('input.jpg');// Resize to 400x300$dst=imagescale($src,400,300);// Save resultimagejpeg($dst,'resized.jpg',90);?><!DOCTYPEhtml><html><body><h2>Original</h2><imgsrc="input.jpg"style="max-width: 800px"><h2>Resized (400×300)</h2><imgsrc="resized.jpg"></body></html>
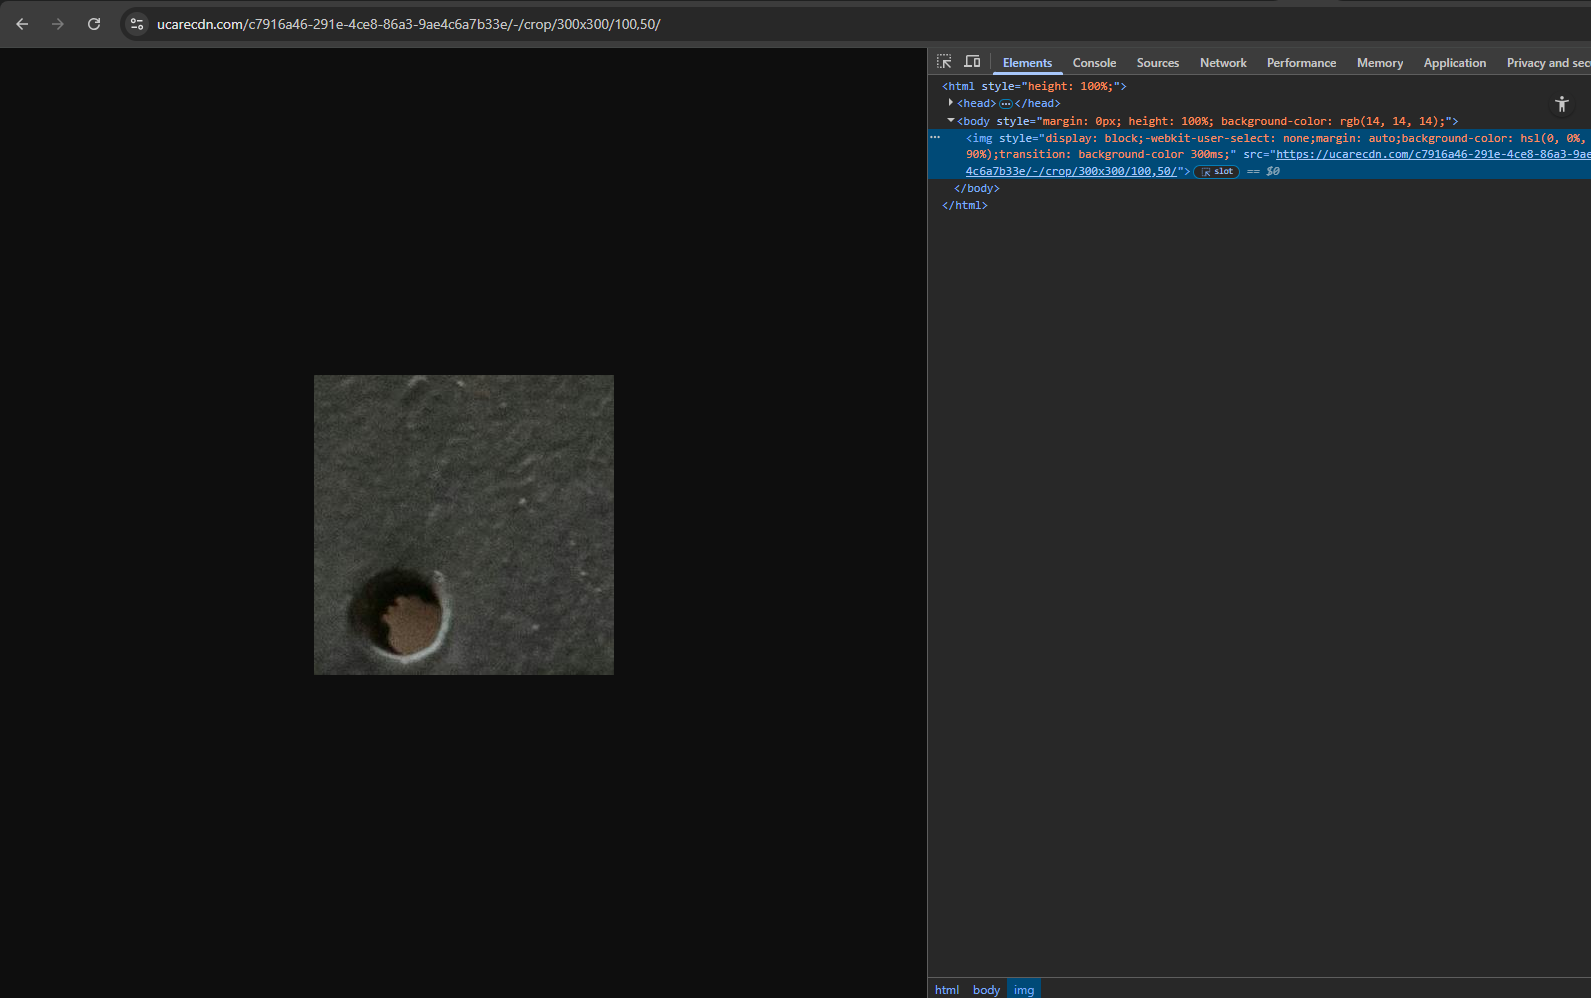
Image cropping transformation using Uploadcare URL API
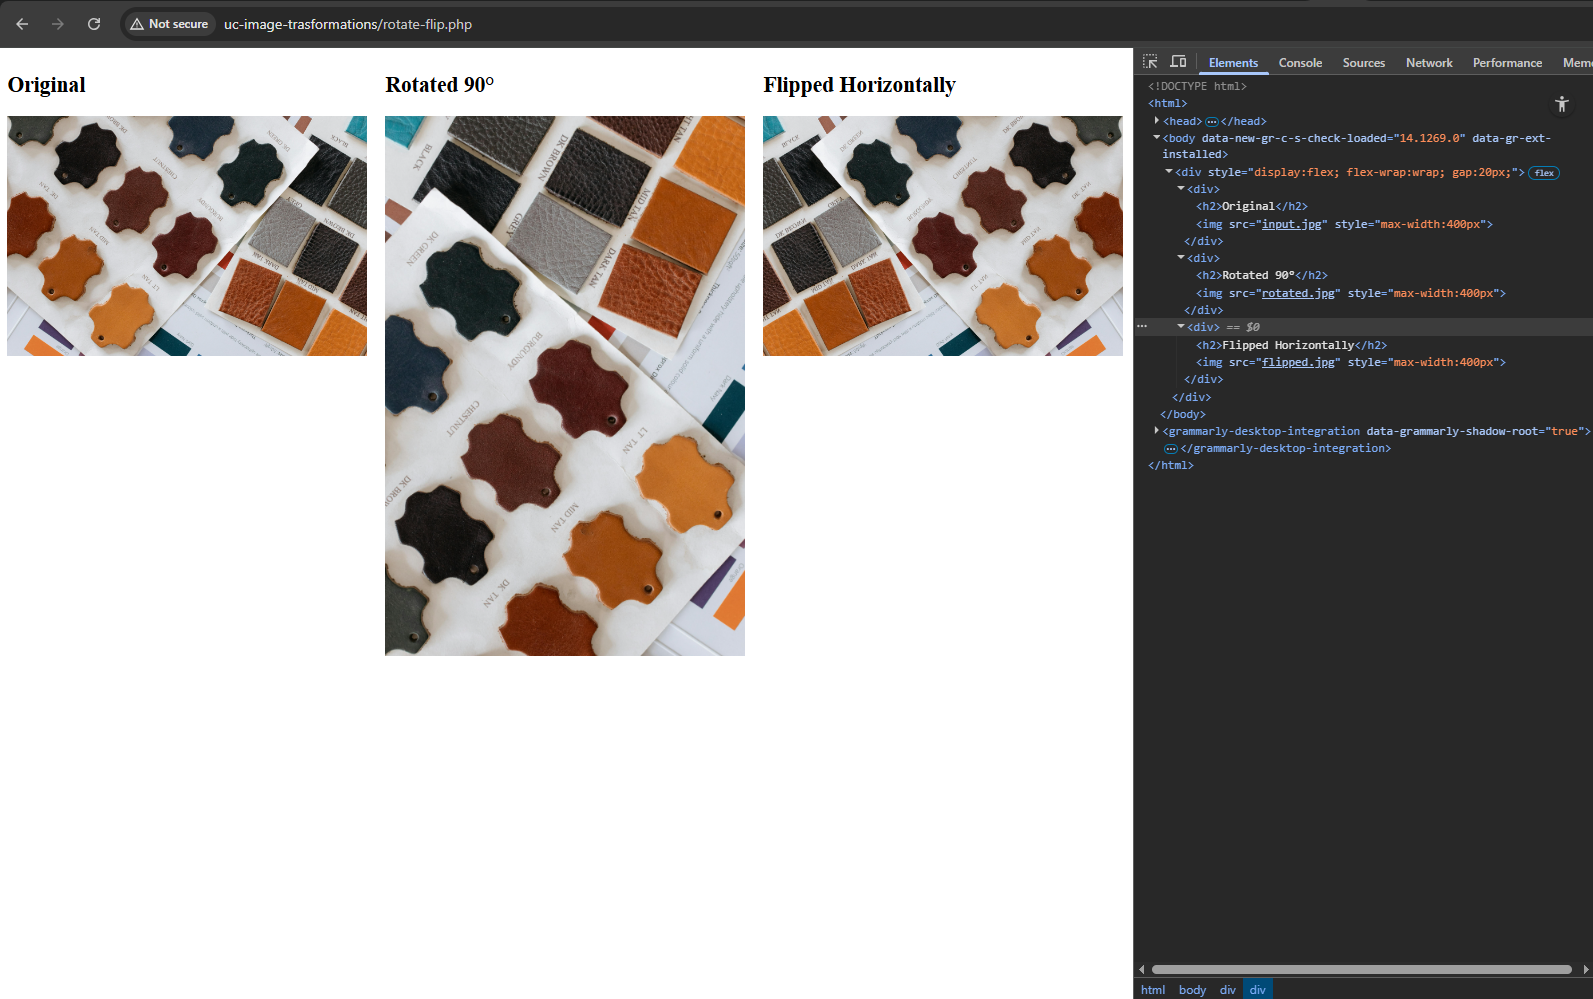
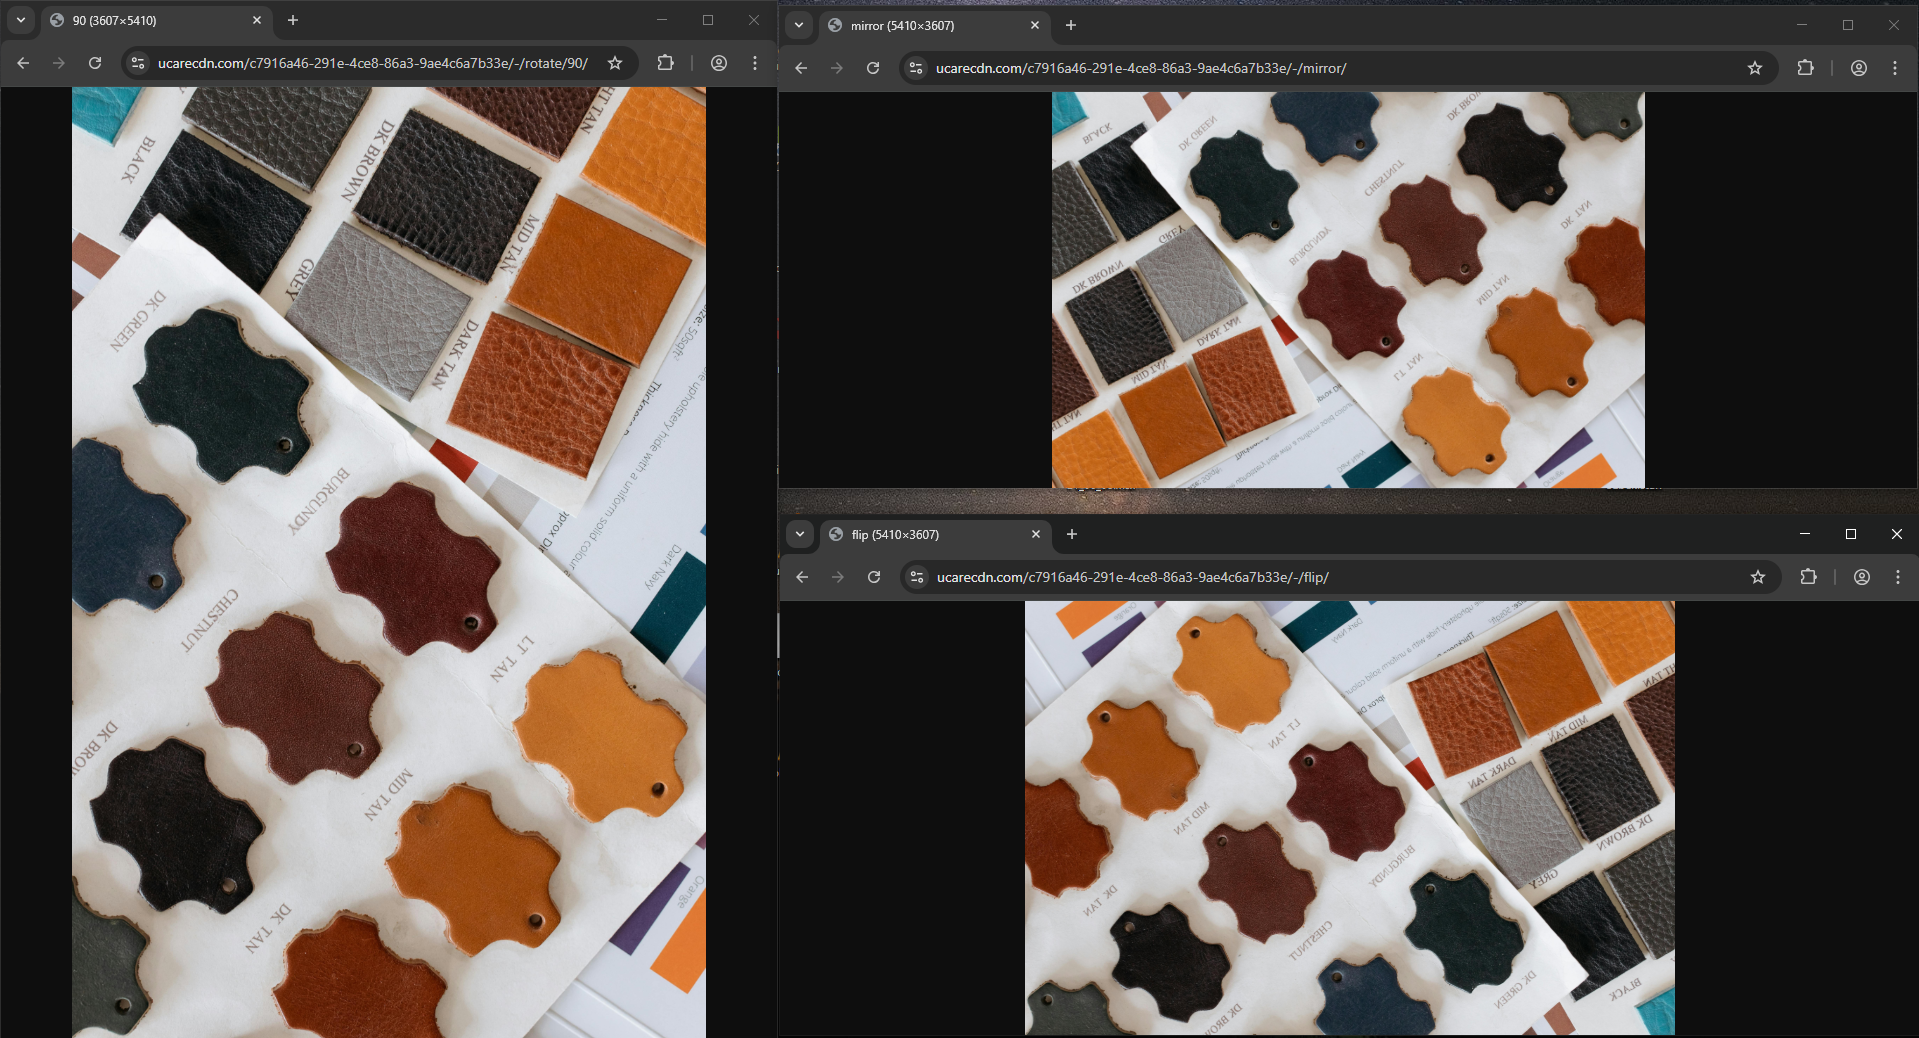
Rotating & flipping using PHP
Here, the code applies two different transformations to the same source image.
One operation rotates the picture by 90 degrees, while another produces a horizontally mirrored version.
Each transformation is saved as its own output file.
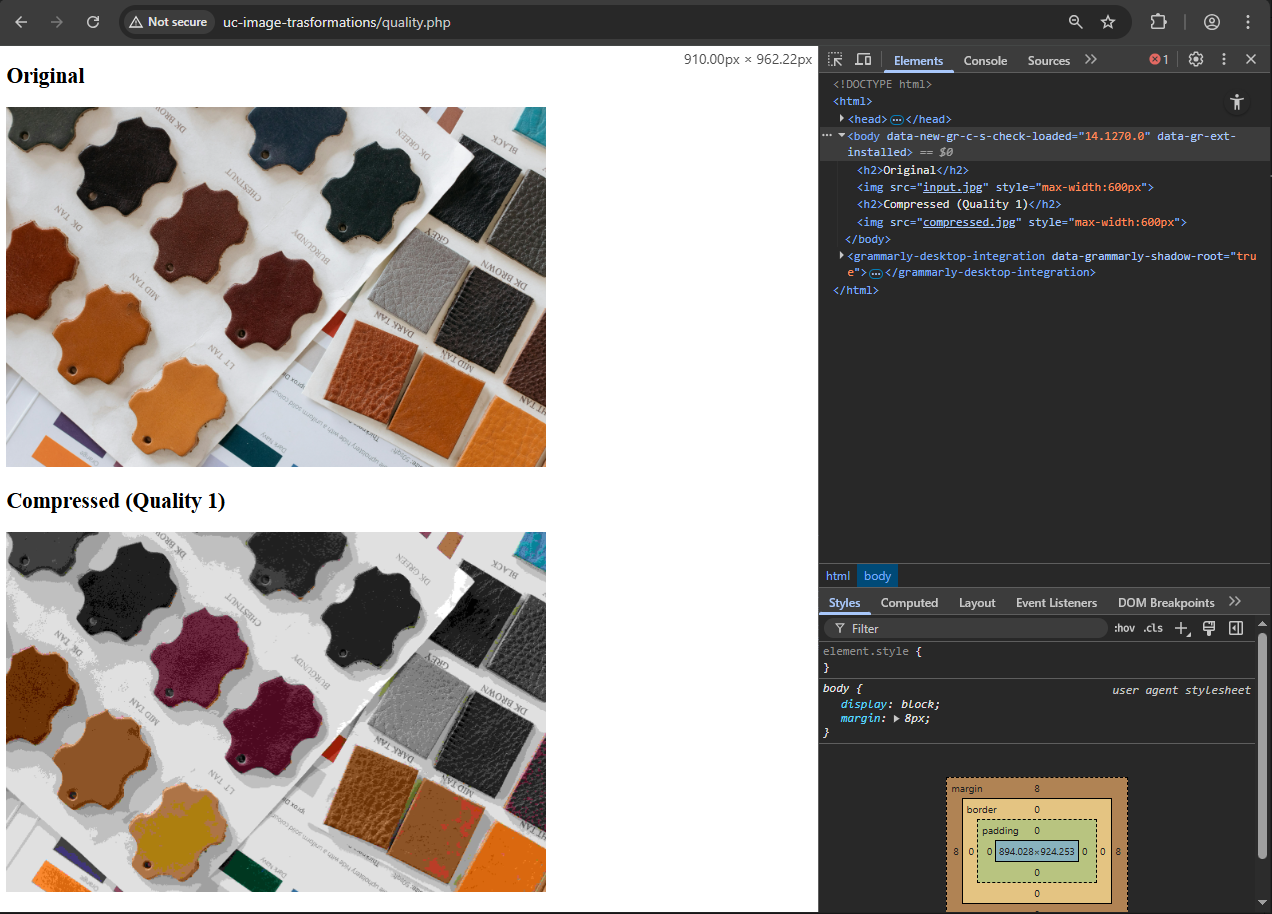
In this example, the focus is on JPEG compression.
The script saves a new version of the image using an extremely low-quality setting,
illustrating how compression parameters influence visual detail.
<?php$src=imagecreatefromjpeg('input.jpg');// lowest quality for demo purposesimagejpeg($src,'compressed.jpg',1);?><!DOCTYPEhtml><html><body><h2>Original</h2><imgsrc="input.jpg"style="max-width: 600px"><h2>Compressed (Quality 1)</h2><imgsrc="compressed.jpg"style="max-width: 600px"></body></html>
Drastic JPEG compression using PHP and GD image library
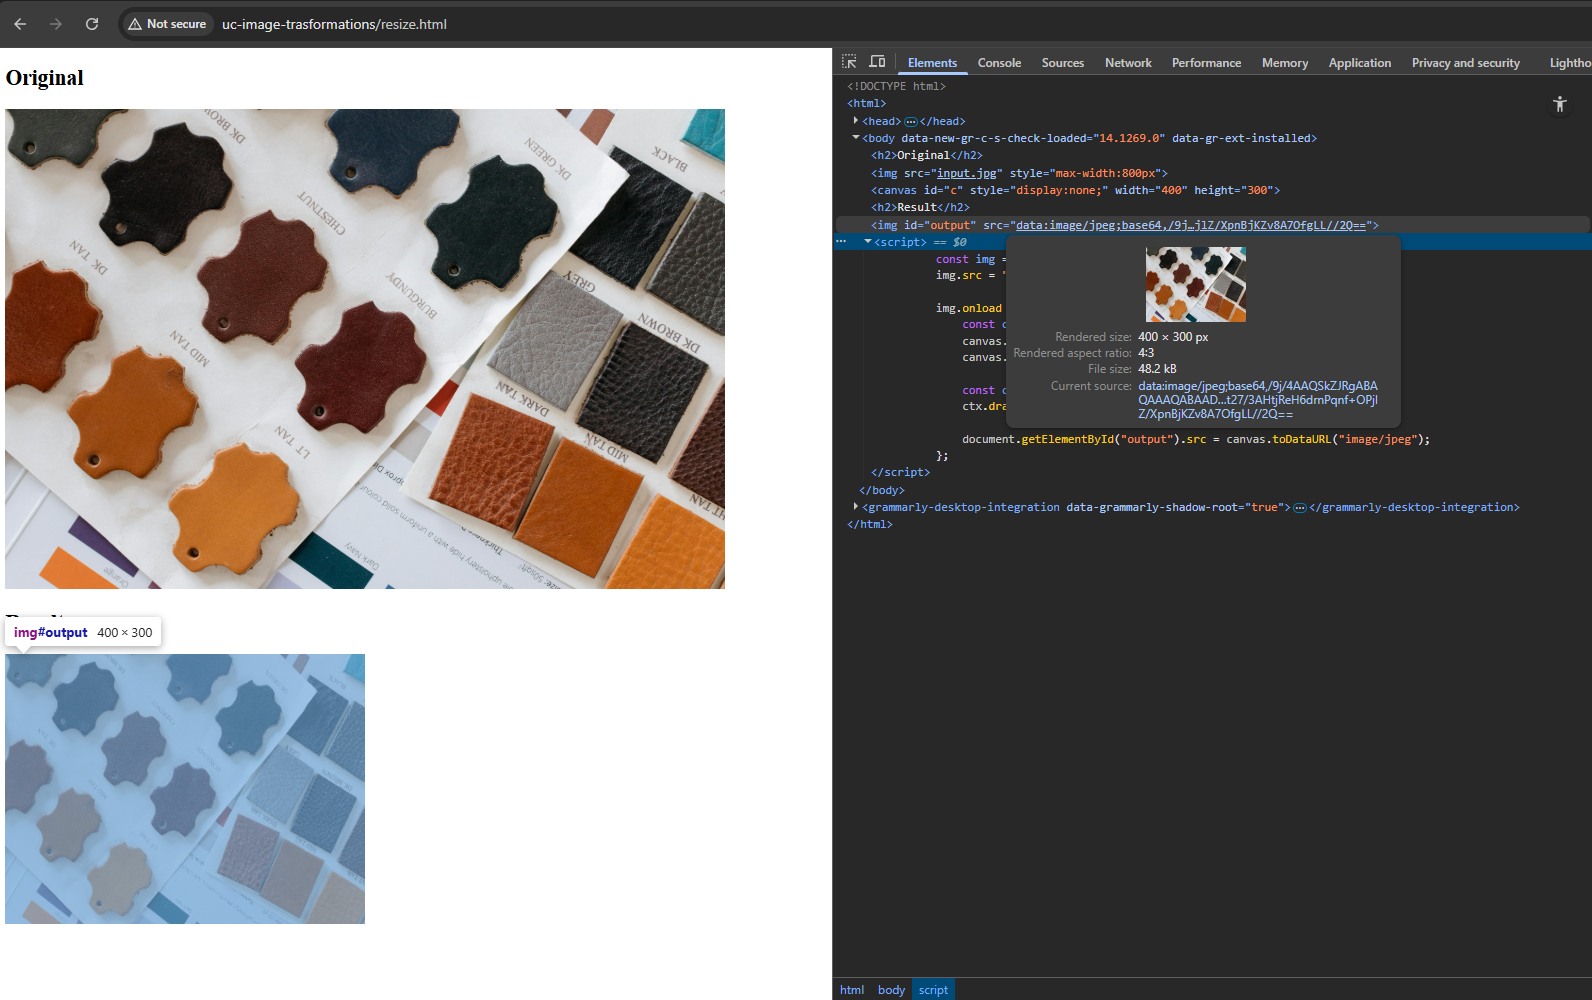
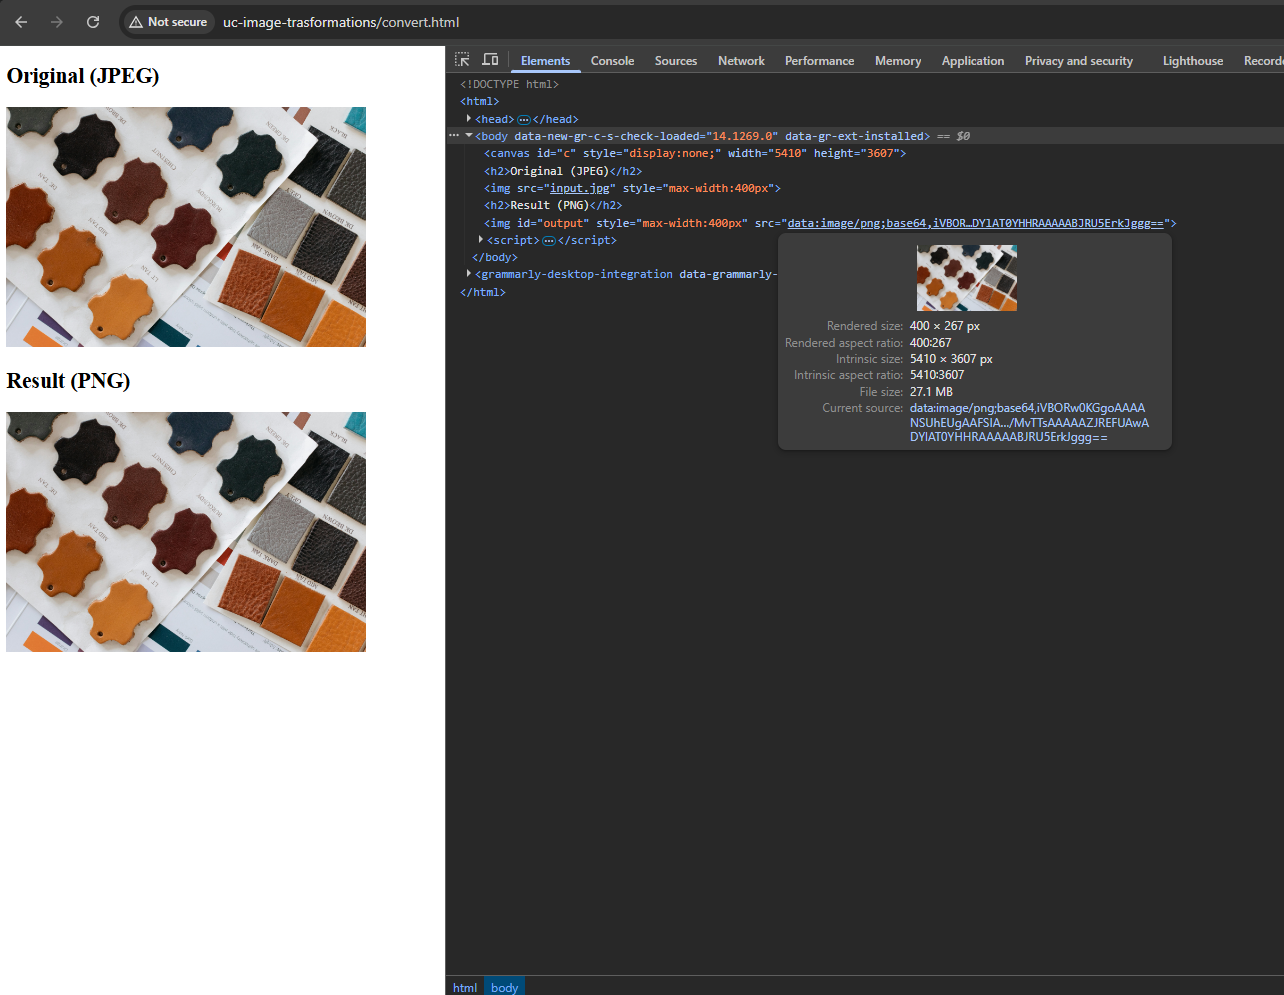
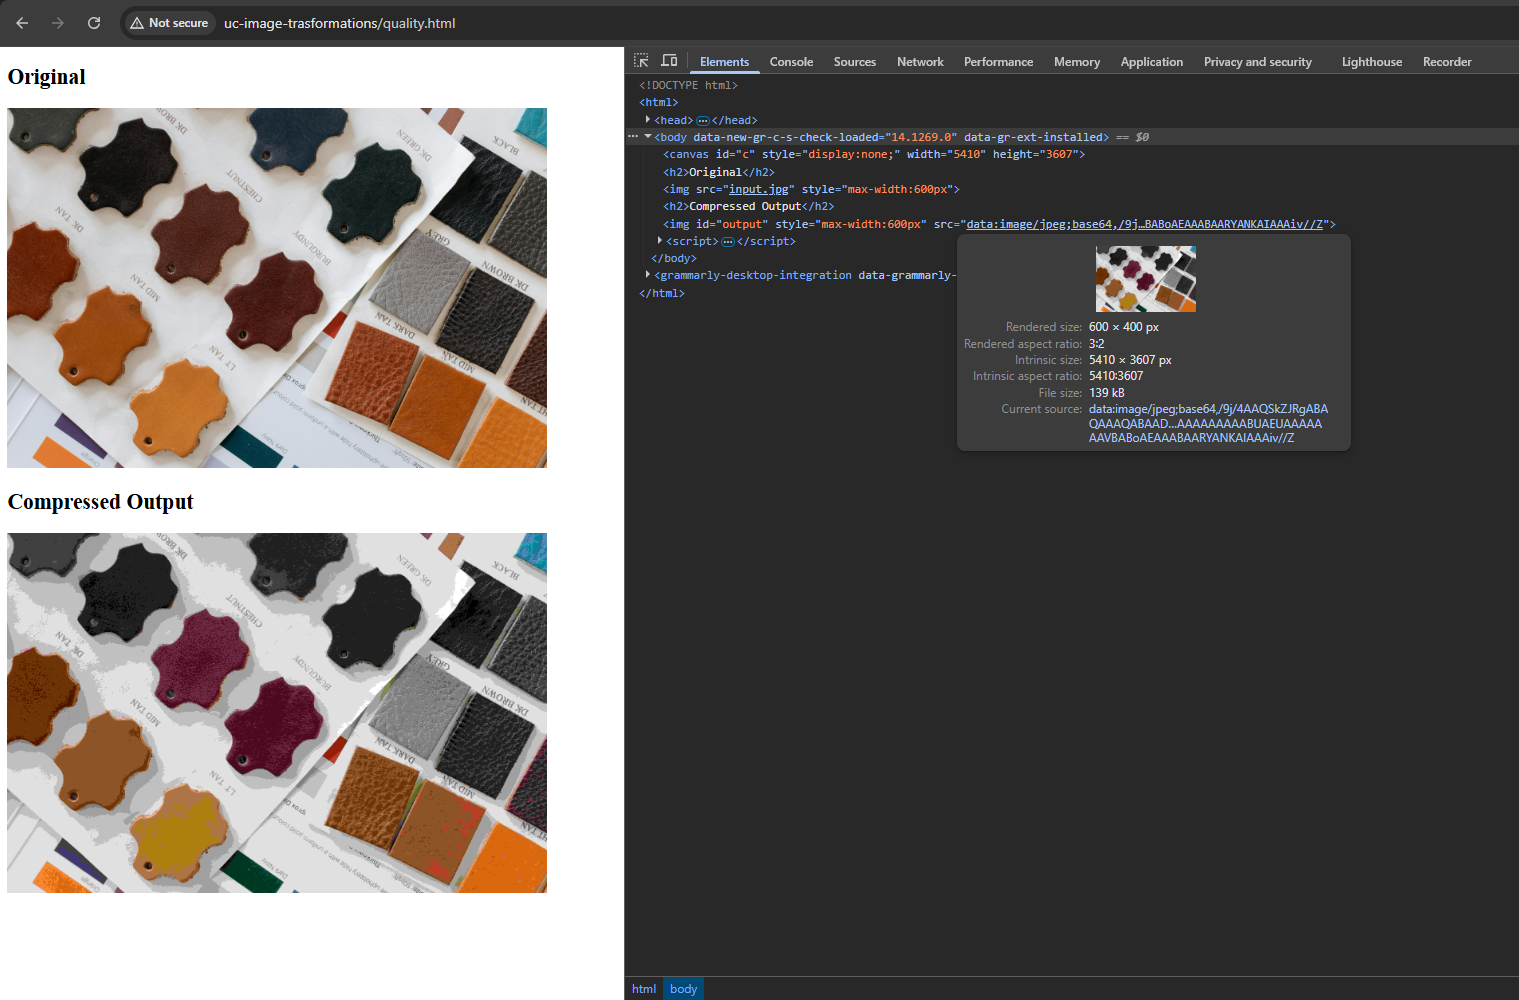
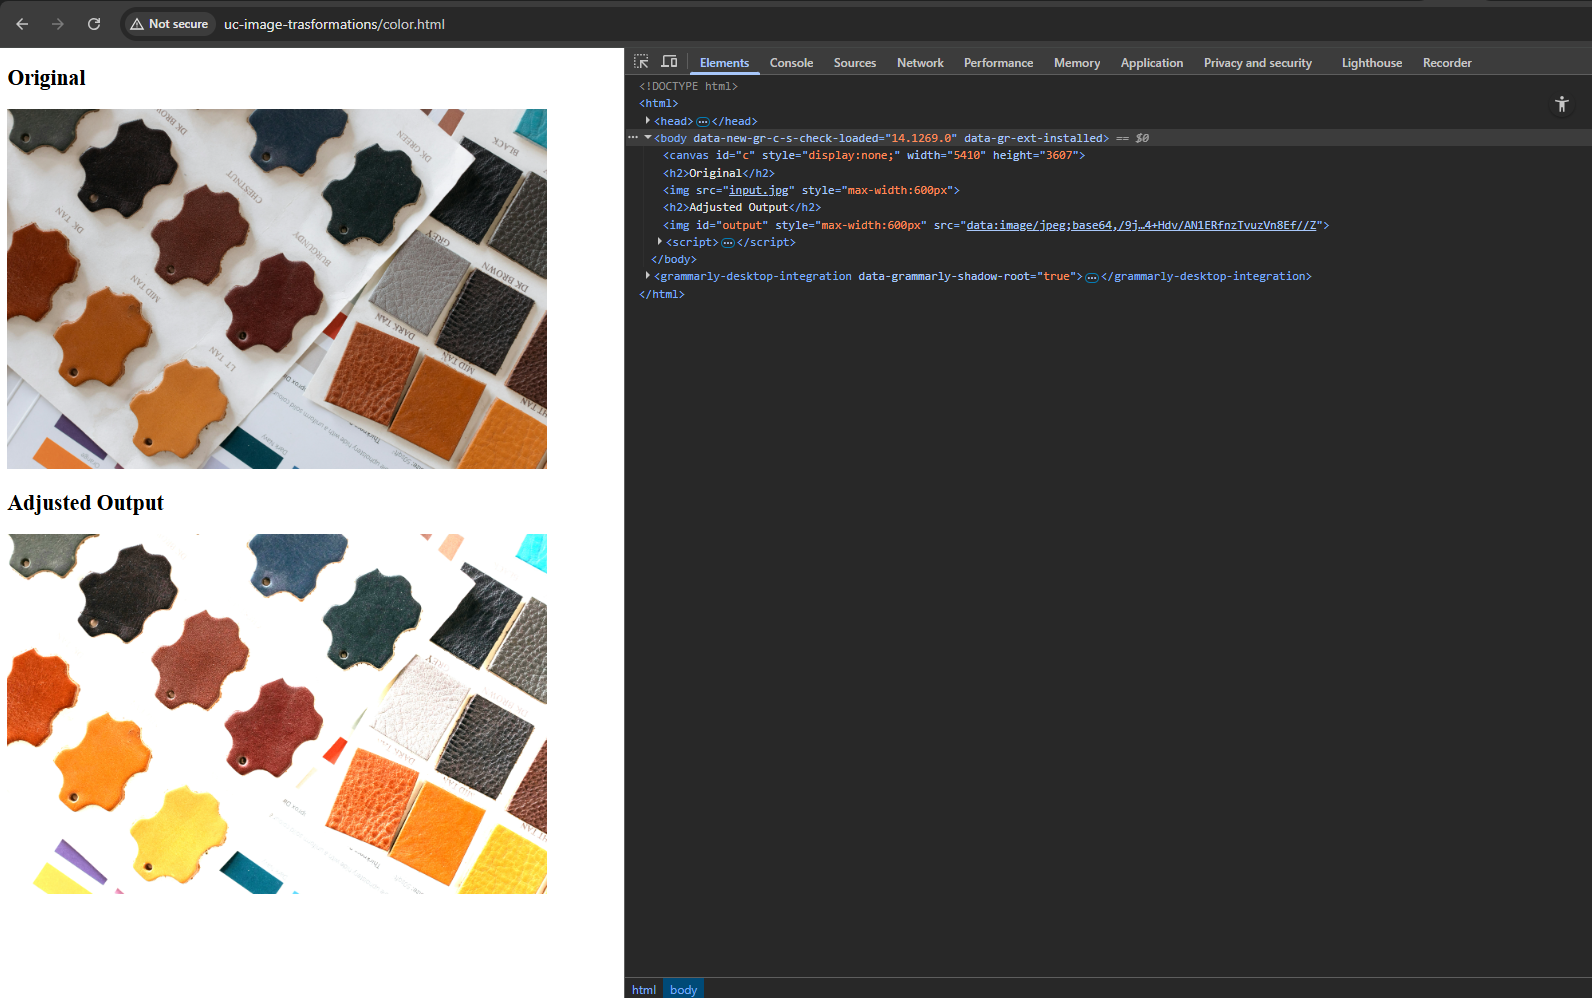
Changing quality and compression using HTML5 Canvas + JavaScript
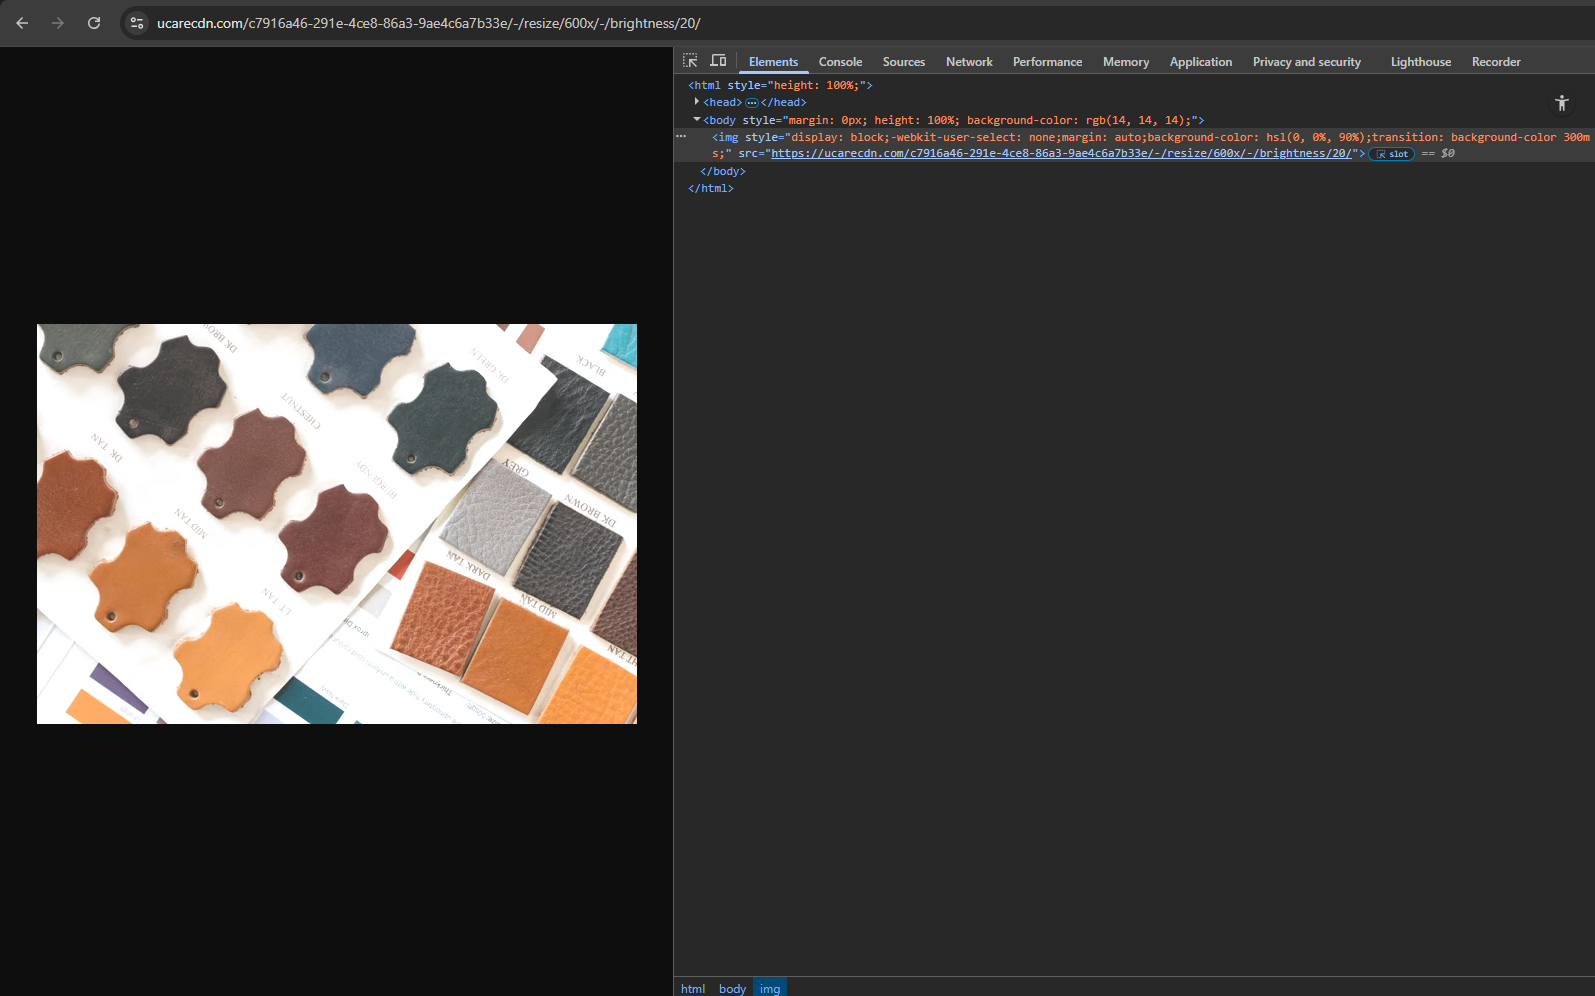
This snippet demonstrates brightness adjustment using PHP and GD library.
The script increases the image’s brightness level and outputs a modified version with the updated appearance.
As the screenshots show, each tool produces different brightness characteristics.
Advanced image transformations for developers
AI-powered transformations
Uploadcare offers AI‑driven transformations to automate regular tasks.
Examples include smart crop, face blurring based on face detection algorithms, and background removal.
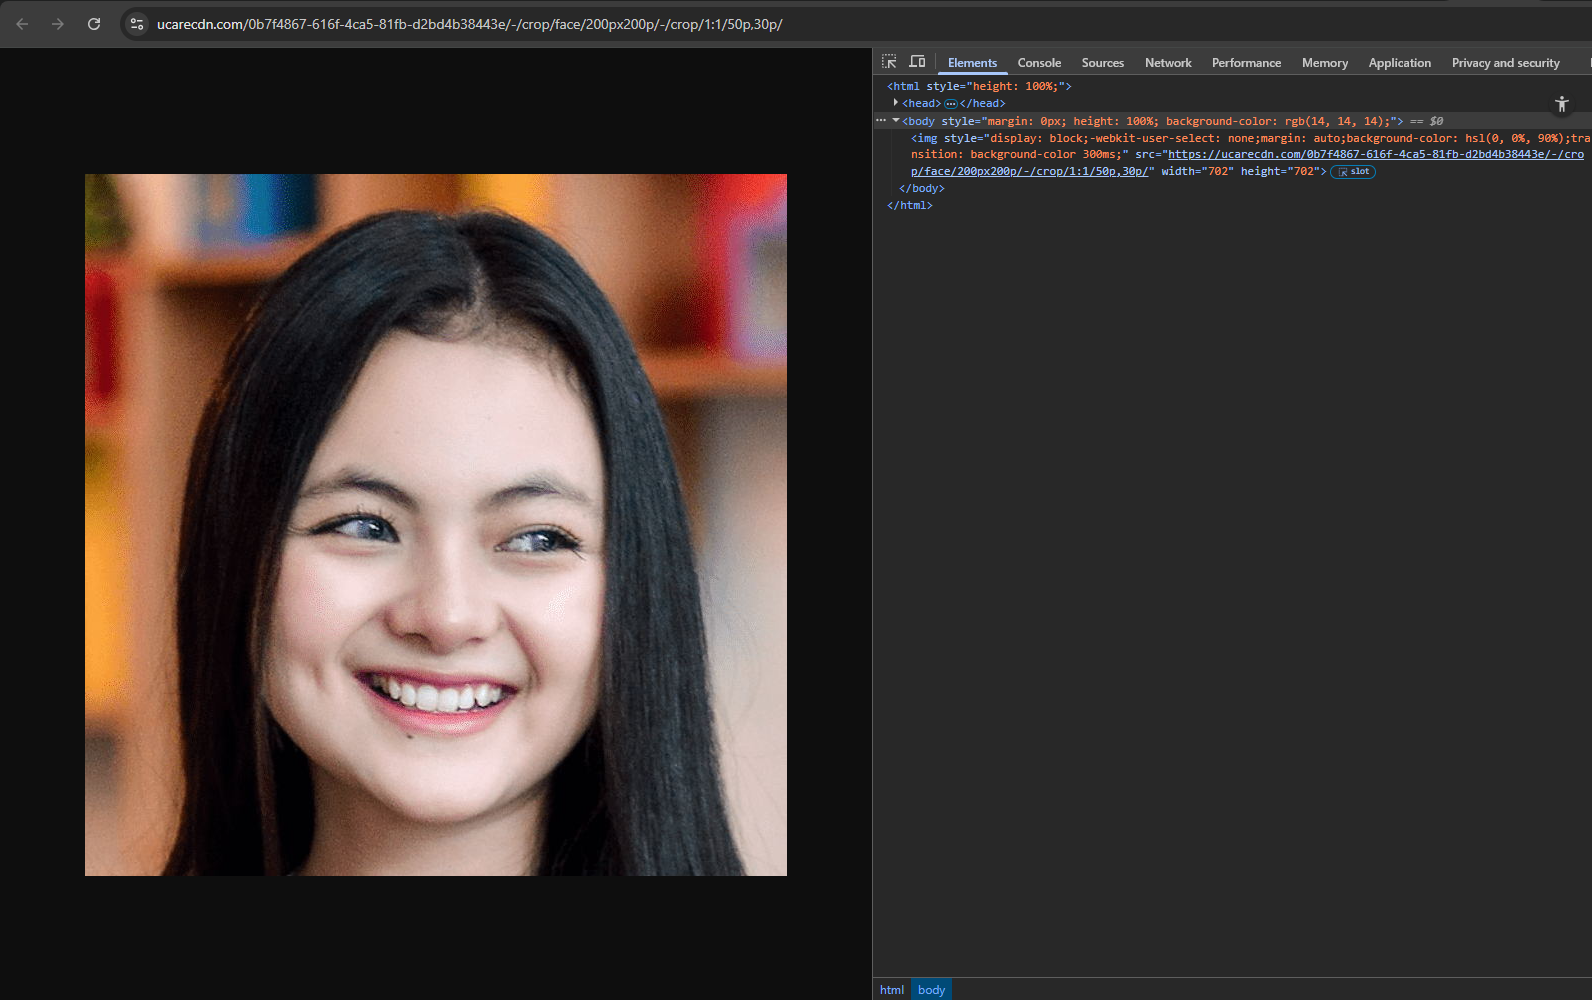
Smart crop lets you crop an image based on the main object’s position.
It’s useful for generating profile pictures and highlighting key objects.
Smart cropping using automated face detection with Uploadcare
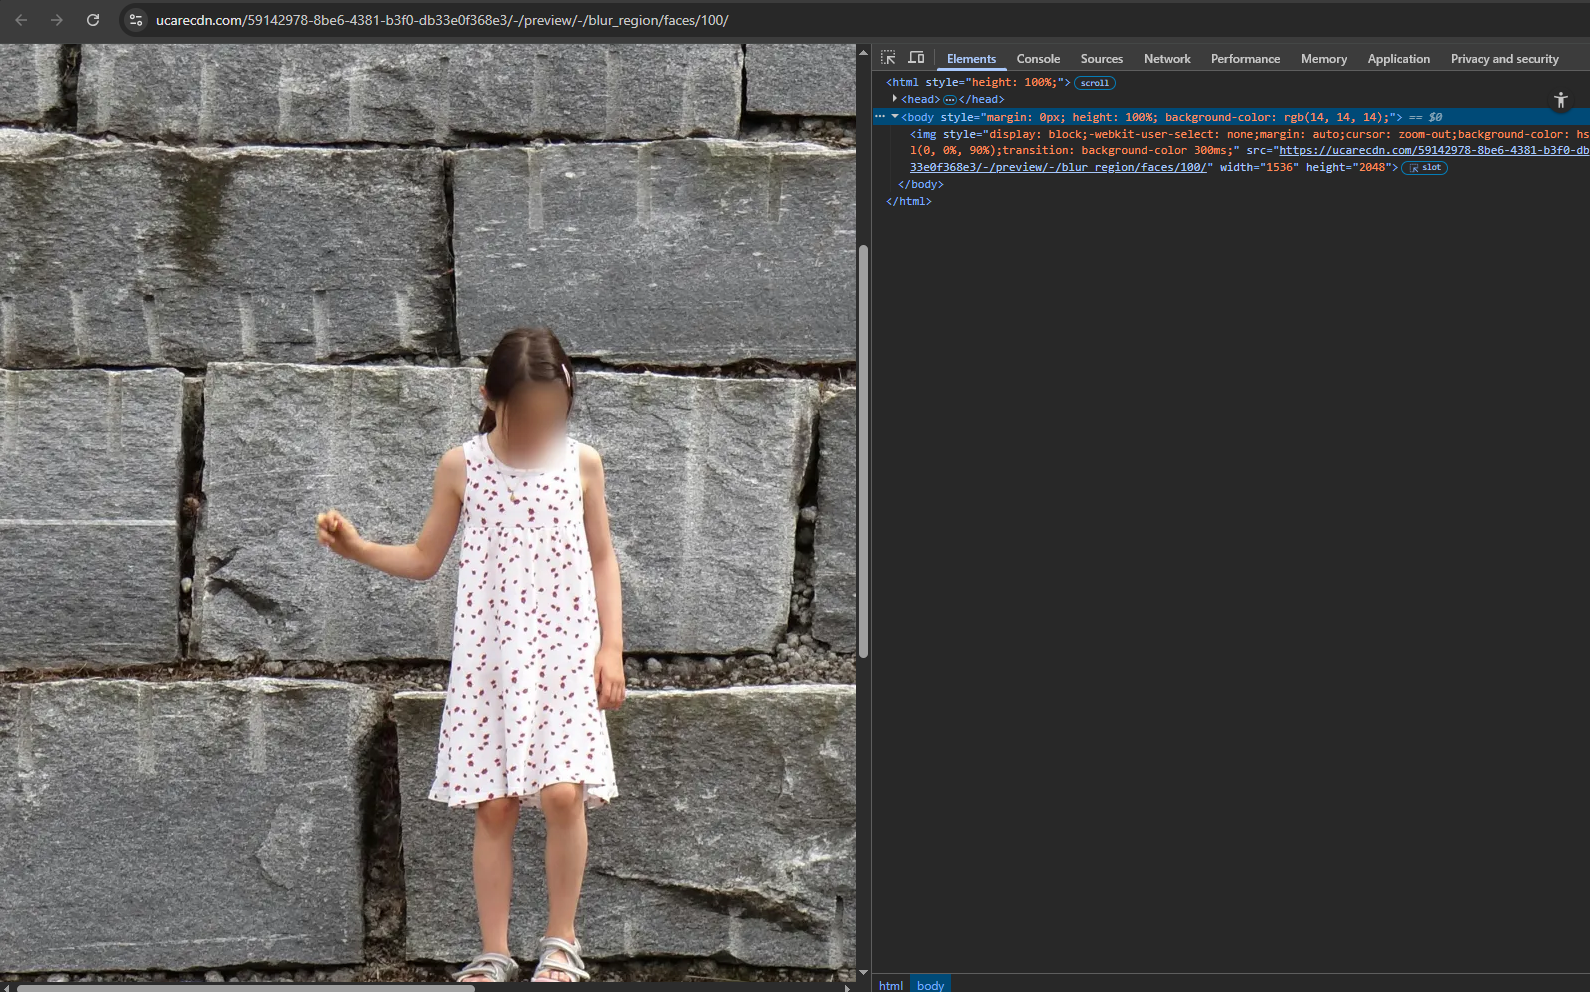
Face detection works similarly and helps you blur faces:
Blurring faces with Uploadcare
Background removal detects the main object and removes everything else. It’s available through the REST API only.
Lazy generation and CDN caching strategies
With the “lazy generation” approach, dynamic assets are not pre-generated.
Instead, each transformation is created at the time of the first request.
After the first request, the file is stored in the CDN cache.
Subsequent requests check the cache first and are served from there if available.
This balances the load and speeds up the delivery.
Cached results stay predictable because each URL acts as a unique key in the cache database.
With this approach, you don’t need manual CDN invalidation because no existing assets are updated.
If there’s a transformation with unique parameters, there’s a unique identifier for that.
Core Web Vitals optimization
You can find a detailed breakdown of Core Web Vitals for web developers in a separate article on Uploadcare.
For this article, let’s go over the main ideas that can help you improve your website by optimizing images.
Reducing Largest Contentful Paint (LCP) with transformed images
LCP often depends on how fast the largest image in the viewport loads. You can improve loading speed by:
Resizing to the rendered size so you avoid sending extra bytes (while accounting for different DPIs)
Converting into modern formats (WebP, AVIF)
Automated quality optimizations such as Uploadcare’s -/quality/smart/
Your goal is to use as little bandwidth as possible for the required visual result.
Minimizing CLS with aspect-ratio aware transformations
The Cumulative Layout Shift metric reflects how much page elements shift during loading.
Images without width and height attributes cause the most CLS issues. You improve CLS by:
Using transformations with predefined dimensions, like -/resize/ and -/crop/
Setting <img> width and height attributes to those predefined variables
Role of CDN in web performance
Caching is one of the core responsibilities of a CDN. Distributed points of presence are another major advantage of CDNs like Uploadcare.
Files are cached at CDN edge nodes around the world.
Your users receive content from the closest edge nodes with low latency and fast transfer speeds.
Bottom line
Working with images in modern web applications relies on understanding how each transformation affects the final output.
Knowing when operations are lossy or lossless and how client‑side and server‑side approaches differ helps you choose the right technique for each task.
URL‑based pipelines are another option to consider — they offer a straightforward way to handle transformations and delivery,
and they integrate cleanly into different project setups.
Key takeaways
Automated image transformations should be integrated into the file management process
There are different use cases for lossy and lossless transformations
Client- and server-based methods serve different needs
Image CDNs like Uploadcare simplify the process
FAQ
What are the most common image transformations developers use, and when should each be applied?
The most common transformations are resize (performance + responsiveness), crop (thumbnails/avatars),
rotate/flip (fix orientation), format conversion (WebP/AVIF for smaller files), and quality adjustments (reduce bandwidth).
Some workflows also use AI transformations like smart crop or background removal for automation.
How do I implement image transformations in my application using Uploadcare?
Uploadcare uses URL-based transformations. After upload, you apply operations directly in the CDN URL:
https://ucarecdn.com/<UUID>/-/resize/800x600/
You can also chain transformations, and Uploadcare delivers results via a cached global CDN.
What’s the difference between client‑side and server‑side image transformations, and which approach is best for performance?
Client-side transformations are great for instant previews, but performance depends on the user’s device.
Server-side transformations are more consistent and handle large files better.
With Uploadcare, transformations run on demand and are cached via CDN, giving predictable performance without managing infrastructure.
Arthur Khayrullin is a web developer with over a decade of experience. His clients are international start-ups and companies that want to stand firmly on their feet on the Web, while focusing on the business operations.